The Ultimate Guide to Permanently Restoring Headlights
Table of Contents
Introduction
Having clear and functional headlights is essential for safe driving, providing optimal visibility during nighttime and adverse weather conditions. Headlights not only illuminate the road ahead but also make your vehicle visible to other drivers. However, over time, headlights can deteriorate, compromising their performance and potentially endangering you and others on the road.
Importance of Clear and Functional Headlights
Clear and functional headlights play a vital role in ensuring your safety while driving. Here’s why they are crucial:
1. Enhanced Visibility: Properly functioning headlights enable you to see the road ahead clearly, even in low-light conditions, fog, or rain. This improves your ability to react to unexpected obstacles, pedestrians, or animals.
2. Road Illumination: Headlights provide illumination, helping you navigate dark roads and identify potential hazards, such as potholes, debris, or sharp turns.
3. Signaling and Communication: Headlights also serve as a means of communication with other drivers. They indicate your presence and intentions to help prevent accidents by making your vehicle visible to others.
Understanding Headlight Degradation

Headlights are a critical component of your vehicle’s safety system, providing illumination for nighttime driving and improving visibility during adverse weather conditions. To comprehend headlight degradation and its implications, let’s explore the components of a headlight, the factors that contribute to its deterioration, and the signs of degraded headlights.
Factors Contributing to Headlight Deterioration
1. UV Exposure: Ultraviolet (UV) rays from the sun can cause damage to the protective coatings on the headlight lens, leading to discoloration, hazing, and reduced light output.
2. Oxidation: Headlight lenses are typically made of polycarbonate, which is susceptible to oxidation. Over time, exposure to oxygen causes the lens to turn yellow, cloudy, or hazy, diminishing the clarity of the light.
3. Environmental Factors: Harsh weather conditions, such as extreme heat, cold, humidity, and road debris, can contribute to headlight degradation. They can cause cracks, scratches, or pitting on the lens surface, affecting light transmission.
4. Chemical Exposure: Chemicals like road salt, gasoline, and cleaning agents can erode the protective coating and cause damage to the lens, impairing the headlight’s performance.
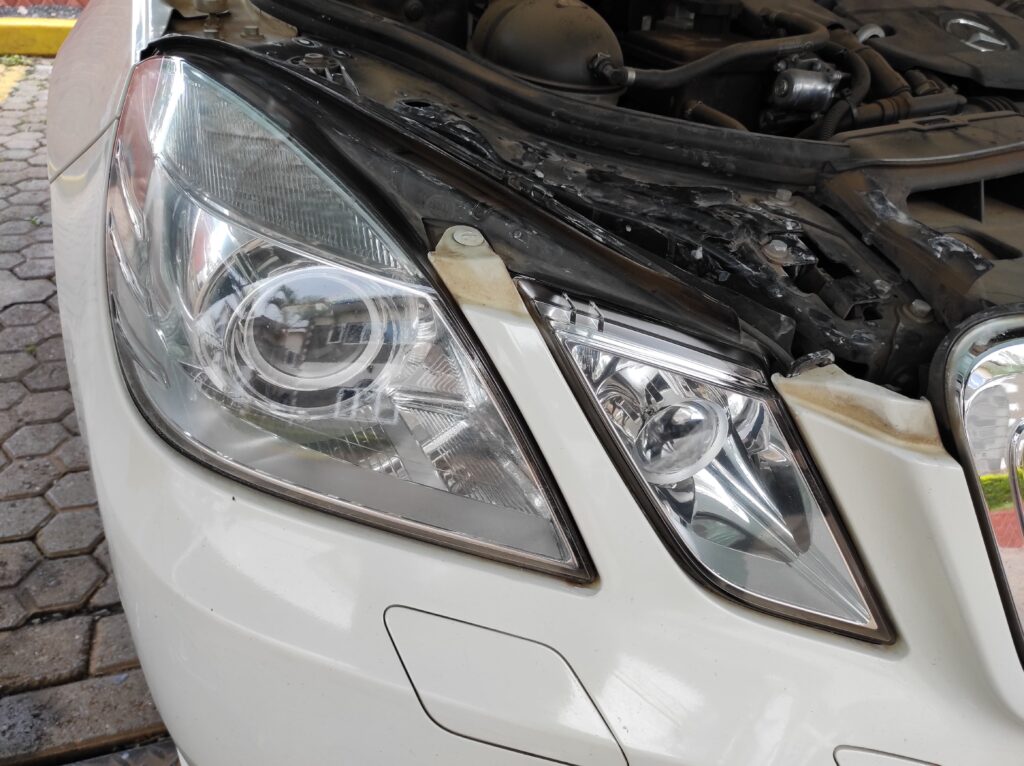
Signs of Degraded Headlights and Their Impact on Visibility
1. Diminished Light Output: Deteriorated headlights produce a reduced amount of light, leading to decreased visibility on the road. This can make it challenging to see obstacles, pedestrians, or road signs clearly.
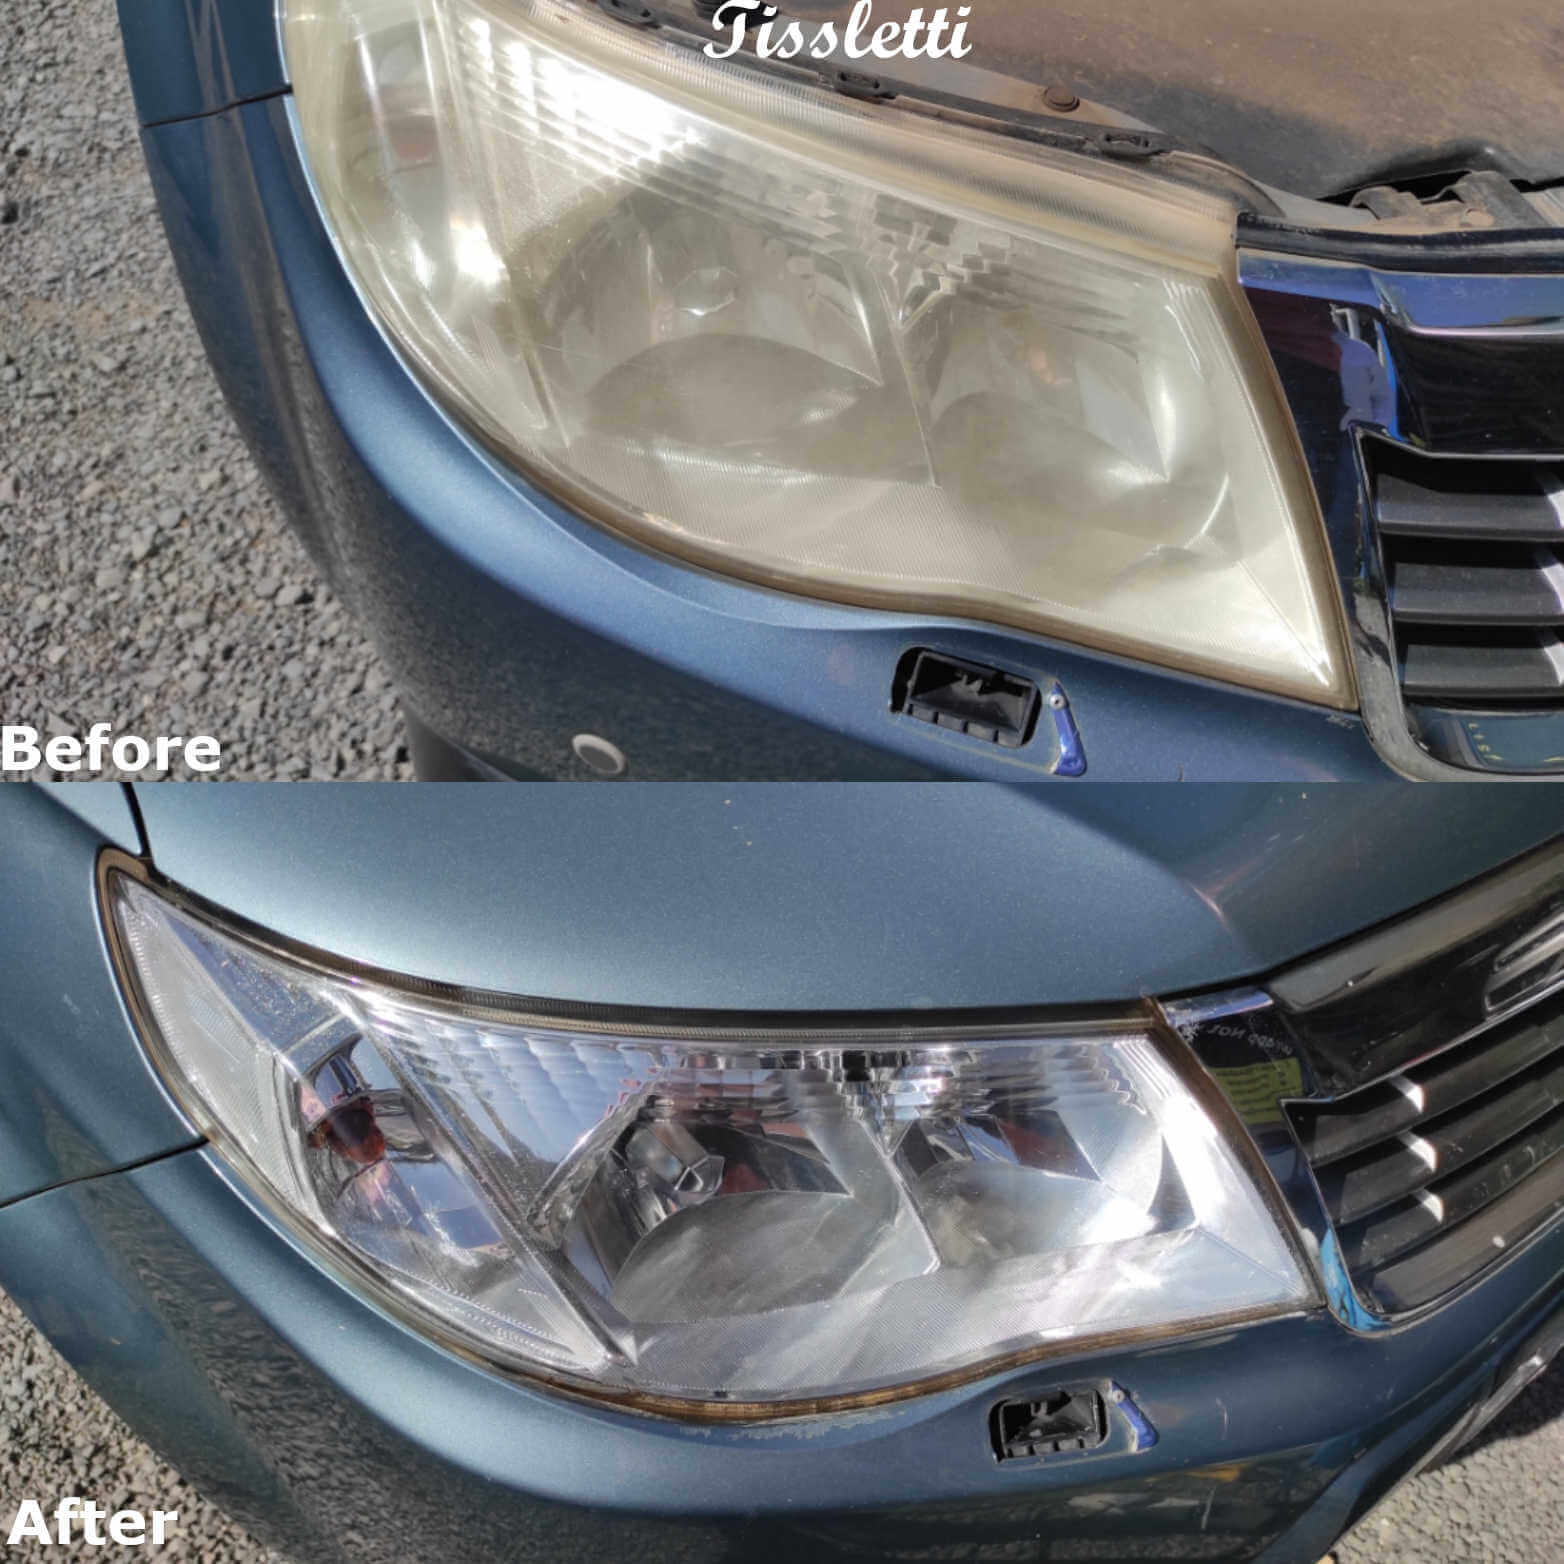
2. Discoloration and Hazing: Yellowed or hazy headlights scatter the light and create a diffused beam, reducing the effectiveness of illumination. It can create glare for oncoming drivers and limit your ability to see the road ahead.
3. Uneven Beam Pattern: Deteriorated headlights may have an uneven distribution of light, causing dark spots or patches in the beam pattern. This irregular lighting can obscure objects and increase the risk of accidents.
Understanding the components of a headlight, the contributing factors to its degradation, and the signs of degraded headlights is crucial for taking proactive measures. In the next section, we will explore effective methods to restore and maintain your headlights, ensuring optimal visibility and safety on the road.
Preparing for Restoration
Before embarking on the restoration process for your headlights, it is crucial to lay the groundwork through proper preparation. This section will emphasize the importance of preparation, provide a checklist of essential tools and materials, and guide readers on safely removing headlights from their vehicles for restoration.
Importance of Proper Preparation
Proper preparation sets the stage for a successful headlight restoration. Taking the time to prepare ensures that you have everything you need and helps you approach the restoration process with confidence. It allows for a more efficient and effective restoration, ultimately resulting in headlights that are restored to their optimal condition.
Checklist of Tools and Materials
To begin the restoration process, gather the following tools and materials:
1. Masking tape: used to protect surrounding areas of the vehicle from accidental damage during the restoration process.
2. Microfiber cloth: ideal for cleaning the headlights and removing any dirt, grime, or loose debris.
3. Sandpaper: Various grits of sandpaper, such as 400, 800, 1000, and 2000, will be necessary to remove the outer layer of oxidation and restore clarity to the headlights.
4. Headlight restoration kit: Choose a reputable restoration kit that typically includes a cleaning solution, a polishing compound, and a sealant or protective coating.
5. Soft cloth or applicator pad: Required for applying the cleaning solution, polishing compound, and protective coating.
6. Plastic or vinyl gloves: These will protect your hands from any chemicals or abrasive materials used during the restoration process.
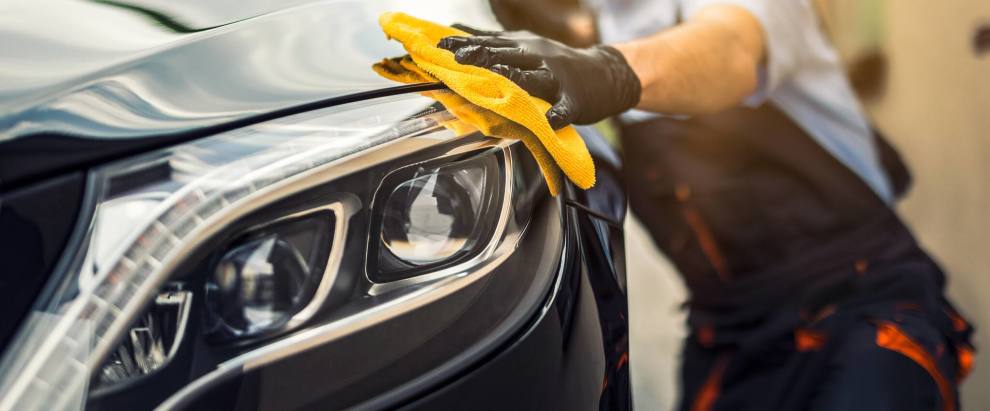
Cleaning and Sanding: Preparing the Headlights for Restoration
The cleaning and sanding stage serves as the crucial first step in the headlight restoration process. This stage is essential for removing dirt, grime, and other contaminants that have accumulated on the surface of the headlights. By properly cleaning and sanding the headlights, you create a smooth and clean surface, ready for the restoration products to work their magic.
Importance of Removing Dirt and Grime
Over time, headlights are exposed to various elements, including road debris, environmental pollutants, and weather conditions. These factors contribute to the buildup of dirt, grime, and contaminants on the headlight surface, leading to a hazy and dull appearance. Moreover, the presence of these substances can obstruct the effectiveness of the restoration products, hindering their ability to restore clarity and brightness.
Step-by-Step Cleaning Instructions
To effectively clean the headlights, follow these step-by-step instructions:
1. Gather the necessary materials: Start by gathering a microfiber cloth and a suitable cleaning solution. Ensure that the cleaning solution is specifically designed for headlights to avoid any potential damage to the lens.
2. Prepare the headlights: Before applying the cleaning solution, rinse the headlights with water to remove any loose debris. This step helps prevent scratches during the cleaning process.
3. Apply the cleaning solution: Spray or apply a small amount of the cleaning solution onto the microfiber cloth. Avoid spraying the solution directly onto the headlight to prevent it from seeping into the electrical components.
4. Wipe the headlights: Gently wipe the headlights using the dampened microfiber cloth. Make sure to cover the entire surface of the headlight, paying extra attention to areas with stubborn dirt or grime. Use a circular or back-and-forth motion to effectively remove the contaminants.
5. Rinse and dry: After thoroughly wiping the headlights, rinse them with water to remove any remaining cleaning solution. Ensure that all traces of the cleaning solution are washed away. Finally, dry the headlights with a clean, dry microfiber cloth to prevent water spots or streaks.
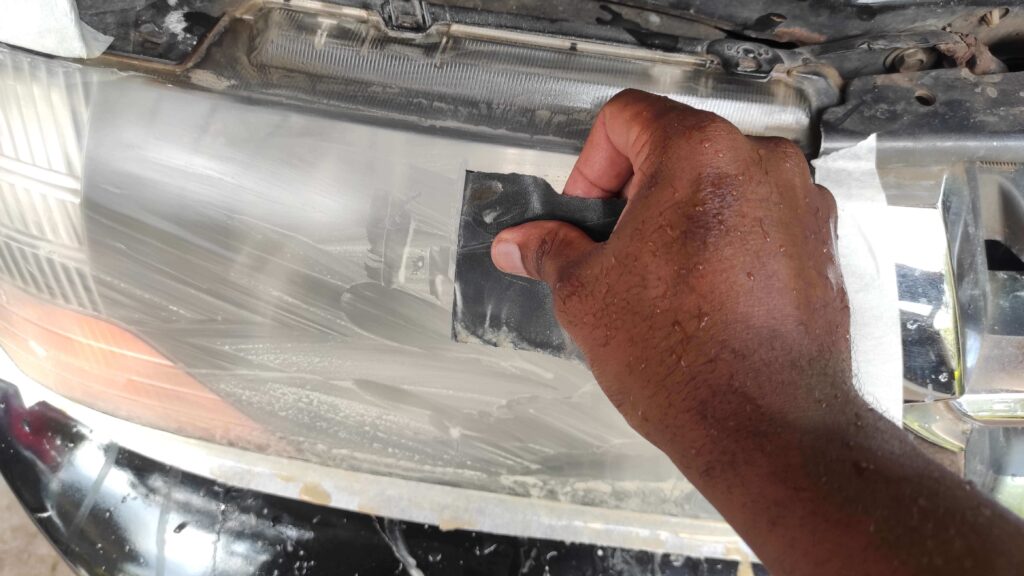
Sanding Techniques and Grit Selection

Once the headlights are clean and dry, sanding becomes the next crucial step in the restoration process. Sanding helps remove the outer layer of oxidation and restores clarity to the headlights. Here are some important factors to consider during the sanding stage:
1. Grit selection: Start with a lower-grit sandpaper, such as 400 or 800, to remove the surface oxidation effectively. As the restoration progresses, gradually move to higher grits, such as 1000 or 2000, for finer sanding and polishing.
2. Sanding technique: Use firm but gentle pressure while sanding the headlights. Keep the sandpaper flat against the headlight surface and maintain a consistent motion. It’s best to sand in straight lines or back-and-forth motions to achieve even results.
3. Even sanding: Ensure that you sand the entire headlight surface evenly. Neglecting certain areas may result in an uneven restoration outcome. Take your time and pay attention to detail to achieve a smooth and uniform finish.
By following these cleaning and sanding instructions, you establish a solid foundation for the subsequent steps in the headlight restoration process. The removal of dirt, grime, and contaminants, along with effective sanding techniques, prepares the headlights for the application of restoration products, which we will explore in the next section.
Applying Restoration Products: Restoring Headlight Brilliance
Restoring the brilliance of your headlights involves the application of specialized restoration products. In this section, we will explore different types of restoration products available in the market and guide you through the application process. By following these steps and techniques, you can effectively revitalize your headlights and enhance their appearance.
Types of Restoration Products
There are several types of restoration products that can help you achieve impressive results. Here are some commonly used options:
- Polishing compounds: These abrasive substances are designed to remove scratches, oxidation, and hazing from the headlight surface. Polishing compounds come in various forms, such as creams, gels, or liquids, and they contain fine particles that gently buff the lens, restoring clarity and shine.
- Restoration kits: These comprehensive kits provide a complete solution for headlight restoration. They often include cleaning solutions, sanding pads or discs, and polishing compounds. Restoration kits are a convenient option for those who want all the necessary components in one package.
Application Process
To ensure the best outcome, it’s essential to follow the manufacturer’s instructions when applying restoration products. The application process may vary depending on the type of product you choose. Here’s a general overview of how to apply restoration products effectively:
Step 1: Preparation: Start by cleaning the headlights thoroughly to remove dirt, grime, and other contaminants. This ensures that the restoration product adheres properly to the surface. Follow the cleaning instructions provided with the product, or refer to our earlier section on cleaning and sanding.
Step 2: Application: Apply the restoration product according to the manufacturer’s instructions. Whether you’re using a polishing compound or a restoration kit, the process typically involves the following steps:
- Apply a small amount of the product to a clean, soft cloth or applicator pad.
- Gently work the product into the headlight surface using circular motions. Be sure to cover the entire lens area.
- If using a restoration kit, follow the specific instructions provided for each step, such as using sanding pads or applying additional solutions.
- Pay attention to any recommended drying times between applications.
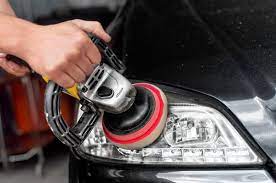
Techniques for Hand and Machine Application
You can apply restoration products manually or with the help of a machine. Here are some techniques to consider:
- Hand application: When applying restoration products by hand, use a soft cloth or applicator pad. Apply gentle pressure and work the product in circular motions. This technique allows you to have better control and feel the surface as you restore it.
- Machine application: If you have access to a machine polisher, it can make the restoration process faster and more efficient. Attach a foam or polishing pad to the machine and apply the restoration product onto the pad. Move the machine in slow, overlapping passes across the headlight surface. Avoid applying excessive pressure to prevent damage.
Tips for Optimal Results and Avoiding Common Mistakes
To achieve optimal results and avoid potential pitfalls during the application process, consider the following tips:
- Follow instructions: Always read and follow the manufacturer’s instructions provided with the restoration product. They contain valuable information specific to the product and ensure the best possible outcome.
- Work in a well-ventilated area: When applying restoration products, ensure proper ventilation to avoid inhaling fumes or chemicals. Working outdoors or in a well-ventilated space is recommended.
- Take your time: Don’t rush the application process. Allow sufficient time for the restoration product to work, and follow any recommended drying times. Patience and attention to detail will yield superior results.
- Protect surrounding areas: To prevent damage, cover or tape off surrounding surfaces, such as the car’s paint, trim, or any sensitive electrical components. This will safeguard them from accidental contact with the restoration product.
- Test in a small area: Before applying the restoration product to the entire headlight, it’s advisable to test it in a small, inconspicuous area. This allows you to assess its compatibility with your specific headlights and ensure the desired results.
- Avoid contact with painted surfaces: Be careful not to let the restoration product come into contact with painted surfaces, as it may cause damage or discoloration. Use masking tape or protective films to create a barrier between the headlights and adjacent areas.
- Regular maintenance: After restoring your headlights, regular maintenance is key to prolonging their clarity and preventing future deterioration. Keep them clean by regularly washing your car and consider applying a protective sealant or clear coat to provide an additional layer of defense against environmental factors.
By following these application techniques and tips, you can effectively restore the brilliance of your headlights and enjoy enhanced visibility while driving. Remember to prioritize safety throughout the restoration process and consult professional assistance if needed.
Sealing and Protecting the Headlights

Sealing and protecting headlights after restoration is crucial to ensuring their longevity and maintaining optimal visibility on the road. By taking this extra step, you can significantly extend the lifespan of your headlights and avoid the need for frequent repairs or replacements. In this section, we will explore different sealing options and provide step-by-step instructions on how to apply them effectively.
1. Significance of Sealing Headlights
When you restore your headlights, you remove the oxidized layer that hinders their performance. However, without proper sealing, the newly restored surface is vulnerable to environmental factors such as UV rays, dirt, and debris. Sealing acts as a protective barrier, shielding the headlights from these elements and preventing further damage or discoloration.
2. Various Sealing Options
- Clear Coats: Clear coats provide a transparent, glossy layer that safeguards the headlights from UV rays and contaminants. They are easy to apply and provide long-lasting protection. Look for a clear coat specifically designed for automotive use, ensuring compatibility with the headlight material.
- Sealants: Headlight sealants offer a protective barrier against UV rays and help repel dirt and grime. They come in liquid or paste form and are usually applied with a soft cloth or applicator pad. Prioritize sealants that are specifically formulated for headlights and have UV-resistant properties.
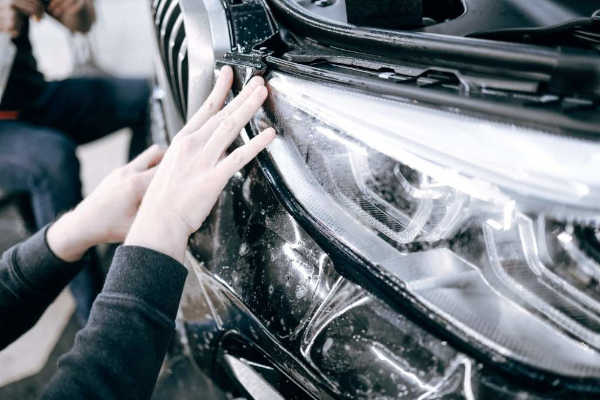
- Protective Films: Protective films provide a physical shield that covers the entire headlight surface. They are made of durable materials, such as polyurethane, that offer resistance to UV rays, scratches, and yellowing. Applying protective films requires precision and patience; follow the manufacturer’s instructions carefully.
3. Applying the Chosen Sealing Method
Regardless of the sealing option you choose, it is essential to follow the application instructions precisely. Here’s a general step-by-step guide:
- Thoroughly clean the headlights using a mild soap or automotive cleaning solution.
- Rinse off any residue and dry the headlights completely.
- Apply the chosen sealing product according to the manufacturer’s instructions. This may involve spraying, wiping, or carefully placing the protective film over the headlights.
- Ensure even coverage and avoid excessive product application, as it can lead to uneven drying or a hazy appearance.
- Allow the sealing product to dry or cure completely before exposing the headlights to any moisture or harsh conditions.
- For clear coats and sealants, consider applying multiple layers for enhanced protection, allowing each layer to dry before applying the next.
- After the sealing product has dried, inspect the headlights for any missed areas or uneven application. Touch up if necessary.
- Once the sealing process is complete, take preventive measures to maintain the longevity of the headlights. This includes regular cleaning, avoiding abrasive cleaners or materials, and applying additional layers of sealant or clear coat periodically.
Regular maintenance is essential to ensure long-lasting results. Monitor the condition of the sealed headlights and reapply the sealing product as needed. Additionally, practice safe driving habits and park your vehicle in shaded areas whenever possible to minimize UV exposure.
By sealing and protecting your headlights after restoration, you not only preserve their clarity and performance but also enhance the overall appearance of your vehicle. Taking the time to apply the appropriate sealing method will pay off in the end, ensuring that your headlights remain bright, clear, and reliable for years to come.
Other Considerations: Ensuring Longevity and Overcoming Challenges
When it comes to headlight restoration, a few additional considerations can help prolong the life of your headlights and address common challenges that may arise during the restoration process. In this section, we will explore these aspects and provide guidance on handling more severe headlight damage.
1. Using Car Covers and Parking in Shaded Areas
To protect your headlights from environmental factors and minimize the need for frequent restoration, consider using headlight covers. These covers act as a barrier against UV rays, debris, and scratches, preserving the clarity and condition of your headlights. Look for covers specifically designed for your vehicle’s make and model to ensure a proper fit.
In addition to using covers, parking your vehicle in shaded areas can significantly reduce UV exposure, which is a leading cause of headlight deterioration. Whenever possible, choose covered parking spaces or utilize carports to shield your headlights from direct sunlight.
2. Overcoming Common Challenges
During the headlight restoration process, you may encounter a few challenges. Here are some common issues and how to overcome them:
- Uneven Sanding: If you notice uneven sanding results or missed spots, carefully re-sand those areas using the appropriate grit sandpaper. Ensure consistent sanding motions and maintain a steady hand to achieve a smooth and uniform finish.
- Residual Haze: Sometimes, a slight haze may remain on the headlight surface even after restoration. To address this, you can apply a polishing compound specifically formulated for headlights. Follow the instructions provided by the manufacturer to effectively remove the haze and restore clarity.
3. Handling Severe Headlight Damage and Seeking Professional Help
In cases where the headlight damage is severe, such as deep scratches, cracks, or extensive oxidation, it may be best to seek professional assistance. Professional restoration services have the expertise and specialized tools to tackle complex headlight issues effectively. They can assess the condition of your headlights and provide tailored solutions to restore them to optimal condition.
If you are unsure about your ability to handle the restoration process or if the damage seems beyond repair, it is advisable to consult with a professional. They can offer professional-grade restoration techniques or suggest the best course of action, which may include headlight replacement if necessary.
By implementing these additional measures, addressing common challenges, and knowing when to seek professional help, you can ensure the longevity of your headlights and maintain optimal visibility on the road. Remember, regular maintenance and preventive measures are key to keeping your headlights in top shape and enjoying a safer and more enjoyable driving experience.
Frequently Asked Questions: Clearing Up Headlight Restoration Queries
In this section, we will address some frequently asked questions related to headlight restoration. Gain insights into the longevity of the restoration, the suitability of DIY methods, associated costs, safety precautions, and more.
By addressing these frequently asked questions, we hope to provide clarity and guidance on headlight restoration. Whether it’s about maintenance, brightness improvement, or handling significant damage, understanding these aspects will help you make informed decisions and enjoy the benefits of restored headlights.
Conclusion
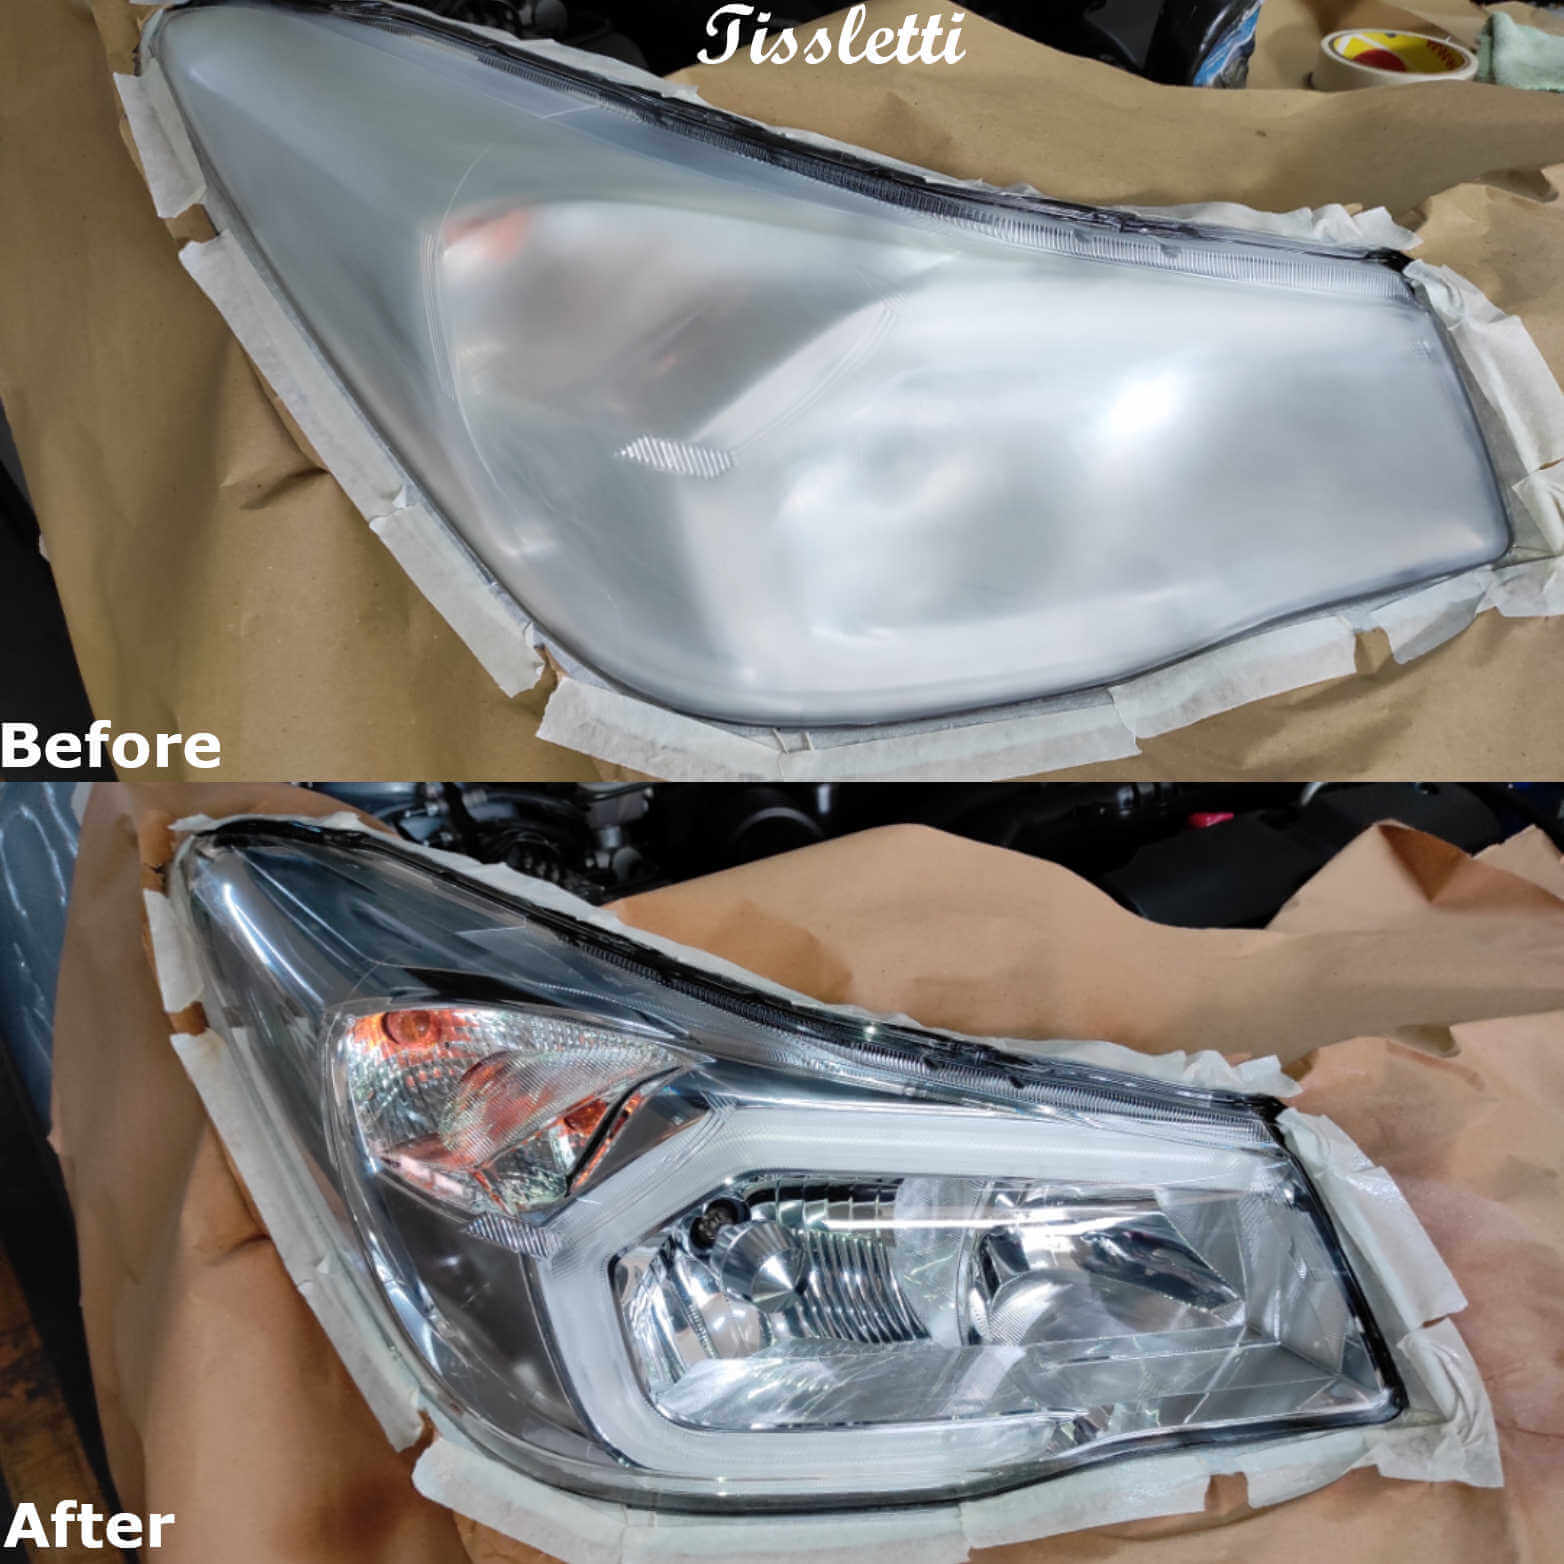
In conclusion, this comprehensive guide has covered essential information on restoring headlights and highlighted the significance of this maintenance task. By summarizing the key points discussed, reinforcing the importance of clear and functional headlights, and encouraging readers to take action, we can ensure improved safety and visibility on the road.
Throughout this guide, we have explored the various factors that contribute to headlight degradation and the potential risks associated with dim or yellowed headlights. We’ve also discussed the step-by-step process of headlight restoration, including the necessary tools and techniques.
Restoring your headlights not only enhances the overall appearance of your vehicle but also plays a crucial role in ensuring your safety and the safety of others on the road. Clear and bright headlights provide better visibility during nighttime driving, adverse weather conditions, and in poorly lit areas, reducing the risk of accidents.
Now that you are equipped with the knowledge and understanding of headlight restoration, we encourage you to take action. Make it a priority to restore your headlights and experience the benefits firsthand. By investing a small amount of time and effort, you can significantly improve your driving experience and contribute to a safer road environment.
Remember, your headlights are a vital component of your vehicle, and their proper maintenance should never be overlooked. Take the necessary steps today to restore your headlights, and enjoy the benefits of improved visibility and enhanced safety on your journeys.
Thank you for reading this guide, and we hope it has provided you with valuable insights and guidance in restoring your headlights. Safe travels!