Headlight Cleaner: The Ultimate Guide to Restoring Headlight Clarity
Table of Contents
Introduction
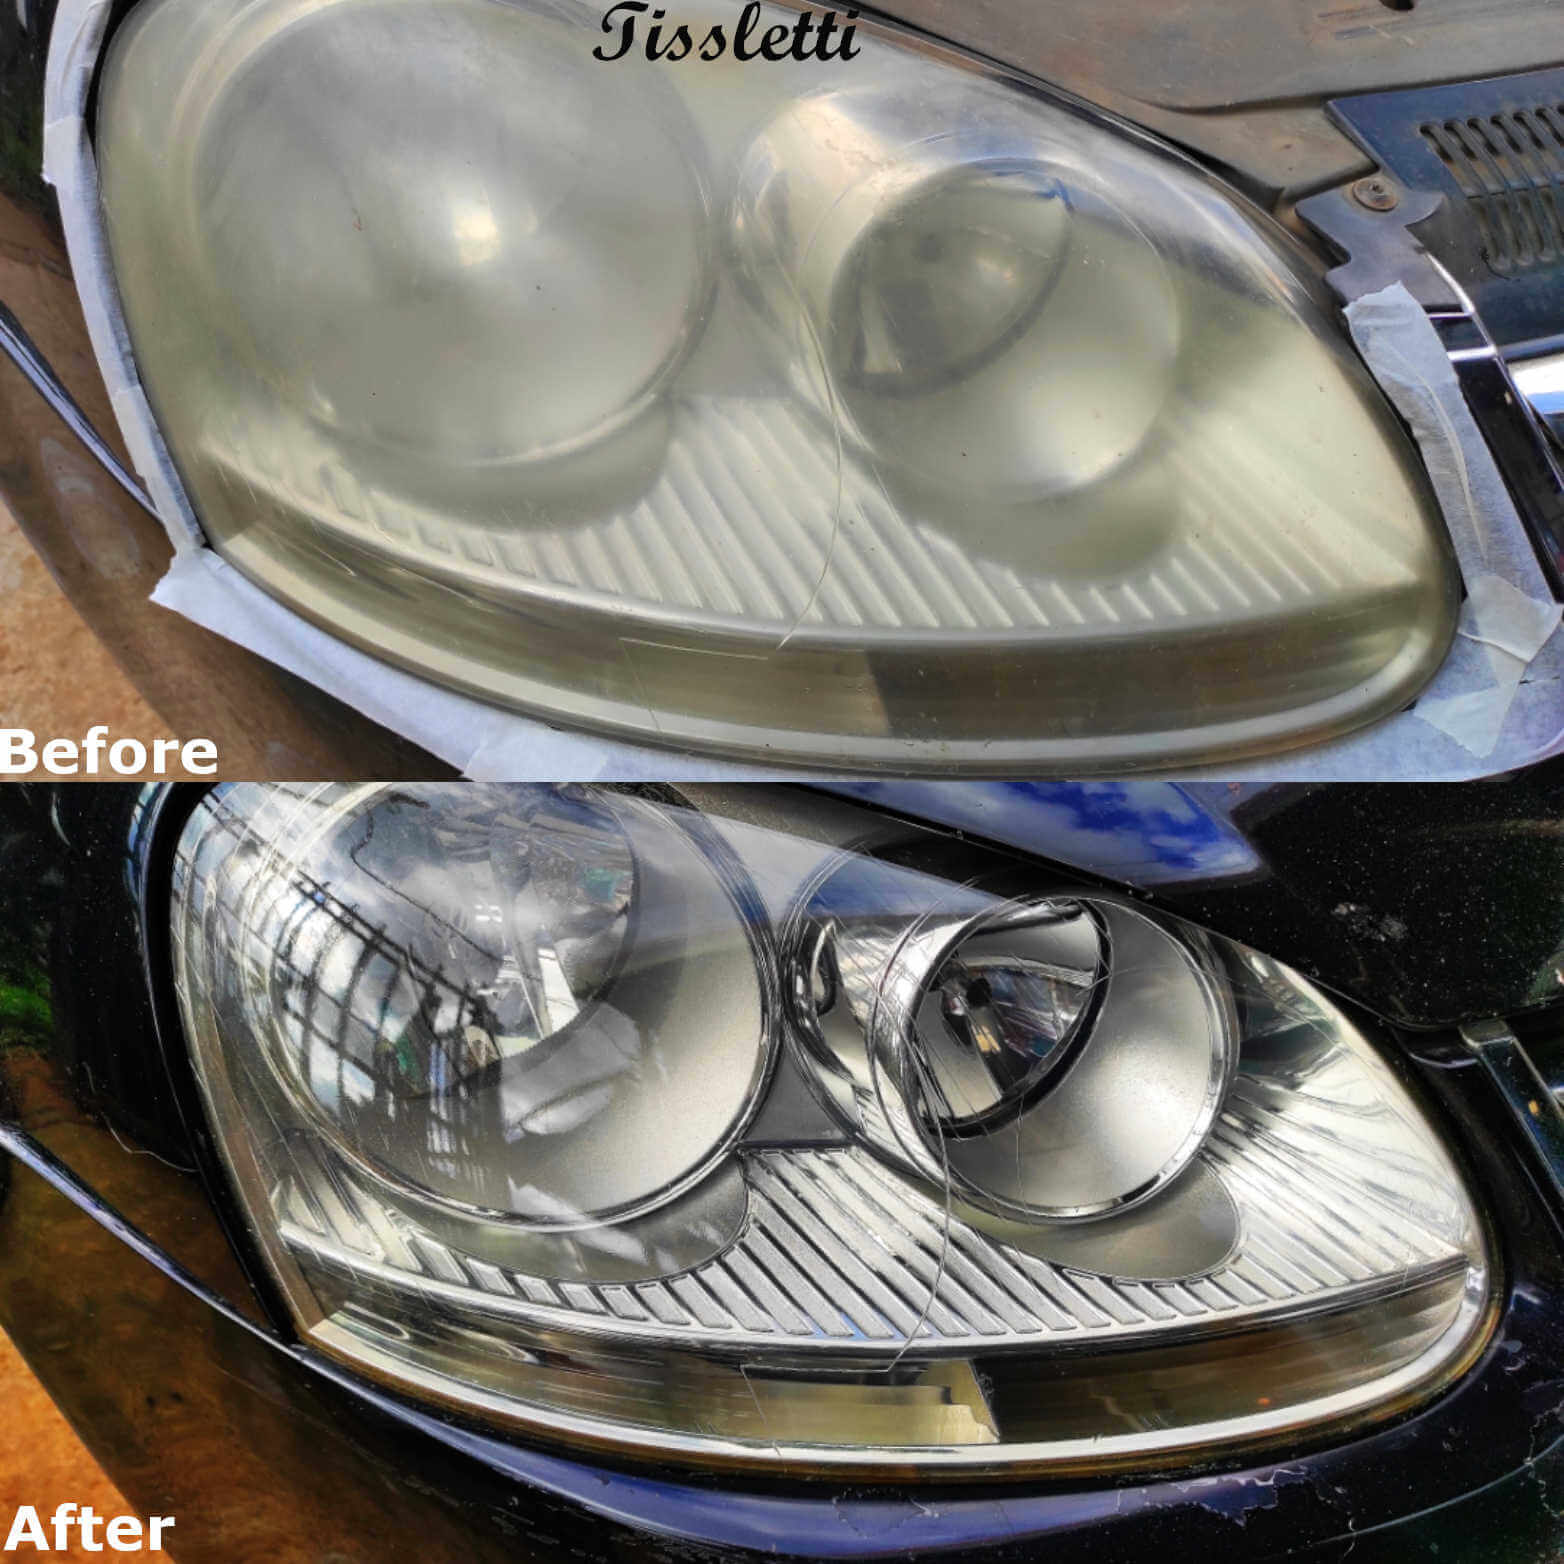
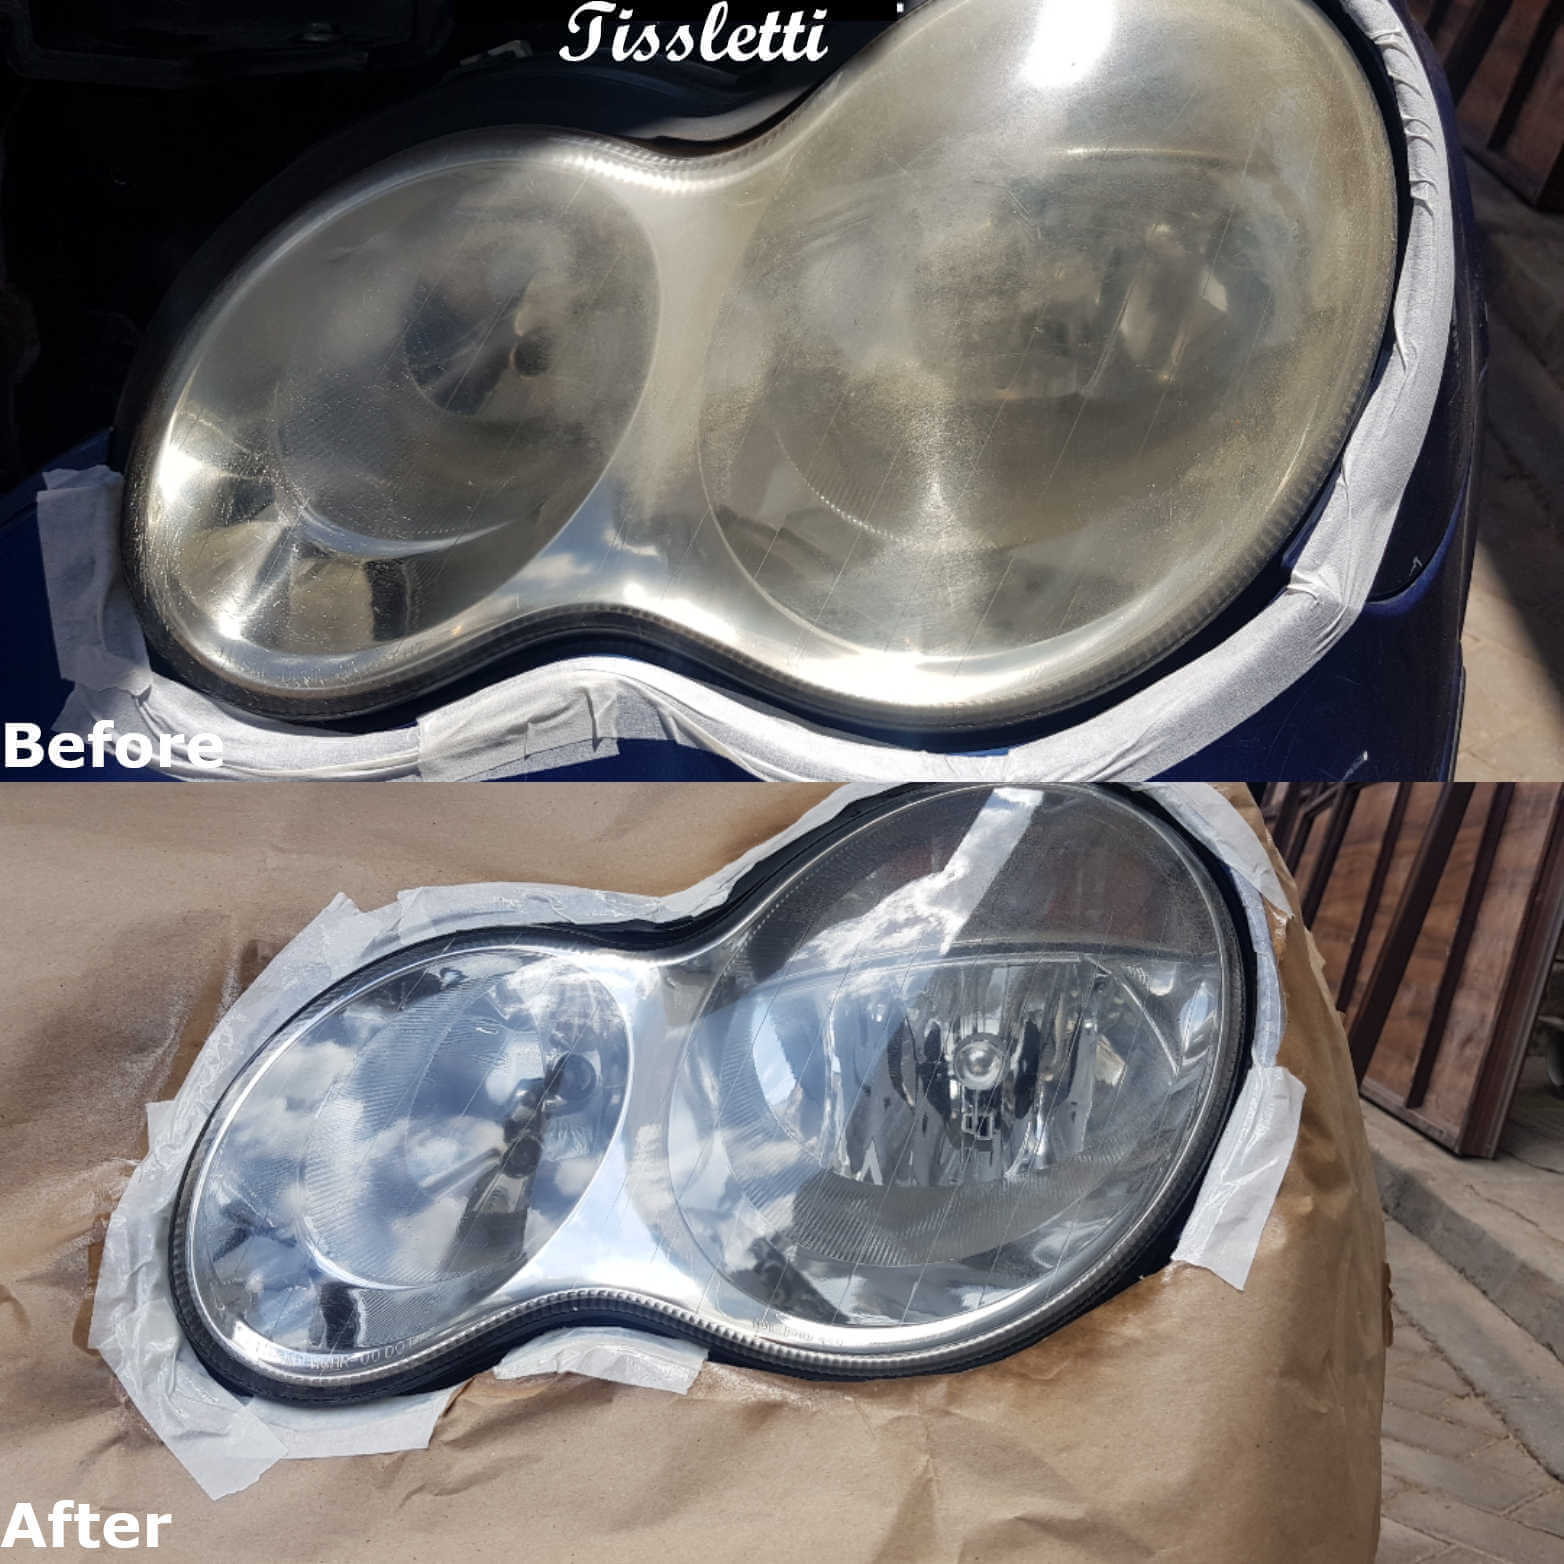
Clear and properly functioning headlights are essential for optimal visibility and safety while driving. Over time, headlights can become dull, hazy, or yellowed due to oxidation, UV exposure, and environmental factors. This not only affects the appearance of your vehicle but also reduces the effectiveness of your headlights, compromising your ability to see the road ahead. Thankfully, headlight cleaners offer a simple and effective solution to restore the clarity of your headlights.
Benefits of Using a Headlight Cleaner
Using a headlight cleaner has numerous benefits, including:
- Improved Visibility: By restoring the clarity of your headlights, a headlight cleaner ensures maximum brightness and coverage, allowing you to see the road and potential hazards more clearly, especially during nighttime driving or adverse weather conditions.
- Enhanced Safety: Clear and well-functioning headlights significantly improve your safety on the road by making your vehicle more visible to other drivers. This helps prevent accidents and ensures a safer driving experience for you and those around you.
- Cost-Effective: Headlight cleaners are a cost-effective alternative to replacing the entire headlight assembly. By restoring the clarity of your existing headlights, you can avoid the expense of purchasing new ones.
- Time-Saving: Restoring your headlights with a headlight cleaner is a relatively quick and simple process. It can be done at home without the need for professional assistance, saving you time and the hassle of visiting an auto repair shop.
- Preservation of Resale Value: Clear and well-maintained headlights contribute to the overall appearance of your vehicle. By using a headlight cleaner, you can help preserve the resale value of your car by keeping it looking its best.
In the following sections, we will delve deeper into the different types of headlight cleaners available, the steps involved in the restoration process, and useful tips for maintaining the clarity of your headlights.
Stay tuned for our next section, where we explore the various types of headlight cleaners and their unique features and benefits.
Understanding Headlight Degradation
Clear and functional headlights are crucial for ensuring optimal visibility and safety while driving. However, over time, headlights can degrade and lose their clarity due to various factors. Understanding the common causes of headlight degradation can help you take appropriate measures to restore their performance. Let’s explore the primary culprits behind headlight deterioration:
Oxidation from Exposure to UV Rays and Environmental Elements
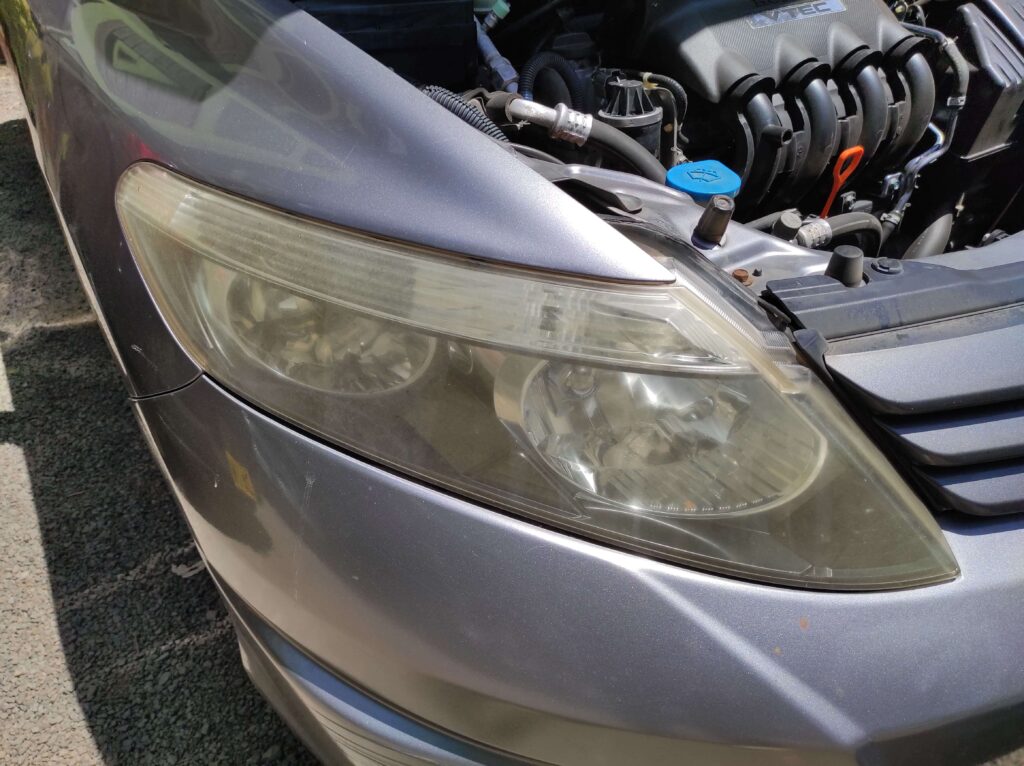
Headlights are exposed to the harsh effects of ultraviolet (UV) rays from the sun, as well as environmental factors like pollution, dirt, and debris. Over time, these elements cause oxidation, resulting in a cloudy or hazy appearance on the headlight lens. This oxidation layer diminishes the amount of light emitted, reducing the effectiveness of the headlights and limiting visibility.
To combat oxidation, it’s important to regularly clean and protect your headlights. Using a headlight cleaner specifically formulated to remove oxidation can help restore clarity and brightness to the lenses, ensuring optimal performance.
Yellowing or Discoloration Due to Plastic Degradation
Headlight lenses are typically made of polycarbonate plastic, which is prone to yellowing or discoloration over time. This occurs as a result of the plastic’s exposure to UV rays, heat, and other environmental factors. The yellowed or discolored appearance not only diminishes the aesthetic appeal of the headlights but also reduces light output, making it harder to see while driving at night.
To address yellowing or discoloration, headlight restoration kits or cleaners that specifically target plastic degradation can be used. These products contain abrasives and chemicals that effectively remove the discolored layer and restore the clear plastic surface of the headlights.
Scratches and Abrasions That Reduce Light Output
Headlights are prone to scratches and abrasions from road debris, sand, gravel, and general wear and tear. These scratches not only detract from the appearance of the headlights but also reduce the amount of light emitted. The presence of scratches and abrasions disperses the light, making it less focused and lowering visibility on the road.
To address scratches and abrasions, headlight restoration kits often include abrasive compounds or sanding pads that help remove surface imperfections. Polishing and buffing the headlights after removing the scratches further enhances their clarity and light output.
By understanding the common causes of headlight degradation, you can take proactive steps to restore and maintain the performance of your headlights. In the next section, we will explore effective solutions for restoring headlight clarity and brightness, ensuring optimal visibility and safety while driving.
The Science Behind Headlight Cleaners
Headlight cleaners are not just ordinary cleaning products; they are specifically designed to tackle the unique challenges of headlight degradation. Understanding the science behind headlight cleaners can shed light on how they effectively restore clarity and enhance the performance of your headlights. Let’s delve into the science behind these remarkable products:
Chemical Composition and Formulation
Headlight cleaners typically consist of a carefully formulated blend of chemicals and abrasives. These ingredients work synergistically to remove oxidation, eliminate discoloration, and restore the optical clarity of the headlight lens. The specific composition may vary depending on the brand and product, but they generally contain ingredients such as:
- Abrasives: These abrasive particles help to remove the outer layer of oxidation and any surface imperfections, such as scratches or haze, from the headlight lens.
- Solvents: Solvents are used to dissolve and break down dirt, grime, and other contaminants that may be present on the headlight surface.
- Polishing Agents: Polishing agents aid in the process of restoring clarity and enhancing the shine of the headlight lens.
Breaking Down Oxidation and Removing Discoloration
One of the primary functions of headlight cleaners is to address oxidation and discoloration that occur over time. Oxidation creates a hazy or cloudy layer on the headlight lens, reducing its transparency and light output. Headlight cleaners contain active ingredients that penetrate this layer, breaking it down and removing the oxidized particles. This process helps restore the original clarity of the headlight lens and improves the overall appearance.
Restoring Clarity and Enhancing Light Output
Headlight cleaners not only eliminate oxidation and discoloration but also restore the optical properties of the headlight lens. The abrasives present in the cleaner help to smooth out the surface of the lens, reducing the scattering of light and improving light transmission. This results in enhanced clarity and brightness, allowing for better visibility and safety while driving at night or in low-light conditions.
By harnessing the power of their chemical composition and formulation, headlight cleaners provide an effective solution for restoring the performance and appearance of your headlights. In the next section, we will explore the different types of headlight cleaners available on the market and their unique features.
Different Types of Headlight Cleaners
When it comes to restoring the clarity and brightness of your headlights, there are different types of headlight cleaners available on the market. Each type offers unique features and benefits, catering to various preferences and needs. Let’s explore the different types of headlight cleaners:
Spray-on Headlight Cleaners
Spray-on headlight cleaners are a popular choice for their ease of use and convenience. They come in a spray bottle, allowing for quick and straightforward application. Here are some key features and benefits of spray-on headlight cleaners:
- Ease of Application: Spray-on cleaners are designed for hassle-free application. Simply spray the cleaner directly onto the headlight lens and let it sit for the recommended time.
- Effective Cleaning: These cleaners are formulated to break down oxidation, remove discoloration, and restore clarity to the headlight lens.
- Convenience: Spray-on cleaners are convenient for on-the-go use, making them ideal for regular maintenance and quick touch-ups.
- No Tools Required: Unlike some other types of headlight cleaners, spray-on cleaners usually do not require additional tools or equipment for application.
Popular spray-on headlight cleaner brands include Meguiar’s, Turtle Wax, and 3M. These brands offer a range of spray-on cleaners that are specifically formulated to tackle headlight degradation and deliver impressive results.
When using a spray-on headlight cleaner, it’s important to follow the manufacturer’s instructions for the best results. Generally, the process involves spraying the cleaner onto the headlight lens, allowing it to dwell for a few minutes, and then wiping it off with a clean cloth or microfiber towel. This simple application process, combined with the effectiveness of the cleaner, makes spray-on headlight cleaners a popular choice among car enthusiasts and DIYers.
In the next section, we will explore another type of headlight cleaner that offers a different approach to restoring headlight clarity: headlight restoration kits.
Headlight Restoration Kits
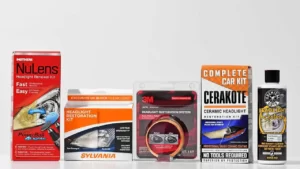
Headlight restoration kits are comprehensive solutions designed to tackle headlight degradation and restore their clarity effectively. These kits typically contain a variety of components and offer a step-by-step process to guide users through the restoration process. Let’s take a closer look at what you can expect from a typical headlight restoration kit:
Contents and Components of a Typical Kit
A standard headlight restoration kit usually includes the following components:
- Cleaning Solution: This solution is specially formulated to remove oxidation, discoloration, and other contaminants from the headlight lens.
- Sanding Pads or Abrasives: These pads or abrasives are used to remove the outer layer of oxidation and smooth out any imperfections on the lens.
- Polishing Compound: The polishing compound helps to restore clarity and shine to the headlight lens after the initial cleaning and sanding process.
- Protective Coating: Many kits include a protective coating that can be applied to the headlight lens to prevent future oxidation and maintain the restored clarity for an extended period.
Step-by-Step Process for Using a Restoration Kit
Using a headlight restoration kit typically involves the following steps:
- Preparation: Clean the headlight surface to remove any loose dirt or debris before starting the restoration process.
- Sanding: Use the provided sanding pads or abrasives to gently sand the headlight lens in a back-and-forth motion. This step helps remove the oxidized layer and smooth out any scratches or imperfections.
- Cleaning: Apply the cleaning solution to the headlight lens and use a clean cloth or applicator to scrub the surface. This step helps remove any remaining oxidation and deep-seated discoloration.
- Polishing: Apply the polishing compound to the headlight lens and use a clean cloth or buffer to polish the surface. This step restores clarity and enhances the shine of the headlight lens.
- Coating: If included in the kit, apply the protective coating to the headlight lens according to the manufacturer’s instructions. This coating helps maintain the restored clarity and protect against future oxidation.
Notable Brands and Their Features
Several brands offer high-quality headlight restoration kits with their unique features. Some popular brands in this category include 3M, Meguiar’s, and Turtle Wax. These brands provide comprehensive kits that are widely recognized for their effectiveness and ease of use.
- 3M Headlight Restoration Kit: This kit includes sanding discs, a polishing pad, compound, and a protective coating. It is known for its professional-grade results and long-lasting clarity.
- Meguiar’s Headlight Restoration Kit: Meguiar’s kit offers a straightforward three-step process with sanding discs, a cleaning solution, and a headlight coating. It is favored for its user-friendly approach and impressive results.
- Turtle Wax Headlight Lens Restorer Kit: This kit includes a lens clarifying compound, spray lubricant, and a lens sealing wipe. It is appreciated for its affordability and ability to restore headlight clarity effectively.
Using a headlight restoration kit provides a comprehensive solution that allows you to restore the clarity of your headlights and improve their performance. These kits offer a systematic approach, making it easier for car enthusiasts and DIYers to achieve professional-quality results.
DIY Alternatives and Homemade Headlight Cleaners
If you’re looking for budget-friendly alternatives or prefer a DIY approach to restore your headlights, there are a few methods you can try using common household items. While these methods may not offer the same level of effectiveness as commercial headlight cleaners, they can still provide some improvement. Let’s explore some popular DIY alternatives and homemade headlight cleaners:
- Toothpaste Method: Toothpaste is a commonly suggested household item for headlight restoration. Here’s how you can use it:
- Apply a small amount of toothpaste (non-gel and non-whitening) directly onto the headlight lens.
- Use a clean cloth or a soft-bristled toothbrush to gently scrub the toothpaste onto the lens in circular motions.
- Rinse the headlight lens thoroughly with water and wipe it dry.
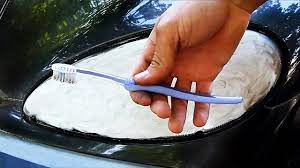
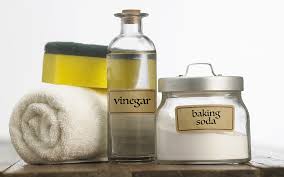
- Baking Soda Method: Baking soda is another DIY option that can help remove oxidation and restore clarity to your headlights. Follow these steps:
- Create a paste by mixing baking soda with water until you achieve a thick consistency.
- Apply the baking soda paste to the headlight lens, spreading it evenly.
- Use a clean cloth or sponge to gently scrub the paste onto the lens in circular motions.
- Rinse the headlight lens with water and dry it thoroughly.
- Vinegar Method: Vinegar can be used as an acid-based cleaner to tackle headlight oxidation. Here’s how to use it:
- Mix equal parts white vinegar and water in a spray bottle.
- Spray the vinegar solution onto the headlight lens and let it sit for a few minutes.
- Scrub the lens gently with a soft cloth or sponge.
- Rinse the headlight lens with water and dry it completely.
While these DIY methods can provide some improvement in headlight clarity, it’s important to note their limitations:
- DIY alternatives may not be as effective in removing severe oxidation or deep discoloration.
- The results of DIY methods may vary depending on the condition of the headlights and the specific products used.
- It’s possible that these methods may provide temporary improvement rather than a long-lasting solution.
When using DIY alternatives, it’s essential to consider safety precautions:
- Protect your hands by wearing gloves when handling chemicals or abrasive materials.
- Avoid getting toothpaste, baking soda, or vinegar on other parts of your vehicle’s paint or trim.
- Test the method on a small, inconspicuous area of the headlight lens first to ensure it doesn’t cause any damage or adverse reactions.
While DIY alternatives can be a cost-effective option, it’s important to manage your expectations and understand their limitations. If your headlights require significant restoration or you’re looking for professional-quality results, it may be best to consider commercial headlight cleaners or restoration kits.
Choosing the Right Headlight Cleaner
When it comes to selecting a headlight cleaner, it’s essential to consider several factors to ensure you choose the right product for your needs. Here are some key factors to consider when selecting a headlight cleaner:
- Compatibility with Your Headlight Type: Not all headlight cleaners are suitable for all types of headlights. Some cleaners may work better on specific materials, such as plastic or glass. Before making a purchase, check the product label or specifications to ensure it is compatible with your headlight type.
- Ease of Use and Application: Consider the convenience and ease of use of the headlight cleaner. Look for products that offer a user-friendly application process. Spray-on cleaners or restoration kits with clear instructions and all-inclusive components can make the restoration process smoother and more efficient.
- Longevity and Durability of the Restoration: Evaluate the longevity and durability of the restoration results. A good headlight cleaner should provide a long-lasting solution, keeping your headlights clear and bright for an extended period. Look for products that offer UV protection or additional coatings to prevent future oxidation and discoloration.
- Customer Reviews and Recommendations: Take the time to read customer reviews and recommendations to gauge the effectiveness and satisfaction level of a particular headlight cleaner. Real-life experiences and feedback from other users can provide valuable insights into the performance and reliability of the product.
- Brand Reputation and Quality: Consider the reputation and quality of the brand offering the headlight cleaner. Established brands with a track record of producing high-quality automotive care products are often a safer choice. Look for trusted brands that have been in the market for a while and have positive reviews.
By considering these factors, you can make an informed decision and choose a headlight cleaner that meets your specific requirements. Remember to follow the instructions provided by the manufacturer for optimal results and ensure your headlights are restored to their full clarity, improving visibility and safety on the road.
Step-by-Step Guide to Cleaning Headlights
Properly cleaning your headlights is an important part of headlight maintenance and restoration. Follow these step-by-step instructions to effectively clean your headlights and restore their clarity:
Preparing the Headlights
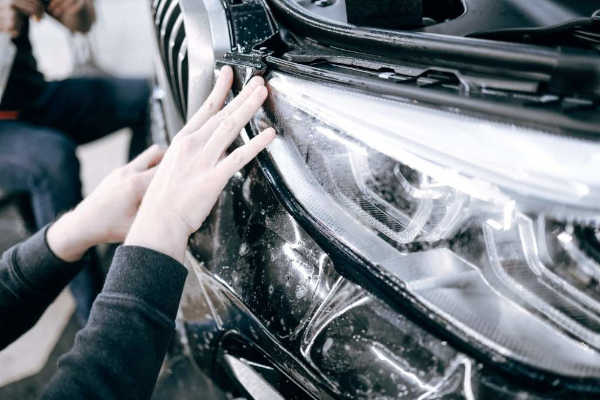
Before you begin the cleaning process, it’s crucial to properly prepare the headlights. This involves cleaning the surface and protecting the surrounding areas.
- Cleaning the Surface and Removing Debris: Start by thoroughly washing the headlights with soap and water to remove any dirt, grime, or debris. Use a microfiber cloth or a soft sponge to gently scrub the surface, ensuring all areas are clean. Rinse off the soap residue and allow the headlights to dry completely.
- Masking and Protecting Surrounding Areas: To prevent any accidental damage or unwanted contact with other parts of your vehicle, it’s recommended to mask and protect the surrounding areas. Cover the adjacent areas around the headlights, such as the paintwork and nearby trim, with masking tape or plastic sheets. This will provide a barrier and prevent any unintended scratches or chemical damage.
By properly preparing the headlights, you ensure a clean and safe environment for the subsequent steps of the cleaning process.
Remember, different headlight cleaning methods may have specific instructions or variations in the preparation process. Always refer to the product instructions or guidelines provided by the manufacturer for the best results.
Next, we will move on to the next step in the headlight cleaning process: removing oxidation and restoring clarity.
Applying the Headlight Cleaner
Once you have prepared your headlights, it’s time to apply the headlight cleaner of your choice. The application process may vary depending on the type of cleaner you’re using. Here’s a step-by-step guide on how to apply different types of headlight cleaners:
Spray-On Cleaner Application Technique
Spray-on headlight cleaners are a convenient and popular option for restoring headlight clarity. Follow these steps to effectively apply a spray-on cleaner:
- Step 1: Shake the Bottle: Before using the spray-on cleaner, give the bottle a good shake to ensure the ingredients are well-mixed.
- Step 2: Spray the Cleaner: Holding the bottle about 6-8 inches away from the headlight lens, apply an even coat of the cleaner. Start from the top and work your way down, covering the entire surface of the headlight.
- Step 3: Let it Sit: Allow the cleaner to sit on the headlights for the recommended amount of time, as specified by the manufacturer. This allows the cleaner to penetrate the surface and break down any oxidation or discoloration.
- Step 4: Agitate if Necessary: For more stubborn stains or heavy oxidation, you may need to gently agitate the cleaner using a soft brush or sponge. Follow the manufacturer’s instructions on whether agitation is required and the appropriate tools to use.
- Step 5: Rinse and Dry: After the specified time has passed, thoroughly rinse the headlights with clean water to remove the cleaner. Use a microfiber cloth or a soft towel to dry the headlights.
Restoration Kit Usage Instructions
Headlight restoration kits typically come with detailed instructions that you should follow for optimal results. Here’s a general step-by-step guide:
– Step 1: Prepare the Kit: Gather all the components included in the restoration kit and read the instructions carefully. Make sure you have all the necessary tools and materials.
– Step 2: Surface Preparation: Clean the headlights using soap and water, similar to the preparation steps mentioned earlier. Ensure the headlights are dry before proceeding.
– Step 3: Apply the Restoration Compound: Apply the restoration compound or abrasive solution provided in the kit to the headlight lens. Use a clean, soft cloth or the recommended applicator, and rub the compound in a circular motion. Follow the specific instructions regarding the amount of compound to use and the duration of application.
– Step 4: Buff and Polish: After applying the compound, use a clean cloth or a buffing pad (if included) to buff and polish the headlight lens. This step helps remove any remaining oxidation and restore clarity.
– Step 5: Apply Protective Coating: Some restoration kits may include a protective coating or sealant. Apply it according to the instructions provided to enhance the longevity of the restoration and protect the headlights from future degradation.
DIY Alternative Methods Step-by-Step
If you prefer a do-it-yourself approach to headlight cleaning, here’s a step-by-step guide for common DIY alternative methods such as using toothpaste, baking soda, or vinegar:
- Step 1: Clean the Headlights: Start by cleaning the headlights with soap and water to remove any dirt or debris. Dry the headlights before proceeding.
- Step 2: Create a Cleaning Paste: For toothpaste or baking soda methods, create a paste by mixing a small amount of toothpaste or baking soda with water. For vinegar method, you can use vinegar directly without mixing.
- Step 3: Apply the Paste: Using a clean cloth or a sponge, apply the paste or vinegar to the headlight lens. Rub the surface in a circular motion, applying gentle pressure. Continue this process for a few minutes.
- Step 4: Rinse and Dry: Thoroughly rinse the headlights with water to remove the paste or vinegar. Use a microfiber cloth or a soft towel to dry the headlights.
Please note that the effectiveness of DIY methods may vary, and they may not provide the same long-lasting results as dedicated headlight cleaners or restoration kits. Exercise caution and consider the limitations of these DIY alternatives.
By following these step-by-step instructions, you can effectively apply headlight cleaners and restore the clarity of your headlights. Remember to always refer to the specific instructions provided by the manufacturer for the best results.
Post-Cleaning Care and Maintenance
Once you have successfully restored the clarity of your headlights, it’s important to take proper care of them to ensure their longevity and continued performance. Here are some valuable tips and regular cleaning routines to maintain your restored headlights:
Tips for Maintaining Restored Headlights
- Avoid Harsh Chemicals: When cleaning your headlights, avoid using harsh chemicals or abrasive cleaners that can damage the lens. Stick to mild soap and water or dedicated headlight cleaning solutions.
- Regular Inspection: Periodically inspect your headlights to check for any signs of oxidation, discoloration, or scratches. Catching these issues early allows for prompt action and prevents further degradation.
- Apply Protective Coating: Consider applying a protective coating or sealant specifically designed for headlights. These coatings provide an extra layer of protection against UV rays and environmental elements, helping to maintain the clarity of your headlights for longer periods.
- Park in Shaded Areas: Whenever possible, park your vehicle in shaded areas or use a car cover to minimize direct exposure to sunlight. UV rays are a common cause of headlight degradation, and reducing their impact can help prolong the clarity of your headlights.
Regular Cleaning Routines to Prevent Degradation
- Frequent Washing: Incorporate regular washing of your vehicle, including the headlights, into your routine. This removes dirt, grime, and other contaminants that can contribute to headlight degradation.
- Gentle Cleaning Techniques: When cleaning your headlights, use gentle techniques and tools. Avoid scrubbing with abrasive materials or using excessive force, as this can scratch the lens and diminish clarity.
- Protective Films or Covers: Consider using protective films or covers specifically designed for headlights. These add an extra layer of protection against environmental elements and can be easily removed or replaced as needed.
- Avoid Parking Lot Hazards: Be cautious when parking in crowded or tight spaces to prevent accidental damage to your headlights. Carefully navigate around obstacles to avoid scratches or cracks.
By following these post-cleaning care and maintenance tips, you can extend the lifespan of your restored headlights and enjoy improved visibility and safety on the road. Regular attention to your headlights will help them stay clear and provide optimal lighting for a safer driving experience.
Frequently Asked Questions (FAQs)
Here are some frequently asked questions about headlight cleaners, along with their concise answers:
By addressing these frequently asked questions, you can gain a better understanding of headlight cleaners and make informed decisions when it comes to restoring and maintaining your vehicle’s headlights.
Conclusion
As we conclude our guide to headlight cleaners, let’s recap the key benefits, encourage you to take action, and share some final thoughts on the accessibility and effectiveness of these products.
Recap of the Benefits of Using Headlight Cleaners
Using headlight cleaners offers several important benefits that can enhance your driving experience and ensure safety on the road:
- Improved Visibility: Headlight cleaners restore the clarity of your headlights, removing oxidation, discoloration, and scratches that can hinder visibility. This allows for better illumination of the road ahead, especially during nighttime driving or adverse weather conditions.
- Enhanced Safety: Clear and bright headlights are crucial for your safety and the safety of others on the road. By restoring your headlights’ clarity, headlight cleaners help you see potential hazards earlier, react faster, and avoid accidents.
- Cost-Effective Solution: Headlight cleaners offer a cost-effective alternative to replacing entire headlight assemblies. With a small investment in a quality cleaner, you can restore your headlights’ performance and aesthetics, saving you money in the long run.
- Preservation of Resale Value: Well-maintained headlights contribute to the overall appearance and value of your vehicle. By keeping your headlights clear and bright, you can preserve the resale value and appeal of your car.
Encouragement to Take Action
Don’t wait until your headlights are severely degraded. Take action now to restore them and enjoy the benefits of clear and bright illumination. By following the methods outlined in this guide, you can bring back the clarity of your headlights and improve your driving experience.