Headlight Restoration Hacks
Table of Contents
Introduction
Understanding the Need for Headlight Restoration
Headlights are an integral part of any vehicle, ensuring safe driving at night and in adverse weather conditions. However, over time, they can become cloudy, reducing their effectiveness and compromising safety. In this section, we will delve into the reasons why headlight restoration is crucial for every car owner.
The Dilemma of Dull Headlights
Dull and cloudy headlights are a common sight on the roads, and they result from various factors such as oxidation, UV exposure, and environmental contaminants. These issues can lead to:
- Diminished Visibility: Cloudy headlights scatter light, reducing the distance you can see ahead, which is particularly hazardous on poorly lit roads.
- Reduced Aesthetics: Cloudy headlights can make even the most luxurious car look old and neglected.
- Safety Concerns: Impaired visibility not only endangers you but also poses a risk to other drivers and pedestrians.
Cost-Effective Solution
Instead of replacing your entire headlight assembly, which can be costly, headlight restoration offers a budget-friendly alternative. By rejuvenating your headlights, you can:
- Improve Safety: Clear headlights enhance your ability to see and be seen, improving overall road safety.
- Enhance Vehicle Appearance: Restored headlights give your car a fresh, well-maintained look.
- Increase Resale Value: A well-maintained vehicle can fetch a higher resale price.
Introducing Headlight Restoration Hacks
Now that we’ve established the importance of headlight restoration, let’s introduce you to some valuable hacks that can help you restore your headlights to their former glory. In the upcoming chapters, we will provide step-by-step guidance, tips, and tricks to make your headlights shine bright once again.
Stay tuned as we explore various headlight restoration methods, from DIY approaches to professional techniques, ensuring that your nighttime drives are safe and your car looks its best.
Remember, clear headlights not only illuminate the road ahead but also reflect the care and attention you give to your vehicle. So, let’s embark on this journey to revitalize your headlights and elevate your driving experience.
Common Headlight Issues


When it comes to your vehicle’s headlights, several common issues can affect their performance and appearance. In this section, we will explore these issues in detail, providing insights into why they occur and how they can impact your driving experience. Let’s dive into the world of common headlight problems.
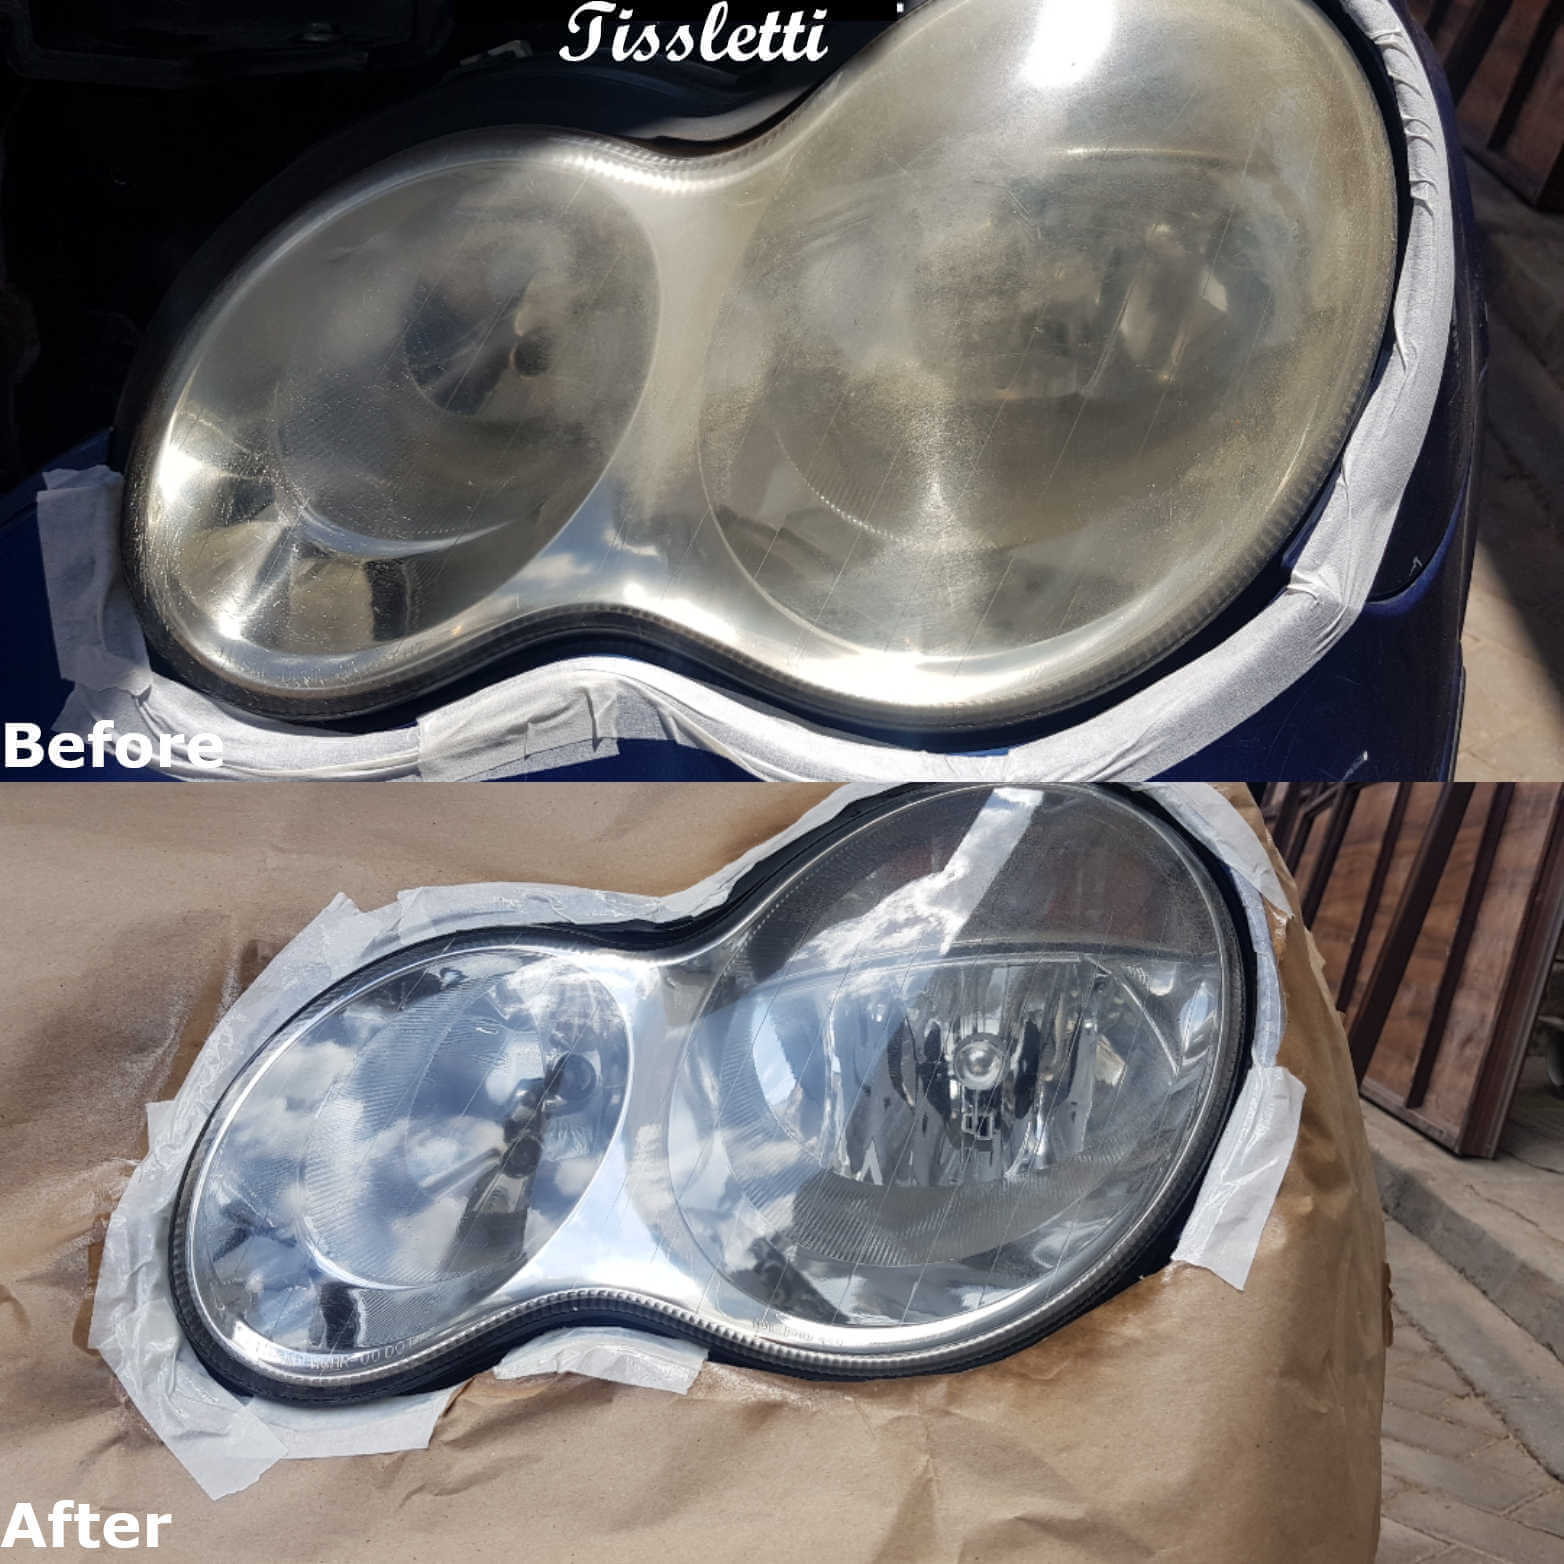
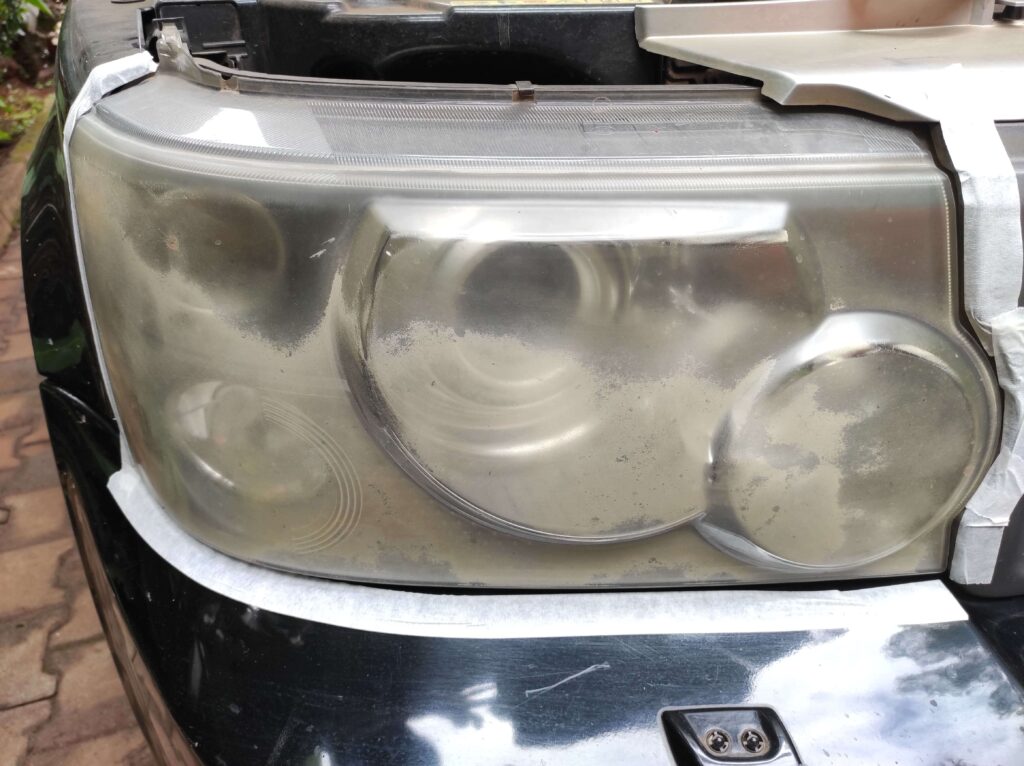
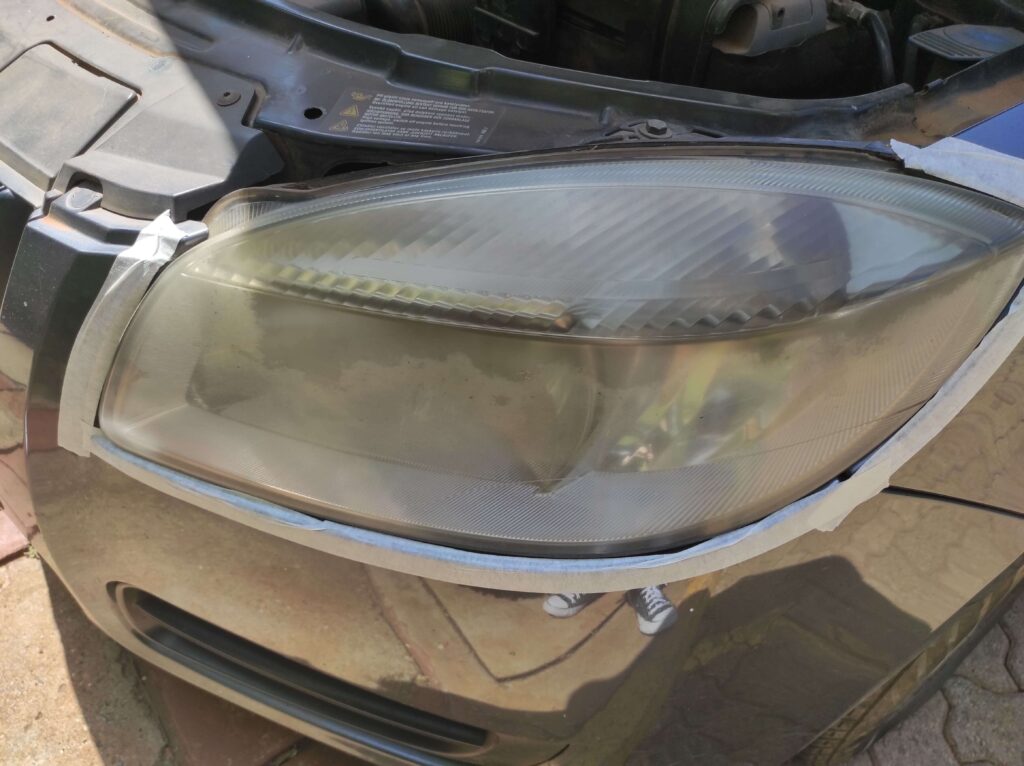
Cloudy and Yellowed Headlights
Understanding Cloudy and Yellowed Headlights
Cloudy and yellowed headlights are a prevalent problem that many car owners face. These issues occur due to a combination of factors, including:
- UV Exposure: Prolonged exposure to sunlight can cause the headlight’s protective coating to deteriorate, leading to cloudiness and yellowing.
- Oxidation: The plastic used in headlights can oxidize over time, resulting in a hazy or yellow appearance.
- Environmental Contaminants: Road debris, pollution, and harsh weather conditions can contribute to the deterioration of the headlight’s surface.
Oxidation and Haze
Unveiling Oxidation and Haze
Oxidation and haze are closely related to cloudy and yellowed headlights but deserve special attention. Oxidation occurs when the headlight’s protective layer deteriorates, exposing the underlying plastic to the elements. This can lead to:
- Haze Formation: As the plastic oxidizes, it becomes hazy, reducing the clarity of the headlight.
- Loss of Transparency: Haze can make headlights appear frosted, obscuring the light’s path.
Safety Implications
Oxidation and haze aren’t just cosmetic issues; they also compromise your safety on the road.
- Diminished Nighttime Visibility: Hazy headlights produce a weaker beam, making it difficult to see the road ahead during nighttime driving.
- Ineffective Signaling: Turn signals and brake lights may become less visible to other drivers, increasing the risk of collisions.
Reduced Light Output

Safety Consequences
The consequences of reduced light output are severe:
- Limited Visibility: Dim headlights reduce your ability to spot hazards, pedestrians, and wildlife on the road, increasing the risk of accidents.
- Reduced Reaction Time: Inadequate illumination can lead to delayed reactions to sudden road obstacles.
Scratches and Pitting
Understanding Scratches and Pitting
Scratches and pitting refer to physical damage on the surface of the headlight lens. These imperfections can result from various factors, such as:
- Road Debris: Rocks, sand, and other debris can strike the headlight, causing scratches and pitting.
- Improper Cleaning: Using abrasive materials or harsh chemicals during cleaning can damage the headlight’s surface.
- Age and Wear: Headlights can naturally accumulate small scratches and pitting over time.
Safety and Aesthetic Concerns
Scratches and pitting not only affect the appearance but also pose safety concerns.
- Glare and Distortion: Scratches can create glare when headlights shine through them, impairing your vision.
- Weakened Structure: Pitting weakens the structural integrity of the headlight lens, making it more susceptible to further damage.
In the next chapters, we will explore effective solutions and DIY hacks to address these common headlight issues, ensuring your headlights not only look great but also keep you safe on the road. Stay tuned for valuable tips and techniques!
The DIY Advantage

In the world of headlight restoration, a do-it-yourself (DIY) approach offers numerous advantages. In this section, we’ll explore why opting for DIY headlight restoration can be a smart choice for car owners. Discover how it can save you money, provide convenience, and offer a sense of personal satisfaction. However, we’ll also delve into the potential risks that come with DIY.
Cost Savings with DIY Headlight Restoration
Affordable Headlight Restoration Hacks
When it comes to headlight restoration, one of the most appealing aspects of the DIY approach is the significant cost savings it can provide. Here’s how:
- No Professional Labor Costs: By tackling the restoration yourself, you eliminate the need to pay for professional labor, which can be quite expensive.
- Affordable Materials: DIY headlight restoration typically requires affordable materials and kits that are readily available, making it a budget-friendly option.
- Reuse and Maintain: You can reuse the restoration kit for future touch-ups, extending the life of your headlights without additional expenses.
With DIY headlight restoration, you can achieve remarkable results without breaking the bank.
Convenience and Flexibility
DIY Headlight Restoration at Your Convenience
DIY headlight restoration offers the convenience of working on your own schedule. Here’s why it’s so flexible:
- No Appointment Needed: Unlike professional services, you don’t need to make appointments or wait for a specific time to restore your headlights. You decide when to start the project.
- Work at Your Own Pace: DIY allows you to take your time and work at a comfortable pace, ensuring thorough restoration without rushing.
- Accessible Anywhere: Whether you’re at home or in your garage, you have the flexibility to restore your headlights in a location that suits you.
This flexibility ensures that you can tackle headlight restoration whenever it’s convenient for you.
Personal Satisfaction
The Joy of DIY Headlight Restoration
Embarking on a DIY headlight restoration project can be personally satisfying for several reasons:
- Sense of Accomplishment: Successfully restoring your headlights can be a fulfilling experience, boosting your confidence in tackling car maintenance tasks.
- Connection to Your Vehicle: Taking care of your headlights fosters a deeper relationship with your vehicle, promoting a sense of pride in ownership.
- Learn and Improve: DIY restoration allows you to acquire new skills and knowledge about your car, enhancing your automotive expertise.
The personal satisfaction derived from DIY headlight restoration can be just as rewarding as the improved headlight clarity itself.
Potential Risks of DIY
Understanding DIY Headlight Restoration Risks
While DIY headlight restoration offers many advantages, it’s essential to acknowledge potential risks:
- Inexperience: Lack of experience can lead to uneven results or accidental damage to your headlights.
- Incorrect Techniques: Without proper guidance, you may use the wrong methods or products, affecting the longevity of the restoration.
- Time and Effort: DIY restoration can be time-consuming and physically demanding, especially if your headlights require extensive work.
To mitigate these risks, it’s crucial to educate yourself, follow instructions carefully, and practice on a small area before tackling the entire restoration.
In summary, DIY headlight restoration is an affordable, convenient, and personally rewarding approach to improving your vehicle’s aesthetics and safety. While there are risks involved, with the right preparation and guidance, you can enjoy the benefits of clear headlights through your own efforts. In the next section, we will provide step-by-step instructions and expert tips for a successful DIY headlight restoration.
Headlight Restoration Hacks
Headlight restoration doesn’t always require a trip to the auto shop. In this section, we’ll explore some clever and cost-effective hacks to restore your headlights to their former glory. These DIY methods are simple, efficient, and can make a noticeable difference in your night-driving experience.
Toothpaste Method: Step-by-Step Guide
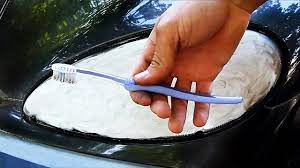
What You’ll Need:
- Toothpaste: Plain, white toothpaste (not gel-based or with added ingredients).
- Microfiber Cloth: For polishing.
- Water: To wet the cloth.
Step 1: Clean the Headlights
Begin by thoroughly cleaning the headlights to remove any loose dirt or grime.
Step 2: Apply Toothpaste
Squeeze a generous amount of toothpaste onto the microfiber cloth. Ensure it covers the entire headlight.
Step 3: Rub Gently
Using circular motions, rub the toothpaste-covered cloth onto the headlight for about 5-10 minutes. Add water as needed to keep the surface wet.
Step 4: Rinse and Dry
After rubbing, rinse the headlight with water and dry it with a clean cloth. You should notice improved clarity.
WD-40 and Toothpaste Combo: How it Works
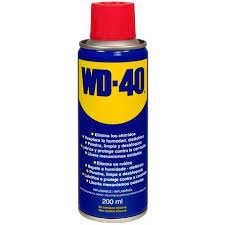
What You’ll Need:
- WD-40: Acts as a cleaning agent.
- Toothpaste: Same as in the previous method.
- Microfiber Cloth: For application and polishing.
Step 1: Clean the Headlights
Start by cleaning the headlights to remove loose dirt and debris.
Step 2: Apply WD-40
Spray a generous amount of WD-40 onto the headlight’s surface.
Step 3: Rub Toothpaste
Squeeze toothpaste onto the microfiber cloth and gently rub it onto the headlight in circular motions.
Step 4: Combine WD-40 and Toothpaste
Continue rubbing, combining the WD-40 and toothpaste, for 5-10 minutes.
Step 5: Rinse and Dry
Rinse off the mixture with water and dry the headlight with a clean cloth. Enjoy the improved clarity.
Baking Soda and Vinegar Technique

What You’ll Need:
- Baking soda Acts as an abrasive cleaner.
- White vinegar Removes oxidation.
- Microfiber cloth: For application and polishing.
Step 1: Mix Baking Soda and Vinegar
Create a paste by mixing baking soda and white vinegar until you achieve a thick consistency.
Step 2: Apply the Paste
Spread the paste evenly onto the headlight.
Step 3: Rub Gently
Using a microfiber cloth, rub the paste onto the headlight in circular motions for 5-10 minutes.
Step 4: Rinse and Dry
Rinse the headlight with water and dry it with a clean cloth. Admire the improved clarity.
Using Car Wax for Long-lasting Clarity
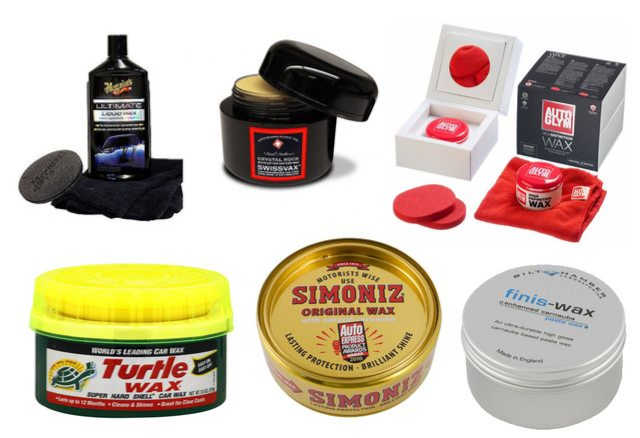
What You’ll Need:
- Car wax: Provides a protective layer.
- Microfiber Cloth: For application and buffing.
Step 1: Clean the Headlights
Start by cleaning the headlights to remove dirt and grime.
Step 2: Apply Car Wax
Apply a thin layer of car wax to the headlight using a clean cloth.
Step 3: Buff the Wax
Using a different microfiber cloth, buff the wax in a circular motion until the headlight shines.
Step 4: Repeat as Needed
For long-lasting clarity, reapply car wax every few months or as recommended by the product instructions.
Bug and Tar Remover Trick

What You’ll Need:
- Bug and Tar Remover: Available in automotive stores.
- Microfiber Cloth: For application and cleaning.
Step 1: Clean the Headlights
Begin by cleaning the headlights to remove surface dirt.
Step 2: Apply Bug and Tar Remover
Apply the bug and tar remover to the headlight following the product instructions.
Step 3: Wipe Clean
Use a microfiber cloth to wipe away the bug and tar remover, along with any residue. This method can effectively remove cloudiness and stains.

Warning: Bug and Tar removers have been known to melt headlight lenses. Please confirm before applying it to the headlight lens or applying the other hacks discussed above.
These headlight restoration hacks offer practical solutions for improving visibility and the overall appearance of your vehicle. Choose the method that suits your needs and the materials available, and enjoy the benefits of clearer, safer headlights without breaking the bank.
Expert Tips and Tricks
Are you ready to take your headlight restoration project to the next level? In this section, we’ll share invaluable tips and tricks that go beyond the basics, allowing you to achieve professional-grade results. Whether you’re a novice or an experienced DIY enthusiast, these expert insights will help you master the art of headlight restoration.
Safety Precautions Before You Start
Ensuring Your Safety and Success
Before you dive into headlight restoration, it’s essential to prioritize safety and set yourself up for success. Follow these precautions:
- Safety Gear: Equip yourself with safety goggles and gloves to shield your eyes and hands from chemicals and debris.
- Ventilation: Always work in a well-ventilated area or wear a mask to protect yourself from inhaling fumes.
- Protect Surroundings: Carefully mask off the areas around your headlights using masking tape and plastic sheets to avoid accidental damage.
How to Properly Mask Surrounding Areas

Preventing Unwanted Mishaps
Properly masking the surrounding areas of your headlights is a critical step in headlight restoration. Here’s a step-by-step guide to ensure you do it right:
- Use Quality Masking Tape: Invest in high-quality masking tape to create clean, precise edges on your headlight covers.
- Secure Plastic Sheets: Place plastic sheets or bags over the rest of your vehicle and secure them tightly with tape or clamps. This will safeguard your car’s paintwork from accidental contact with restoration materials.
- Careful Application: Take your time when applying the masking tape and plastic sheets to ensure they adhere securely and cover the areas completely.
Choosing the Right Tools and Materials
Tools of the Trade
Selecting the right tools and materials can significantly impact the outcome of your headlight restoration project. Here’s what you need:
- Quality Sandpaper: Opt for sandpaper with different grits (e.g., 600, 1000, and 2000) to handle various stages of the sanding process effectively.
- High-Quality Polishing Compound: Invest in a top-notch polishing compound to achieve a glossy, professional finish.
- Microfiber Cloths: These are essential for applying and wiping off compounds and polishes, leaving a streak-free shine.
Consider an Electric Buffer: For larger restoration jobs, an electric buffer with a foam pad attachment can save you time and effort while ensuring an even finish.
Buffing and Polishing for a Glossy Finish
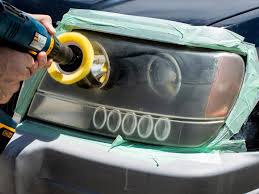
The Final Touch
To give your headlights that professional showroom shine, follow these expert buffing and polishing tips:
- Apply Polishing Compound Strategically: Apply a small amount of polishing compound to a clean, dry microfiber cloth. Rub it onto the headlight using gentle, circular motions.
- Consider an Electric Buffer: For an even glossier finish, an electric buffer with a foam pad attachment can be incredibly effective and save you time.
- Multiple Passes: Don’t rush this step. Make several passes with the polishing compound until you achieve the level of clarity and shine you desire.
- Finish with Protective Wax: To maintain that shine and provide added protection, finish the job by applying a thin layer of car wax to the headlights. Buff it to a glossy finish.
With these expert tips and tricks in your toolkit, you’re well-equipped to tackle headlight restoration like a pro. Remember, the key to success is patience and meticulous attention to detail, ensuring your headlights shine brilliantly and enhance both your vehicle’s aesthetics and safety.
FAQs About Headlight Restoration
Are you curious about headlight restoration and how to maintain the clarity of your car’s headlights? This section answers some frequently asked questions to provide you with the knowledge you need to keep your headlights in top condition.
With these answers to common questions about headlight restoration, you can make informed decisions to maintain your headlights’ clarity and ensure safe and clear nighttime driving.
Conclusion
As we wrap up this guide on headlight restoration, let’s summarize the DIY hacks, share some final thoughts, and emphasize the importance of clear and bright headlights for safe driving.
Recap of DIY Headlight Restoration Hacks
Throughout this article, we’ve delved into various DIY headlight restoration methods to help you regain the clarity and brightness of your headlights. Here’s a quick recap of the key techniques:
- Toothpaste Method: An accessible and budget-friendly approach to improving headlight clarity.
- WD-40 and Toothpaste Combo: Combining WD-40 with toothpaste for enhanced cleaning and restoration.
- Baking Soda and Vinegar Technique: A natural remedy to remove oxidation and restore headlights.
- Using Car Wax for Long-lasting Clarity: Applying car wax for a protective shine that lasts.
- Bug and Tar Remover Trick: Effectively removing stubborn stains and blemishes from your headlights.
These DIY headlight restoration hacks offer practical solutions for enhancing visibility and the overall appearance of your vehicle. Choose the method that suits your needs and the materials available, and enjoy the benefits of clearer, safer headlights without breaking the bank.
Final Thoughts on Restoring Headlight Clarity
Restoring your headlights isn’t just about aesthetics; it’s a critical safety measure. Cloudy, yellowed headlights can significantly diminish your visibility on the road, increasing the risk of accidents. By taking the time to restore them, you’re investing in your safety and the safety of others.
Additionally, the sense of accomplishment that comes with successfully restoring your headlights can be personally rewarding. It connects you more deeply with your vehicle and enhances your confidence in tackling DIY car maintenance tasks.
Drive Safely with Clear and Bright Headlights
Your vehicle’s headlights are not just accessories; they are essential components that ensure your safety on the road. Clear and bright headlights provide better visibility during nighttime driving and adverse weather conditions. They also make your vehicle more visible to other drivers, reducing the risk of accidents.
By following the DIY headlight restoration hacks outlined in this guide and staying proactive in your headlight maintenance, you can enjoy the benefits of improved clarity, safety, and a vehicle that looks its best.
Now that you have the knowledge and techniques to restore your headlights, it’s time to put them into practice. Clear the haze, remove the stains, and drive confidently with headlights that shine brightly, illuminating your path and keeping you safe on your journeys.