Headlight Restoration Home Remedies: Bringing Back Clarity and Safety
Table of Contents
Introduction
Clear and well-functioning headlights are crucial for safe driving, especially during low-light conditions and inclement weather. Dim, foggy, or yellowed headlights can significantly reduce visibility, compromising your safety and that of other road users. It is essential to maintain and restore your headlights to ensure optimal performance and clarity on the road.
Headlight restoration offers an affordable and accessible solution for improving the condition of your headlights. Instead of immediately opting for expensive replacements or professional services, you can try various home remedies to restore your headlights to their former glory. These remedies are cost-effective, easy to implement, and can yield impressive results.
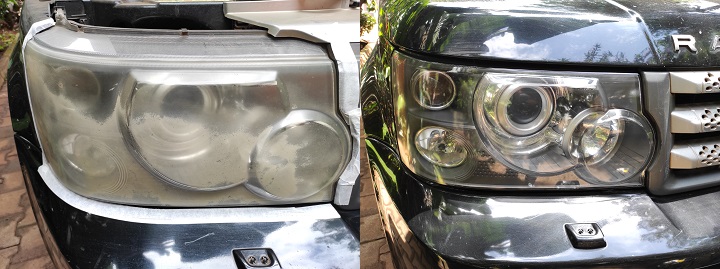
Picture this: you’re driving on a dark, winding road at night when suddenly, you struggle to see ahead due to your hazy headlights. This scenario is all too familiar for many drivers and underscores the significance of well-maintained headlights. With headlight restoration home remedies, you can effectively address these issues and regain clear visibility, ensuring a safer and more enjoyable driving experience.
Understanding the Importance of Clear and Well-Functioning Headlights
Clear and well-functioning headlights play a crucial role in road safety. They not only illuminate the path ahead but also make your vehicle more visible to other drivers. Here are some key reasons why maintaining your headlights is vital:
1. Enhanced visibility: Clear headlights provide optimal visibility, allowing you to see potential hazards, pedestrians, and road signs more clearly, especially during low-light conditions.
2. Improved safety: Properly functioning headlights contribute to road safety by ensuring that other drivers can see your vehicle, reducing the risk of accidents and collisions.
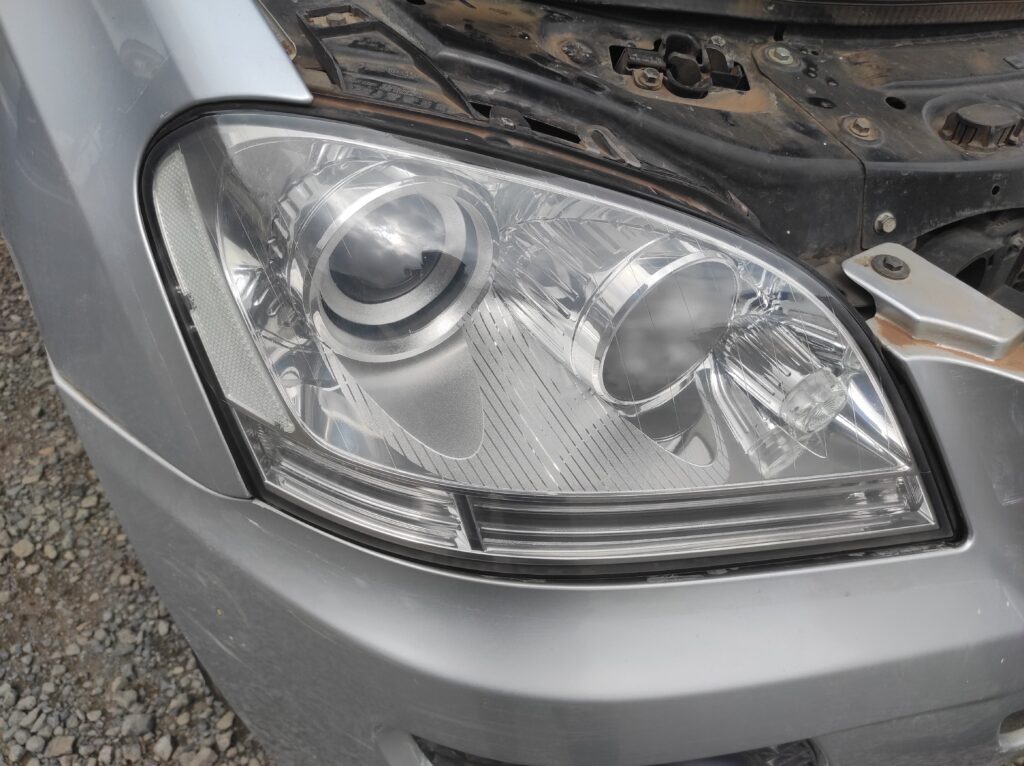
3. Aesthetics: Foggy, yellowed, or oxidized headlights can make your vehicle appear older and neglected. Restoring your headlights can enhance the overall aesthetics and value of your car.
Introducing Headlight Restoration Home Remedies
Headlight restoration home remedies offer a convenient and cost-effective solution to tackle common headlight issues. These remedies involve using household items or readily available products to remove oxidation, fog, or yellowing from the headlight lenses. By restoring clarity and brightness to your headlights, these remedies can significantly improve your visibility on the road.
Some of the popular home remedies for headlight restoration include:
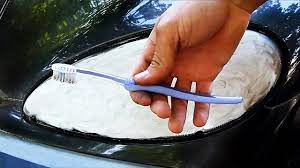
1. Toothpaste and Baking Soda: A mixture of toothpaste and baking soda can act as an abrasive cleaner to remove surface grime and restore clarity to headlights.
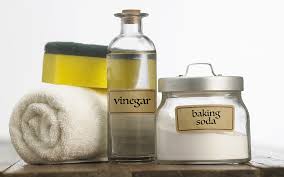
2. Vinegar and Water: Vinegar is mildly acidic and can help break down grime and oxidation on headlight lenses. Mixing vinegar with water creates an effective cleaning solution.
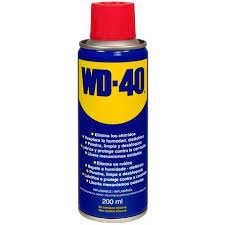
3. WD-40: WD-40, a multipurpose lubricant, can be used to clean and restore headlights. Its powerful cleaning properties help remove dirt and oxidation, improving clarity.
Each of these home remedies offers a unique approach to headlight restoration. The choice of remedy depends on the severity of the headlight issues and the available resources. In the following sections, we will explore these remedies in detail, providing step-by-step instructions for their application.
Remember, while home remedies can be effective for mild to moderate headlight issues, severe damage or cracks may require professional assistance or headlight replacement.
Understanding Headlight Degradation and Causes
Headlight degradation is a common issue that affects many vehicles over time. Understanding the causes of this degradation is essential for effectively addressing the problem and restoring optimal headlight performance. Let’s delve into the common causes of headlight degradation and their impact on visibility, safety, and aesthetics.
1. UV Exposure: Prolonged exposure to ultraviolet (UV) rays from the sun is a primary cause of headlight degradation. These rays break down the protective coating on the headlight lenses, leading to discoloration, hazing, and yellowing. Additionally, UV exposure accelerates the oxidation process, further deteriorating the headlights’ clarity.
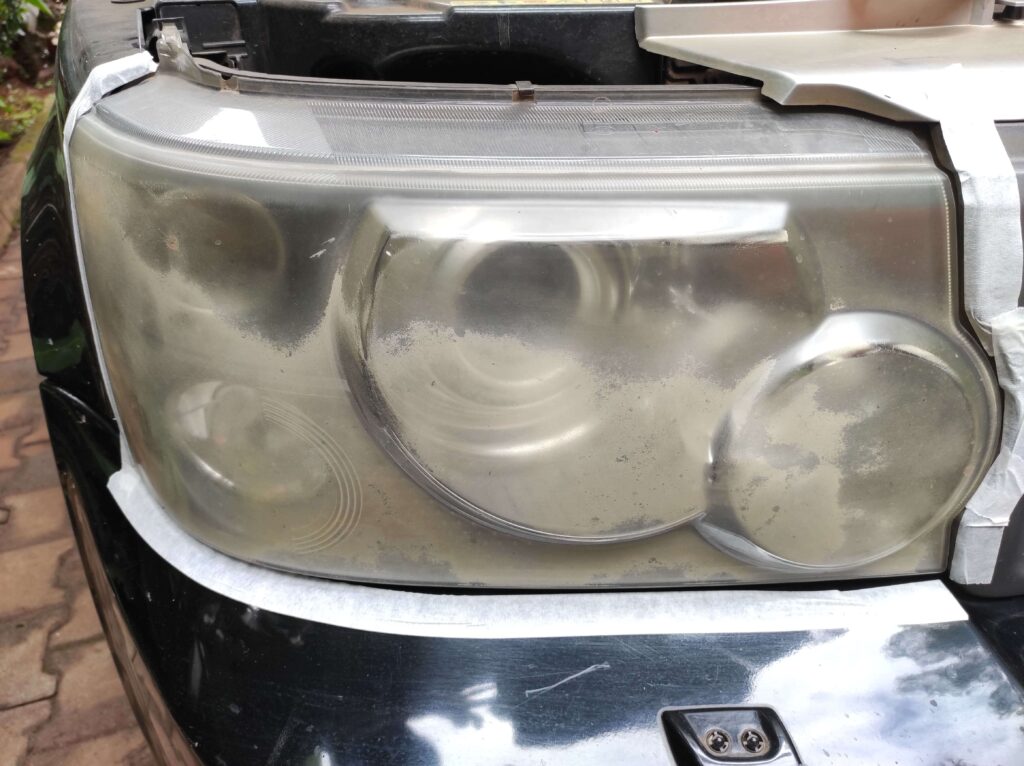
2. Oxidation: Headlight lenses are typically made of polycarbonate, a durable plastic material. However, over time, exposure to air and moisture causes oxidation on the surface of the lenses. This oxidation manifests as a cloudy or foggy appearance, reducing the amount of light that can pass through and diminishing visibility.
3. Dirt and Debris: Dust, dirt, and other environmental pollutants can accumulate on the surface of headlights, obstructing the light output and diminishing the clarity of the lenses. These particles create a layer of grime that diffuses the light and makes the headlights appear dull and hazy.
The degradation of headlights can have significant consequences for drivers. Diminished visibility is a primary concern, as degraded headlights emit less light, reducing the range and intensity of the illumination they provide. This can make it challenging to see the road ahead, potential obstacles, and other vehicles, particularly during nighttime driving or adverse weather conditions.
Moreover, compromised headlights pose safety risks for both the driver and others on the road. Reduced visibility makes it difficult for other drivers to spot your vehicle, increasing the chances of accidents or collisions. Pedestrians and cyclists may also become less visible, jeopardizing their safety.
Beyond safety concerns, degraded headlights can adversely affect the aesthetics of your vehicle. Foggy, yellowed, or oxidized headlights give the impression of a neglected or older car. Restoring the clarity and brightness of your headlights not only improves visibility and safety but also enhances the overall appearance and value of your vehicle.
Regular maintenance and restoration are essential to ensure optimal headlight performance. By addressing degradation issues promptly, you can maintain clear visibility, maximize safety on the road, and preserve the visual appeal of your vehicle. In the following sections, we will explore effective home remedies and maintenance tips to restore and maintain your headlights, bringing back clarity and safety to your driving experience.
Evaluating Home Remedies for Headlight Restoration

When it comes to headlight restoration, using home remedies can be a cost-effective and convenient option. These remedies utilize everyday household items to help restore clarity and improve the appearance of headlights. In this section, we will explore the benefits of using home remedies, discuss the criteria for selecting suitable options, and introduce the top home remedies commonly used for headlight restoration.
Benefits of Using Home Remedies:
1. Cost-Effective: Home remedies for headlight restoration offer significant cost savings compared to professional services or specialized products. By utilizing common household items, you can achieve satisfactory results without breaking the bank.
2. Convenience: With home remedies, you have the flexibility to restore your headlights at your convenience, without the need for appointments or trips to a service center. It allows you to take control of the restoration process and work at your own pace.
3. Accessible Ingredients: Home remedies often make use of readily available ingredients found in your pantry or cleaning supplies. This accessibility means you can start the restoration process without the need for extensive research or sourcing specialized products.
Criteria for Selecting Suitable Home Remedies:
When evaluating home remedies for headlight restoration, it’s important to consider certain criteria to ensure effectiveness and safety. Here are the key factors to keep in mind:
1. Effectiveness: Look for remedies that have proven results in restoring clarity to headlights and removing oxidation, haze, or discoloration. Research online reviews, testimonials, and recommendations from trusted sources to gauge the effectiveness of a particular remedy.
2. Compatibility: Check if the home remedy is suitable for the type of headlight lenses you have. Different headlight materials, such as plastic or glass, may require specific treatments to avoid damage or scratching.
3. Safety: Ensure that the home remedy is safe to use and won’t cause harm to your headlights or other vehicle surfaces. Avoid remedies that contain harsh chemicals or abrasive substances that may further damage the headlights.
4. Ease of Application: Consider the simplicity and ease of applying the home remedy. Look for remedies that come with clear instructions and require minimal tools or equipment. This will make the restoration process smoother and more convenient for you.
Top Home Remedies for Headlight Restoration:
Here are some of the most popular home remedies used for headlight restoration:
1. Toothpaste: Toothpaste, particularly those with mild abrasives, can be effective in removing surface oxidation and restoring clarity to headlights.
2. Baking Soda and Vinegar: A mixture of baking soda and vinegar creates a powerful cleaning solution that can break down grime, oxidation, and discoloration on headlights.
3. Lemon Juice: The acidic properties of lemon juice make it useful for removing haze and restoring brightness to headlight lenses.
4. WD-40: While not a traditional home remedy, WD-40 can be effective in removing oxidation and improving the appearance of headlights.
5. Rubbing Alcohol: Rubbing alcohol is known for its ability to dissolve contaminants and can be used to clean and restore headlights.
Remember, before attempting any home remedy, it’s important to research and understand the specific application instructions for each remedy. Additionally, test the remedy on a small area of the headlight to ensure compatibility and avoid any unwanted effects.
In conclusion, evaluating home remedies for headlight restoration can provide cost-effective and convenient solutions for improving the clarity and appearance of your headlights. By considering the benefits, criteria for selection, and the top home remedies mentioned above, you can choose the most suitable option for your needs. Remember to follow the instructions carefully and prioritize safety when applying these remedies to achieve optimal results.
Home Remedies and Step-by-Step Instructions
Toothpaste Method
Introduction to the Toothpaste Method and its Effectiveness:
The toothpaste method is a popular and cost-effective home remedy for restoring headlights. It utilizes the mild abrasives present in toothpaste to remove oxidation, haze, and discoloration from headlight lenses. This method is known for its effectiveness in improving clarity and enhancing the overall appearance of headlights. Following the step-by-step instructions below, you can easily restore your headlights using toothpaste.
Step-by-Step Instructions on Using Toothpaste for Headlight Restoration:
Step 1: Gather the necessary materials.
- Non-gel toothpaste: Choose a toothpaste that contains mild abrasives, such as baking soda or silica, as they are effective in cleaning the headlights.
- Soft cloth or microfiber towel: This will be used for applying and buffing the toothpaste.
- Water: You’ll need water for rinsing the headlights after the restoration process.
Step 2: Prepare the headlights.
- Ensure that the headlights are cool to the touch before starting the restoration process.
- Clean the headlights with water and a gentle car wash soap to remove any loose dirt or debris.
Step 3: Apply toothpaste to the headlights.
- Squeeze a small amount of toothpaste onto the soft cloth or microfiber towel.
- Gently rub the toothpaste onto the headlight surface using circular motions. Focus on the areas with oxidation or discoloration.
- Continue rubbing for 3-5 minutes, applying moderate pressure. The toothpaste’s mild abrasives will gradually remove the imperfections from the headlight lens.
Step 4: Rinse and inspect:
- Rinse the headlights thoroughly with water to remove the toothpaste residue.
- Inspect the headlights for any remaining haze or imperfections. If needed, repeat the process for better results.
Step 5: Dry and protect the headlights.
- Use a clean, dry cloth to gently dry the headlights.
- To provide long-lasting protection, apply a layer of car wax or a dedicated headlight sealant to the restored headlights. This will help prevent future oxidation and maintain their clarity.
Tips and Precautions for Maximizing the Effectiveness of the Toothpaste Method:
- Use white, non-gel toothpaste: Gel toothpaste may not contain the necessary abrasives to effectively restore headlights. Opt for a white, non-gel toothpaste that contains mild abrasives like baking soda or silica.
- Avoid toothpaste with additives: Toothpaste with added ingredients like whitening agents or menthol may not be suitable for headlight restoration. Stick to a basic toothpaste formula for the best results.
- Test a small area first: Before applying toothpaste to the entire headlight, test it on a small, inconspicuous area to ensure compatibility and to assess the results.
- Be patient and thorough: Take your time when applying the toothpaste and be thorough in your circular motions. This will ensure that the abrasives have enough time to work effectively.
- Regular maintenance: Headlights may require periodic maintenance to prevent future oxidation. Consider repeating the toothpaste method or exploring other home remedies as needed.
By following these step-by-step instructions and implementing the tips and precautions provided, you can effectively restore your headlights using the toothpaste method. Enjoy the enhanced clarity and renewed appearance of your headlights without breaking the bank.
Baking Soda and Vinegar Method
Introduction to the Baking Soda and Vinegar Method and its Effectiveness:
The Baking Soda and Vinegar Method is a widely recognized home remedy for headlight restoration that harnesses the power of these everyday household ingredients. This method has gained popularity for its effectiveness in removing oxidation, dirt, and discoloration from headlight lenses, resulting in improved visibility and a restored appearance. By combining the mild abrasive properties of baking soda with the cleaning power of vinegar, this method provides a cost-effective and accessible solution for enhancing the clarity of your headlights.
Step-by-Step Instructions on Using Baking Soda and Vinegar for Headlight Restoration:
Step 1: Gather the necessary materials.
- Baking soda: This natural abrasive helps to remove surface grime and oxidation from the headlights.
- White vinegar: The acetic acid in vinegar acts as a powerful cleaning agent, breaking down dirt and discoloration.
- Water: You’ll need water for rinsing the headlights and removing any residue.
- Soft cloth or sponge: This will be used for applying the baking soda and vinegar mixture and for cleaning the headlights.
Step 2: Create the baking soda and vinegar mixture.
- In a small bowl, mix 2 tablespoons of baking soda with enough white vinegar to form a paste-like consistency. Adjust the quantities as needed to cover the surface of your headlights.
Step 3: Apply the mixture to the headlights:
- Using a soft cloth or sponge, apply the baking soda and vinegar mixture to the headlights.
- Gently rub the mixture onto the headlight lenses in circular motions, ensuring even coverage.
- Focus on areas with heavy oxidation or stubborn stains, applying slightly more pressure if necessary.
Step 4: Let it sit and work its magic.
- Allow the baking soda and vinegar mixture to sit on the headlights for about 5–10 minutes. This will give the ingredients time to penetrate and break down the dirt and oxidation.
Step 5: Rinse and wipe clean.
- Thoroughly rinse the headlights with water to remove the baking soda and vinegar residue.
- Use a clean cloth or sponge to wipe the headlights, ensuring all traces of the mixture are removed.
- Inspect the headlights to see the initial results and assess if further treatment is necessary.
Step 6: Repeat if needed and apply a protective sealant.
- If the desired results are not achieved, repeat the process until you are satisfied with the clarity of the headlights.
- Once the headlights are clean and dry, consider applying a protective sealant or UV-resistant coating to prolong the restoration and prevent future damage.
Tips and Precautions for Maximizing the Effectiveness of the Baking Soda and Vinegar Method:
- Test on a small area first: Before applying the baking soda and vinegar mixture to the entire headlight, test it on a small, inconspicuous area to ensure compatibility and to evaluate the results.
- Avoid excessive scrubbing: While baking soda is a mild abrasive, excessive scrubbing may cause scratches or damage to the headlight lenses. Use gentle pressure and circular motions during the application.
- Protect surrounding surfaces: Cover any adjacent painted areas or surfaces that may be sensitive to the baking soda and vinegar mixture to avoid potential damage.
- Rinse thoroughly: After the restoration process, ensure that you thoroughly rinse the headlights with water to remove any residue and prevent streaking.
- Regular maintenance: To maintain the clarity and condition of your headlights, periodically repeat the baking soda and vinegar method or consider using other suitable home remedies.
By following these step-by-step instructions and implementing the provided tips and precautions, you can effectively restore the clarity and appearance of your headlights using the Baking Soda and Vinegar Method. Enjoy improved visibility and a renewed aesthetic appeal while driving, thanks to this simple yet powerful DIY solution.
WD-40 Method
Introduction to the WD-40 Method and Its Effectiveness:
The WD-40 method is a popular and effective technique for restoring headlights to their former glory. WD-40, a versatile household lubricant, can also be used to remove oxidation and grime from headlight lenses. With its unique formula, WD-40 helps break down stubborn residue and restore clarity, enhancing visibility and improving the overall appearance of your headlights. This method offers a convenient and affordable solution for those seeking a quick and easy way to rejuvenate their headlights.
Step-by-Step Instructions on Using WD-40 for Headlight Restoration:
Step 1: Gather the necessary materials.
- WD-40: Ensure you have a can of WD-40 handy for the restoration process.
- Soft cloth or sponge: You will need a clean and soft cloth or sponge to apply and wipe off the WD-40.
- Water: Have water available for rinsing the headlights and removing any residue.
Step 2: Prepare the headlights.
- Start by cleaning the headlights with mild soap and water to remove any loose dirt or debris. Dry them thoroughly before proceeding.
Step 3: Apply WD-40:
- Shake the can of WD-40 well to mix the ingredients.
- Spray a generous amount of WD-40 directly onto the headlight lens.
- Ensure the entire surface is covered, paying extra attention to areas with heavy oxidation or stubborn stains.
Step 4: Let it sit and penetrate.
- Allow the WD-40 to sit on the headlights for approximately 5-10 minutes. This will give the solution time to penetrate and break down the grime and oxidation.
Step 5: Wipe off the WD-40.
- Take a clean cloth or sponge and gently wipe the headlights, using circular motions.
- Continue wiping until all the WD-40 residue is removed and the headlight surface feels smooth and clean.
Step 6: Rinse and assess:
- Thoroughly rinse the headlights with water to remove any remaining WD-40 residue.
- Inspect the headlights to evaluate the restoration. If necessary, repeat the process to achieve the desired results.
Tips and Precautions for Maximizing the Effectiveness of the WD-40 Method:
- Test on a small area: Before applying WD-40 to the entire headlight, test it on a small, inconspicuous area to ensure compatibility and check for any adverse reactions.
- Avoid contact with non-headlight surfaces: Take care to avoid spraying WD-40 on painted surfaces or other non-headlight areas, as it may cause damage or discoloration.
- Protect surrounding areas: Cover adjacent surfaces or areas that you do not want to be exposed to WD-40 during the application process.
- Use in a well-ventilated area: Ensure proper ventilation when working with WD-40 to avoid inhaling fumes.
- Regular maintenance: To prolong the clarity and appearance of your headlights, consider periodic maintenance using the WD-40 Method or other suitable methods.
Following these step-by-step instructions and adhering to the provided tips and precautions, you can effectively restore your headlights using the WD-40 method. Enjoy improved visibility and a refreshed look as you hit the road with confidence.
Best Practices and Additional Tips
Restoring your headlights using home remedies can be a cost-effective and practical solution. To ensure successful results and prolong the clarity of your headlights, it’s important to follow some general best practices and implement proper maintenance techniques. Here are some essential tips to consider:
General Best Practices for Headlight Restoration
1. Proper Cleaning: Before starting the restoration process, thoroughly clean the headlights with a mild soap and water solution. This will remove surface dirt and grime, allowing the remedies to work more effectively.
2. Test in an Inconspicuous Area: Before applying any home remedy or commercial product to the entire headlight surface, it’s wise to test it in a small, inconspicuous area. This helps ensure compatibility with the headlight material and prevents any adverse reactions.
3. Follow Instructions: Whether you’re using home remedies or commercial restoration kits, carefully read and follow the provided instructions. Each method may have specific guidelines regarding application, duration, and cleaning procedures.
4. Be Patient: Headlight restoration is not an instant process. It may require multiple applications or treatments to achieve the desired results. Follow the recommended steps and allow sufficient time for the remedies to work effectively.
Tips for Maintaining Restored Headlights
1. Regular Cleaning: After restoring your headlights, establish a regular cleaning routine. Regularly wash your headlights with a mild soap and water solution to remove dirt, insects, and other debris that may accumulate over time.
2. Apply UV Protection: UV rays from the sun can cause further damage and discoloration to your headlights. Apply a quality UV protection coating or sealant specifically designed for headlights. This will help prevent oxidation and keep your headlights looking clear and vibrant.
3. Avoid Abrasive Cleaners: When cleaning your headlights, avoid using abrasive cleaners or harsh chemicals. These can damage the protective coatings and worsen the appearance of your headlights. Stick to gentle cleaning solutions and soft microfiber cloths.
4. Park in the Shade: Whenever possible, park your vehicle in shaded areas or use a car cover to minimize sun exposure. This helps reduce UV damage and prolong the life of your restored headlights.
When to Seek Professional Assistance or Consider Commercial Restoration Kits
1. Severely Damaged Headlights: If your headlights have extensive damage, deep scratches, or cracks, it may be best to seek professional assistance. Professional restoration services have specialized tools and expertise to handle more challenging cases.
2. Time Constraints: If you’re short on time or prefer a hassle-free solution, consider commercial restoration kits. These kits often contain all the necessary tools and products required for a comprehensive restoration. Follow the instructions provided with the kit for the best results.
3. Lack of Confidence: If you’re uncertain about your ability to restore the headlights effectively or don’t want to risk damaging them, it’s perfectly acceptable to seek professional help. Trained technicians can ensure a high-quality restoration and provide peace of mind.
By following these best practices, maintaining your restored headlights, and knowing when to seek professional assistance, you can enjoy clear and safe illumination while enhancing the overall appearance of your vehicle.
Frequently Asked Questions (FAQs)
Having questions about headlight restoration using home remedies is natural. Here are answers to some frequently asked questions that can help you gain a better understanding:
Conclusion
As we conclude our exploration of headlight restoration using home remedies, let’s recap the benefits, encourage action, and reflect on the cost-effectiveness and accessibility of these methods.
Recap of the Benefits of Headlight Restoration using Home Remedies
Restoring your headlights using home remedies offers several advantages:
1. Cost-Effective Solution: Home remedies provide an affordable alternative to professional headlight restoration services or purchasing commercial kits, allowing you to achieve impressive results without breaking the bank.
2. Convenience: With readily available household items like toothpaste, baking soda, vinegar, and lemon juice, you can restore your headlights at your convenience without scheduling appointments or waiting for delivery.
3. Simple and DIY-Friendly: The step-by-step instructions provided in this guide make headlight restoration using home remedies accessible to everyone, regardless of their level of expertise. You can take pride in successfully rejuvenating your headlights with your own hands.
Encouragement to Take Action and Restore Degraded Headlights
Don’t let your degraded headlights diminish the beauty and functionality of your vehicle. Take action today and restore them using the simple and effective methods shared in this article. By investing a small amount of time and effort, you can bring back the clarity and brightness of your headlights, improving visibility and enhancing the overall appearance of your vehicle.
Remember, restoring your headlights not only improves safety on the road but also adds value to your vehicle, making it more appealing to potential buyers if you decide to sell in the future.
Final Thoughts on the Cost-Effectiveness and Accessibility of Home Remedies
Headlight restoration using home remedies is a cost-effective and accessible option for vehicle owners. Unlike professional services or commercial kits, which may come with higher price tags, home remedies offer a budget-friendly solution without compromising quality.
Furthermore, the accessibility of household items used in these methods ensures that anyone can restore their headlights without the need for specialized tools or products. This makes headlight restoration an achievable DIY project for car enthusiasts and everyday vehicle owners alike.
In conclusion, don’t underestimate the power of home remedies for headlight restoration. Embrace the benefits, take action, and enjoy the satisfaction of rejuvenating your headlights with simple, cost-effective methods that deliver impressive results. Illuminate the road ahead and drive with confidence, knowing that your headlights are clear, bright, and restored to their optimal condition.