Best Method to Clean Headlights
Table of Contents
Introduction
Highlighting the Role of Headlights in Driving Safety
Imagine embarking on a nighttime journey without the steady guidance of headlights. It’s a daunting thought. Headlights are not mere accessories; they are integral to ensuring safe travel, especially during low-light conditions, adverse weather, or challenging terrain. The role they play in enhancing visibility and preventing accidents cannot be overstated. Whether it’s alerting drivers to potential obstacles, aiding pedestrians in crossing roads, or allowing motorists to maintain a proper distance from other vehicles, headlights are silent guardians that uphold driving safety.
Introducing the Concept of Headlight Clarity and Its Impact
While we often associate headlights with their function of illuminating the road, another essential aspect comes into play: headlight clarity. Over time, headlights can lose their original luster due to factors such as oxidation, environmental elements, and wear. This gradual deterioration can lead to reduced light output, compromised visibility, and even an unappealing aesthetic. As we delve into this article, we will explore the ways in which headlight clarity impacts not only safety but also the overall driving experience. The journey will take us through various methods of maintaining and restoring headlight clarity, empowering readers to make informed decisions to ensure optimal vehicle performance and safety.
The next section will delve into the common issue of headlight oxidation and its implications for visibility and aesthetics.
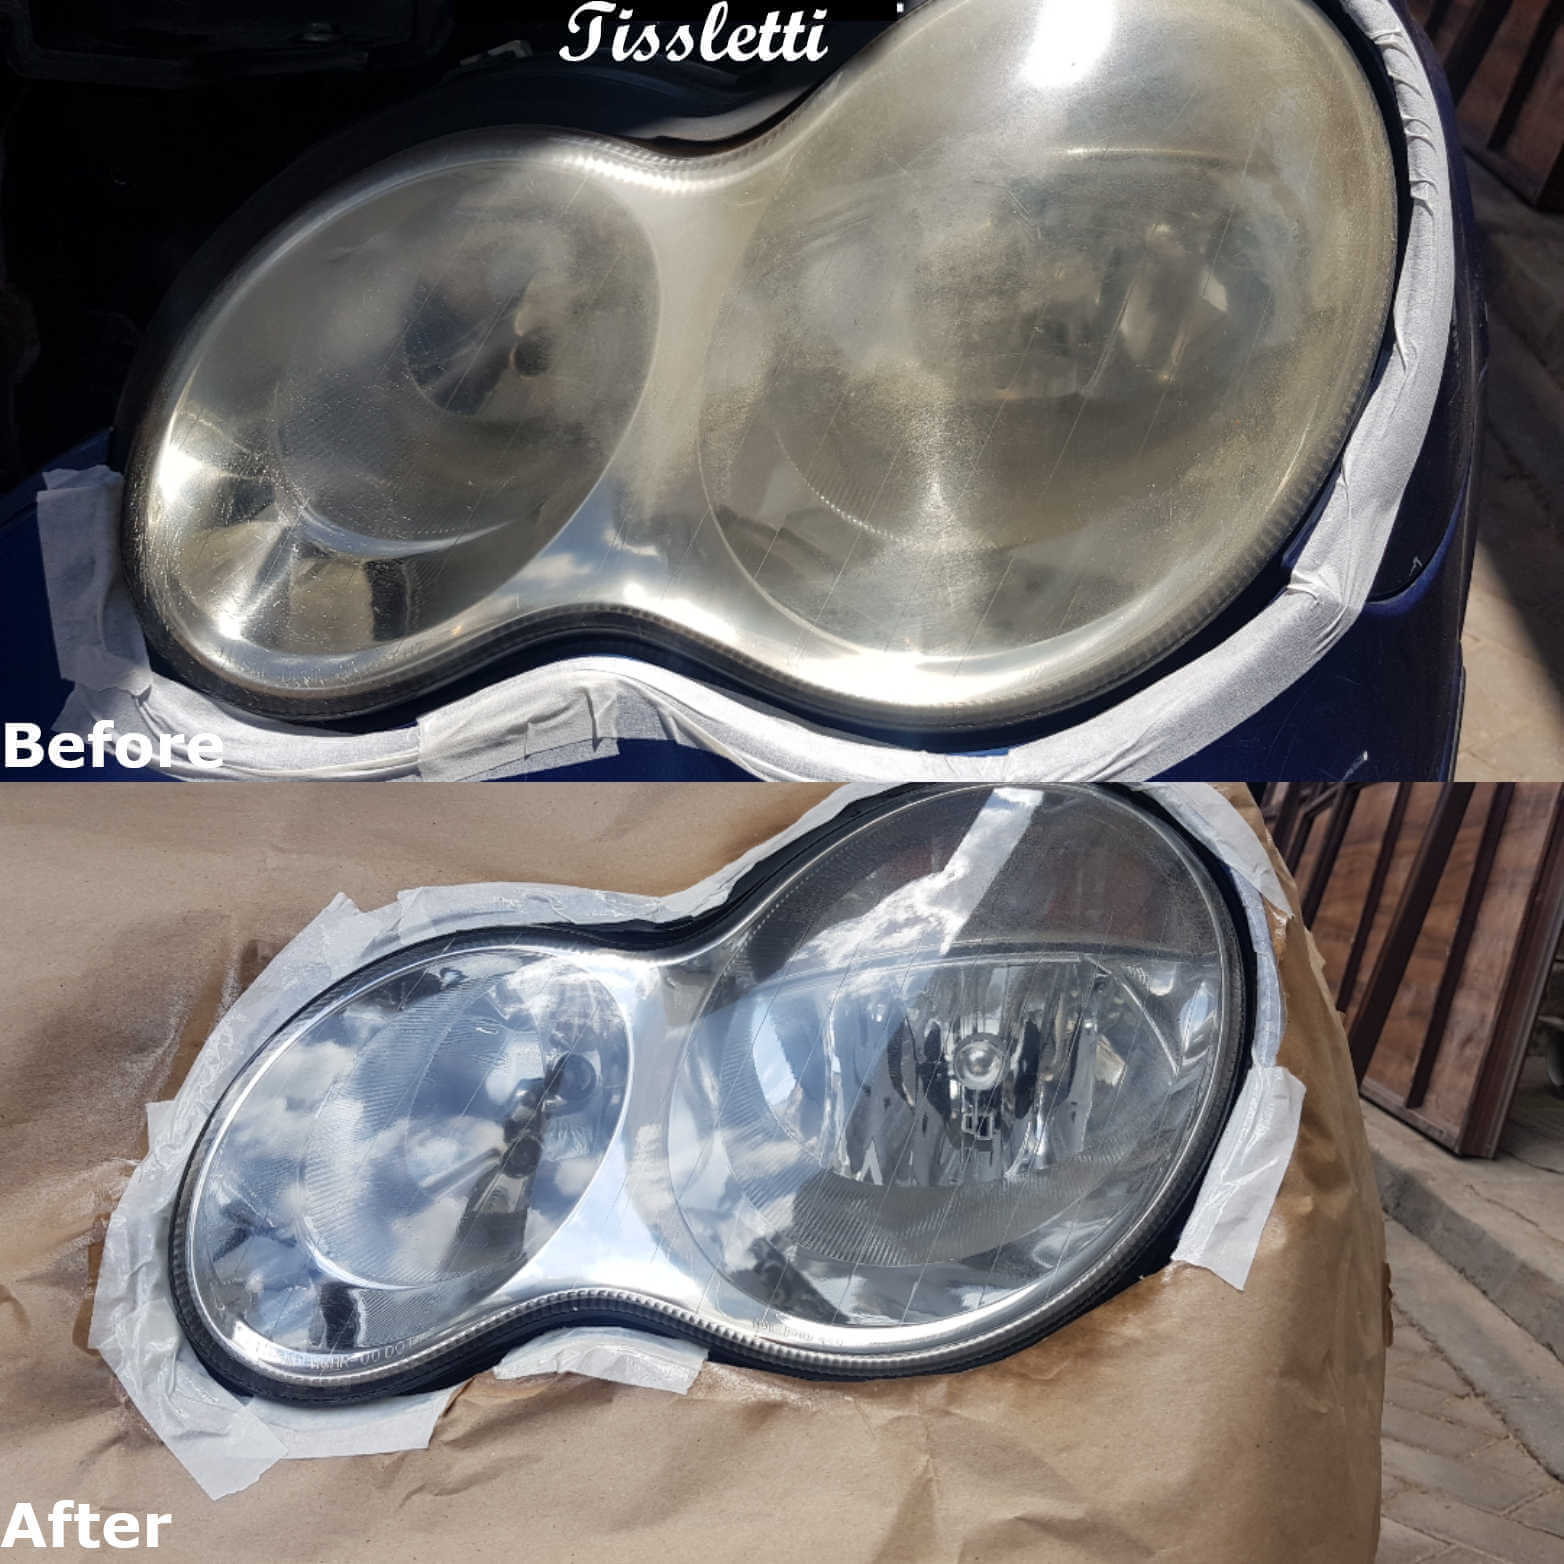
Caught in the Fog: The Problem of Cloudy Headlights
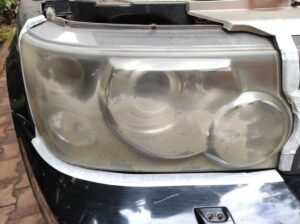
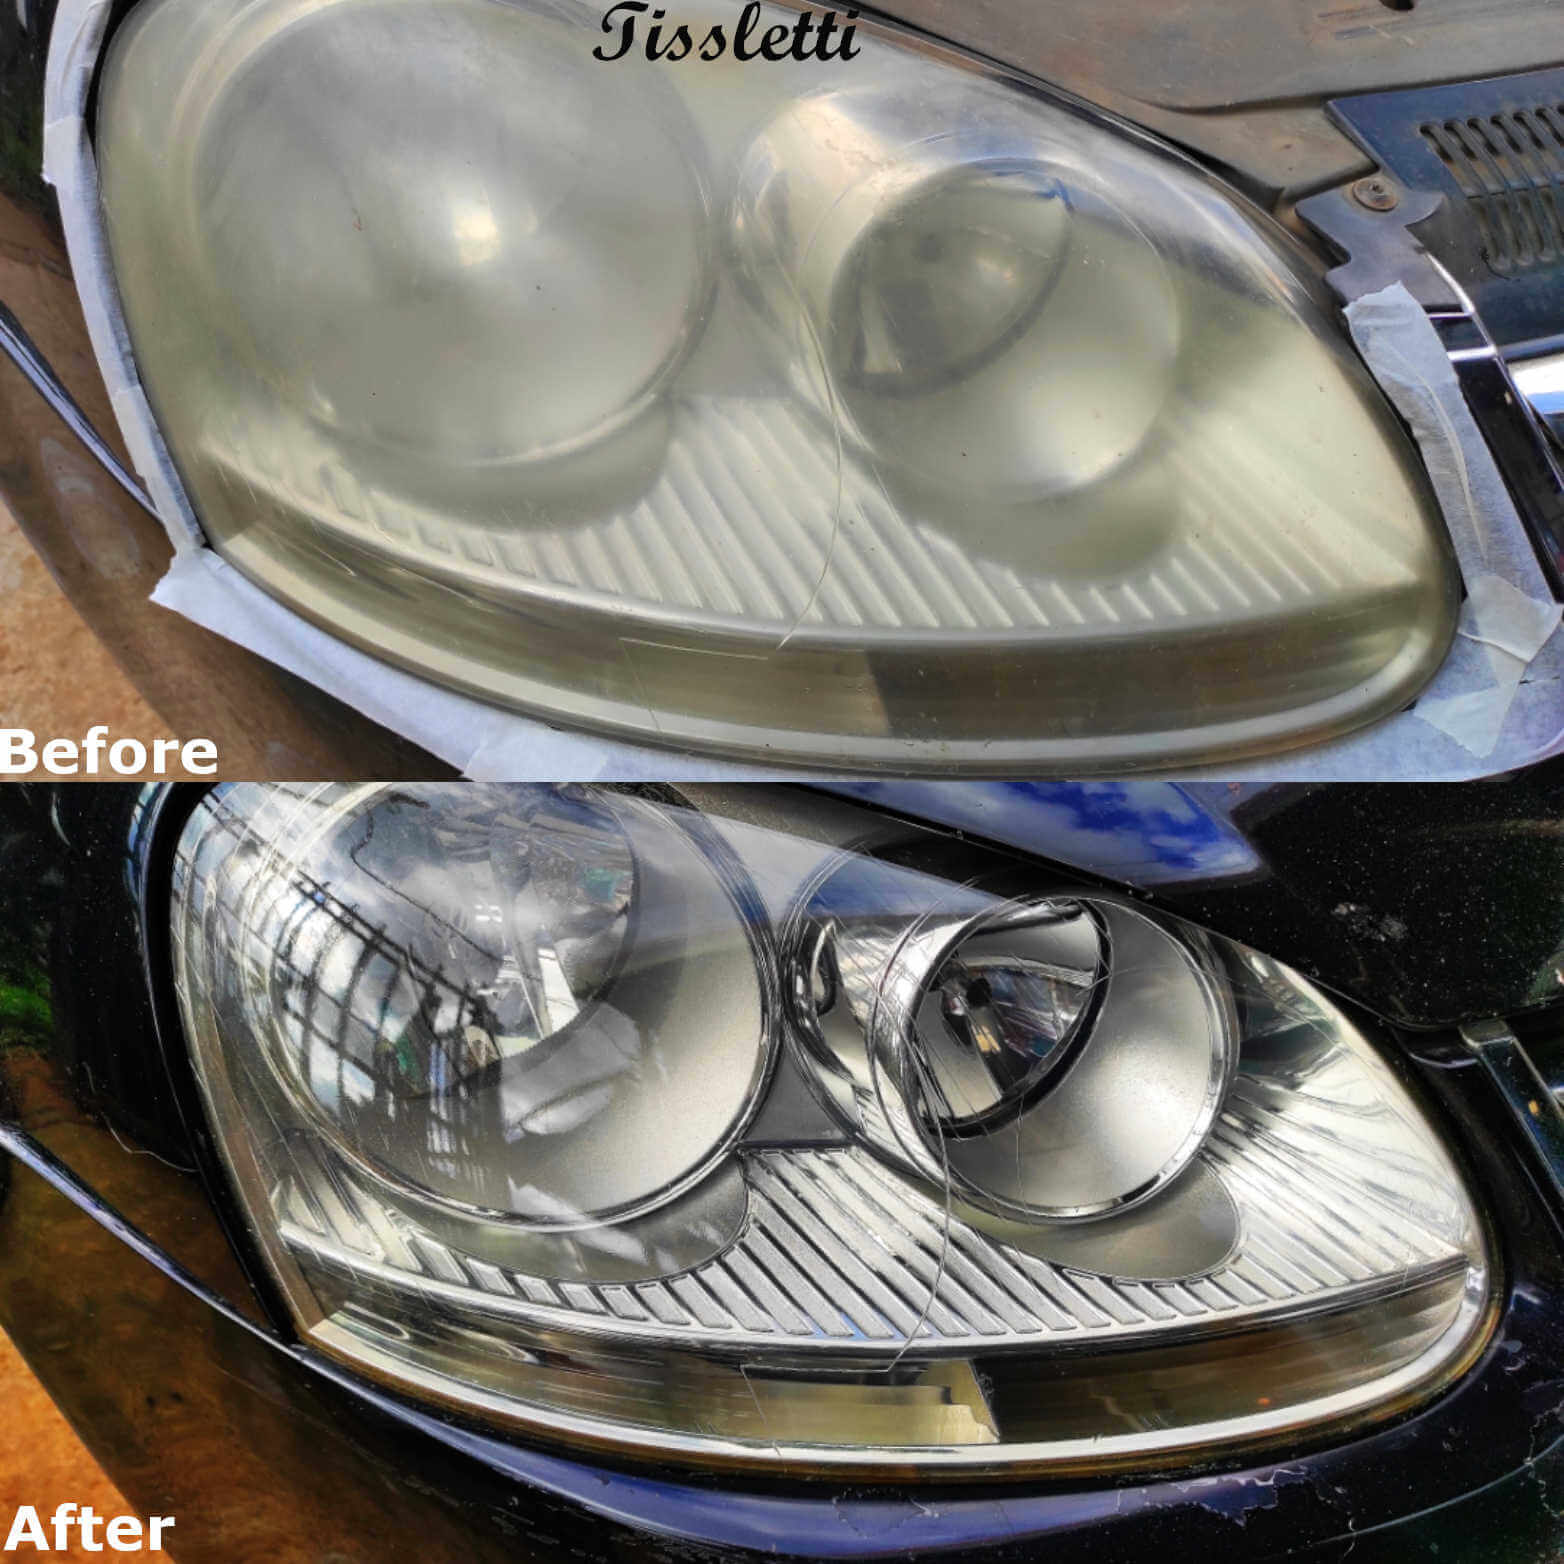
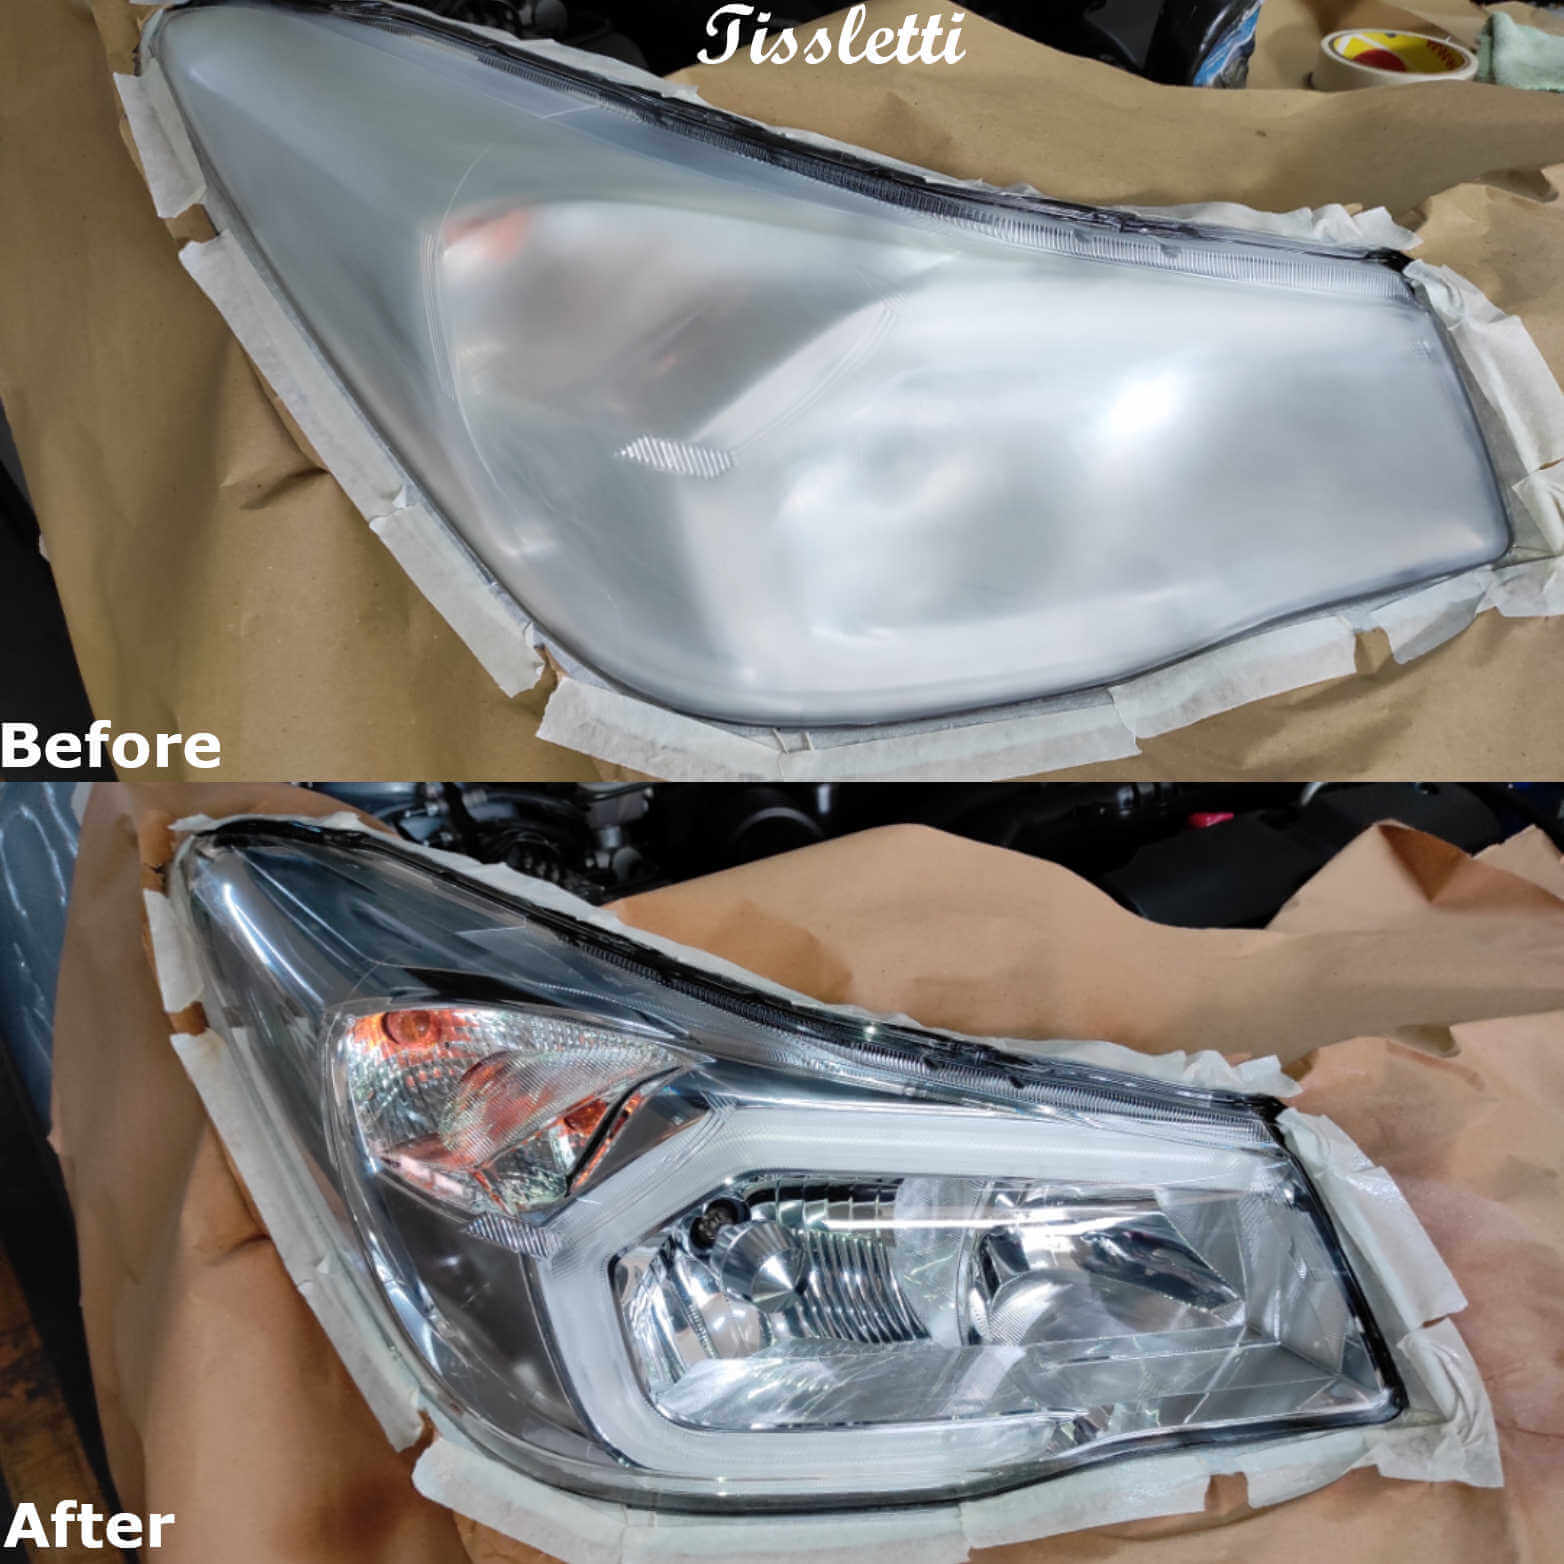
In the realm of vehicular aesthetics and safety, an often unnoticed yet prevalent issue emerges: the phenomenon of cloudy headlights. These once-clear beacons of illumination can succumb to a gradual and insidious process known as headlight oxidation, leaving them shrouded in a hazy veil. This section delves into the intricacies of this common concern, shedding light on its origins and ramifications.
Describing the Common Issue of Headlight Oxidation and Haze
Headlight oxidation, often compared to the formation of fog on a window, is the result of a chemical reaction that occurs as headlights are exposed to various environmental elements. The outer protective layer of headlights, typically made of polycarbonate or acrylic, interacts with UV rays, air pollutants, and other factors. Over time, this interaction leads to the deterioration of the protective layer, resulting in a cloudy appearance.
As oxidation progresses, the once-pristine surface of headlights becomes increasingly opaque. This phenomenon is akin to a thin layer settling onto the headlights, diffusing the light they emit. A diminished light output can drastically impair visibility during nighttime driving, inclement weather, or low-light conditions. Cloudy headlights not only hinder the driver’s ability to see the road clearly but also diminish the visibility of the vehicle to other motorists, increasing the risk of accidents.
Sparking Interest: DIY Methods for Clearer Headlights

Shining a Light on Toothpaste and Baking Soda
In the quest for restoring headlight clarity, do-it-yourself enthusiasts have turned to innovative methods that leverage household ingredients to combat oxidation. This section illuminates two such DIY techniques: the toothpaste method and the baking soda remedy. These accessible solutions offer an alternative path to rejuvenating cloudy headlights, bringing back their luminous brilliance.
Step-by-Step Application Guide for Toothpaste Method
- Gather Your Materials: To embark on the toothpaste method, you’ll need toothpaste (non-gel, non-abrasive), a soft microfiber cloth, water, and painter’s tape.
- Clean the Headlights: Begin by thoroughly cleaning the headlights with water and gentle car soap. This step removes dirt and contaminants that could interfere with the restoration process.
- Apply Toothpaste: Squeeze a small amount of toothpaste onto the microfiber cloth. Gently rub the toothpaste onto the headlight surface using circular motions. The mild abrasive nature of toothpaste aids in removing the oxidized layer.
- Rinse and Inspect: Once you’ve applied the toothpaste, rinse the headlights with water and dry them using a clean cloth. Inspect the clarity and shine, repeating the process if necessary.
Benefits and Limitations of Baking Soda
- A Natural Abrasive: Baking soda, known for its mild abrasive properties, can also be employed to restore headlight clarity. Create a paste by mixing baking soda with water until it forms a thick consistency.
- Application Process: Apply the baking soda paste to the headlight surface using a cloth or sponge. Gently rub the paste in circular motions, allowing the abrasive action to gradually remove the oxidation.
- Rinse and Evaluate: After the paste has been applied and gently rubbed, rinse the headlights with water and assess the results. Baking soda’s gentle abrasiveness can aid in diminishing the cloudy appearance.
User Experiences and Success Stories
- Positive DIY Testimonies: Enthusiasts who have employed the toothpaste and baking soda methods often share their success stories. Many report noticeable improvements in headlight clarity, with diminished haze and increased luminosity.
- Varied Results: It’s important to note that the effectiveness of these DIY methods can vary based on factors such as the severity of oxidation, the type of headlight materials, and the diligence of application. While some individuals achieve impressive results, others may find the improvements subtle.
- Temporary Solution: DIY methods like toothpaste and baking soda offer a budget-friendly approach to headlight restoration. However, it’s essential to understand that these methods may provide temporary relief rather than a long-lasting solution.
As we explore the world of DIY headlight restoration, it becomes evident that household ingredients like toothpaste and baking soda hold the potential to reverse the effects of oxidation and restore clarity. While these methods offer accessible options, it’s important to manage expectations and recognize that their efficacy may vary. In the following sections, we will delve further into additional DIY approaches and explore the benefits of commercial headlight restoration kits. Stay tuned to uncover a range of strategies that empower vehicle owners to bring back the radiance to their headlights.
A Vinegar Solution: Natural Approach to Headlight Clarity
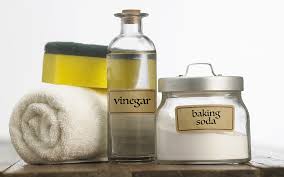
In the realm of do-it-yourself headlight restoration, a natural and wallet-friendly solution emerges: the vinegar and water method. This section uncorks the potential of this household concoction, revealing its role in combating headlight oxidation and restoring luminous clarity.
Mixing and Applying Vinegar and Water Solution
- Ingredients and Proportions: To concoct the vinegar and water solution, you’ll need distilled white vinegar and water. The recommended ratio is typically one part vinegar to three parts water. This dilution ensures that the acidity of the vinegar is gentle enough to not damage the headlight’s surface.
- Prepare the Solution: In a spray bottle or container, combine the vinegar and water in the specified ratio. Shake the mixture gently to ensure even distribution.
- Clean the Headlights: Before applying the solution, clean the headlights with water and mild car soap. This step removes dirt and debris that could hinder the restoration process.
- Application Process: Liberally spray the vinegar and water solution onto the headlight surface. Using a clean microfiber cloth, gently rub the solution onto the headlight using circular motions. The acidity of the vinegar helps break down oxidation and promote clarity.
- Rinse and Dry: Once the solution has been applied and gently rubbed, rinse the headlights with water to remove any residue. Dry the headlights thoroughly using a clean cloth.
Safety Precautions and Considerations
- Acidity Awareness: While vinegar is a natural cleaner, its acidic nature means it should be used with caution. It’s advisable to wear protective gloves to prevent skin irritation during the application process.
- Avoid Surrounding Materials: When applying the vinegar and water solution, take care to avoid contact with other materials, such as your vehicle’s paint. Vinegar’s acidity could potentially harm these surfaces.
- Spot Testing: Before applying the solution to the entire headlight, consider conducting a spot test on a small, inconspicuous area. This test ensures that the solution does not have any adverse effects on the headlight’s materials.
Real-Life Outcomes from DIY Enthusiasts
- Positive Feedback: DIY enthusiasts who have explored the vinegar and water method often share their positive experiences. Many report improvements in headlight clarity and a reduction in haze after using this natural solution.
- Varied Results: As with any DIY method, the outcomes can vary based on factors such as the extent of oxidation, the type of headlight materials, and the thoroughness of application. Some individuals may achieve more noticeable results than others.
- Economical Option: The vinegar and water method offers an economical and environmentally friendly approach to headlight restoration. It harnesses the power of a common household ingredient to combat oxidation and promote clarity.
As we unravel the effectiveness of the vinegar and water solution, it’s clear that a natural approach can have a role in rejuvenating cloudy headlights. By following safety precautions and considering real-life outcomes, vehicle owners can explore this eco-friendly remedy to restore headlight brilliance. In the forthcoming sections, we will venture into the realm of commercial headlight restoration kits and uncover the benefits they offer in the pursuit of clear and luminous headlights. Stay tuned to discover a range of strategies that empower vehicle owners to reclaim the radiance of their headlights.
Restoring Radiance with Commercial Headlight Kits
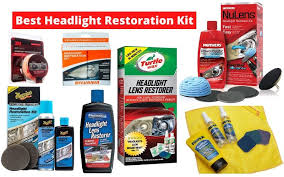
In the pursuit of reclaiming the luminous brilliance of headlights, the realm of headlight restoration unveils a range of commercial kits that promise efficient solutions. This section delves into the realm of these purpose-built kits, shedding light on their components, the importance of adhering to manufacturer instructions, and a balanced assessment of their benefits and drawbacks.
Components of a Typical Restoration Kit
- Abrasive Sanding Pads: Many commercial headlight restoration kits include abrasive sanding pads designed to gently remove the oxidized layer from the headlight surface. These pads vary in grit levels to facilitate a step-by-step approach to restoration.
- Polishing Compounds: Polishing compounds are a staple of restoration kits, aiming to refine the headlight surface after the initial sanding process. These compounds assist in achieving a smooth and clear finish, enhancing light transmission.
- UV Protective Sealants: To safeguard the freshly restored headlights from future oxidation, UV protective sealants are often included. These sealants form a protective barrier against UV rays and environmental contaminants, prolonging the clarity achieved through restoration.
- Buffing Pads and Applicators: Commercial kits usually provide buffing pads or applicators for the even distribution of polishing compounds and sealants. These tools ensure a consistent and effective application process.
Following Manufacturer Instructions for Best Results
The Guiding Manual: Commercial headlight restoration kits come with manufacturer instructions that outline the step-by-step process for achieving optimal results. These instructions are tailored to the components included in the specific kit and provide guidance on usage, timings, and techniques.
The Importance of Precision: Adhering to manufacturer instructions is crucial for achieving the desired outcome. Each component and step in the restoration process serves a purpose, and precision ensures that the restoration is effective and long-lasting.
Technical Expertise: Following instructions also helps users avoid mistakes that could potentially damage the headlight or compromise the clarity achieved. The instructions take into account the technical aspects of restoration to deliver safe and successful results.
Comparing Pros and Cons of Commercial Kits
Pros of Commercial Kits:
- Comprehensive Approach: Commercial kits provide a comprehensive solution, bundling together the necessary components for efficient restoration in one package.
- Structured Process: The step-by-step instructions offered by commercial kits guide users through a structured restoration process, ensuring consistent results.
- Professional-Quality Outcomes: When used correctly, commercial kits can yield outcomes comparable to professional headlight restoration services, enhancing both aesthetics and performance.
- UV Protection: The inclusion of UV protective sealants in these kits offers a preventive measure against future oxidation, extending the lifespan of the restoration.
Cons of Commercial Kits:
- Skill and Technique: Successful restoration using a commercial kit requires a degree of skill and technique. Users must follow instructions closely to achieve the desired results.
- Cost Considerations: While more affordable than professional services, commercial kits are not free. Vehicle owners must consider the cost of the kit relative to their budget.
- Time Investment: Restoration using a commercial kit can be time-consuming, especially for those new to the process. Achieving optimal results may require patience and precision.
In the world of headlight restoration, commercial kits emerge as a viable option for vehicle owners seeking efficient solutions. By understanding the components of these kits, adhering to manufacturer instructions, and weighing the pros and cons, enthusiasts can make informed decisions to restore headlight clarity. In the upcoming sections, we will explore the realm of professional restoration services, examining the expertise they offer and the value proposition they present. Stay tuned to uncover the full spectrum of strategies available for maintaining the brilliance of your headlights.
Professional Restoration Services

Professional Touch: When to Seek Expert Headlight Restoration
In the pursuit of restoring headlight brilliance, the option of professional restoration services emerges as a beacon of expertise and convenience. This section navigates the scenarios that warrant seeking the professional touch and underscores the value of entrusting trained restoration professionals with the task.
Identifying Scenarios that Call for Professional Intervention
- Severe Oxidation and Haze: When headlights are severely oxidized, exhibiting significant haze and reduced light output, professional intervention becomes highly advisable. Professionals possess the tools and techniques to effectively address extensive oxidation.
- Complex Headlight Design: Some modern vehicles feature intricate headlight designs, including curves, grooves, and specialized coatings. These complexities require specialized knowledge to restore effectively, making professional services a prudent choice.
- Time Constraints: Vehicle owners with limited time to dedicate to restoration may find that professional services provide a swift and efficient solution. Professionals are equipped to execute the process with precision and speed.
- Vehicle Resale: For those considering selling or trading in their vehicle, professionally restored headlights can enhance the overall aesthetics and appeal, potentially positively impacting resale value.
Emphasizing the Expertise of Trained Restoration Professionals
- Technical Know-How: Trained restoration professionals possess a deep understanding of headlight materials, surfaces, and restoration techniques. Their technical expertise ensures the application of the most suitable methods for each unique scenario.
- Precision Tools: Professionals have access to specialized tools and equipment that allow them to achieve meticulous results. These tools enable controlled sanding, precise polishing, and effective application of protective coatings.
- Quality Assurance: Reputable restoration services stand by the quality of their work, often offering warranties for the restoration performed. This assurance provides peace of mind to vehicle owners seeking long-lasting clarity.
- Consistency and Durability: Professionals can deliver consistent and durable results across various types of headlights. Their experience helps mitigate the risk of uneven outcomes or damage during the restoration process.
- Customized Approach: Restoration professionals tailor their approach to the specific needs of each headlight. This customized attention ensures that the restoration process is effective and optimized for the individual situation.
In the realm of headlight restoration, seeking a professional touch can be a transformative experience. By recognizing scenarios that necessitate professional intervention and understanding the expertise professionals bring to the table, vehicle owners can make informed decisions that lead to restored headlight brilliance. As we journey deeper into the realm of professional services, we’ll delve into the techniques and processes that restoration experts employ to revive headlights to their optimal clarity. Stay tuned to uncover the insights that illuminate the world of professional headlight restoration.
Illuminating the Process: How Experts Revive Headlights
Showcasing Specialized Tools and Techniques
When it comes to reviving the brilliance of headlights, the arsenal of tools and techniques wielded by restoration experts can truly illuminate the path to clarity. This section unveils the intricate processes that professionals employ, highlighting the specialized tools and craftsmanship that go into achieving remarkable results.
Comprehensive Inspection and Assessment
- Visual Examination: Restoration experts commence the process with a thorough visual assessment of the headlights. They analyze the extent of oxidation, haze, and damage to determine the most suitable restoration approach.
- Surface Analysis: Professionals evaluate the headlight surface, considering factors such as the type of material, level of oxidation, and any previous treatments. This analysis guides them in selecting the appropriate restoration techniques.
Controlled Sanding for Precision
- Grit Selection: Restoration professionals employ various sanding pads with different grit levels. The initial sanding phase removes the oxidized layer, preparing the surface for further refinement.
- Precise Sanding Techniques: Professionals utilize controlled sanding techniques that maintain consistent pressure and motion. This precision ensures the even removal of oxidation without compromising the integrity of the headlight’s surface.
Polishing for Optimal Clarity
Polishing Compounds: Restoration experts utilize high-quality polishing compounds to refine the headlight’s surface. These compounds help eliminate fine scratches and restore the smoothness required for optimal light transmission.
Variable Speed Polishers: Professionals employ variable speed polishers to control the intensity of the polishing process. This control prevents overpolishing and damage while achieving a flawless finish.
UV Protective Coatings
Application Expertise: Experts apply UV protective coatings with precision, ensuring thorough coverage and adherence to the headlight’s surface. These coatings act as a barrier against future oxidation and UV damage.
Curing Process: UV protective coatings often require curing under specialized UV lamps. Restoration professionals follow manufacturer guidelines to ensure the proper curing duration and intensity.
Advantages of Professional Services in Terms of Quality and Durability
- Consistent Results: Restoration experts deliver consistent results across different types of headlights. Their experience minimizes the risk of uneven outcomes or damage during the restoration process.
- Longevity and Durability: Professionally restored headlights tend to exhibit longevity and durability. The combination of specialized techniques and protective coatings extends the clarity achieved through restoration.
- Quality Assurance: Reputable restoration services offer quality assurance, often providing warranties for the restoration performed. This assurance underscores the confidence professionals have in their work.
- Aesthetic and Functional Enhancement: Professional restoration not only enhances the aesthetics of headlights but also improves their functionality. Restored headlights offer improved light output and beam pattern, enhancing nighttime visibility.
- Customized Approach: Restoration experts tailor their approach to the specific needs of each headlight. This customized attention ensures that the restoration process is effective and optimized for individual cases.
As we delve into the intricacies of headlight restoration by experts, it becomes clear that their mastery of specialized tools and techniques elevates the process to an art form. The advantages offered by professional services in terms of quality, durability, and precision reinforce their pivotal role in restoring headlight brilliance. In the forthcoming sections, we’ll explore the financial aspect of headlight restoration, comparing the costs and benefits of DIY methods and professional services. Stay tuned to discover the comprehensive landscape of options available to rejuvenate the luminous allure of your vehicle’s headlights.
Analyzing DIY vs. Professional Restoration
In the journey to restore the luminosity of headlights, a pivotal consideration lies in the costs associated with the two prominent approaches: DIY (Do-It-Yourself) restoration and seeking professional services. This section delves into the financial aspect of headlight restoration, breaking down the expenses linked to each method while evaluating the value proposition they offer.
Breaking Down Costs Associated with Both Approaches
DIY Restoration Costs
- Materials and Products: DIY restoration often involves purchasing materials such as toothpaste, baking soda, sandpaper, and polishing compounds. These products constitute the primary cost of the DIY method.
- Tools: Depending on the chosen method, certain tools might be necessary for sanding, polishing, and applying products. These tools can contribute to the overall expenses.
- Time Investment: While not a direct financial cost, the time spent on DIY restoration has value. Vehicle owners must consider the opportunity cost of time that could be spent on other activities.
Professional Restoration Costs
- Service Fees: Professional headlight restoration services come with service fees. These fees vary based on factors like the extent of oxidation, the complexity of the headlight design, and the reputation of the service provider.
- Quality Assurance: Some professional services offer warranties for their work, which might entail an additional cost. This cost can be viewed as an investment in the assurance of quality and longevity.
Weighing the Value Proposition of Each Option
DIY Restoration Value Proposition
- Affordability: DIY restoration methods are generally more budget-friendly upfront, requiring only the purchase of materials and products.
- Learning Experience: DIY methods provide a hands-on learning experience for vehicle owners interested in tackling the restoration process themselves.
- Convenience: DIY restoration can be performed at the vehicle owner’s convenience, eliminating the need to schedule appointments.
Professional Restoration Value Proposition
- Expertise and Quality: Professional restoration services offer expert knowledge, specialized tools, and techniques that can lead to high-quality and consistent results.
- Time Efficiency: Professional services can complete the restoration process swiftly and efficiently, sparing vehicle owners the time and effort of DIY restoration.
- Long-Term Results: Professionally restored headlights often exhibit longevity and durability due to the use of specialized products and protective coatings.
- Resale Value: The enhanced aesthetics and performance resulting from professional restoration can positively impact the resale value of the vehicle.
In the cost-versus-value debate of headlight restoration, both DIY and professional approaches have their merits. DIY methods appeal to budget-conscious vehicle owners looking for an affordable way to restore headlights. On the other hand, professional restoration services offer the expertise, efficiency, and quality assurance that align with those seeking a premium outcome. As we conclude the financial exploration, the upcoming sections will delve into preventive measures to maintain the clarity of headlights over time. Join us as we uncover the strategies to shield headlights from the perils of oxidation and ensure their brilliance stands the test of time.
Action-Oriented Tips: Preventive Measures for Headlight Clarity
A Shield Against Oxidation: Protective Coatings
To ensure the enduring brilliance of your headlights, proactive measures are essential. In this section, we delve into the realm of protective coatings, unveiling their significance in preserving headlight clarity and enhancing their lifespan.
Exploring the Benefits of UV-Resistant Coatings
- UV Shielding: UV-resistant coatings act as a formidable shield against the damaging effects of ultraviolet rays. These coatings form a protective barrier that prevents oxidation, yellowing, and hazing caused by prolonged UV exposure.
- Enhanced Durability: UV-resistant coatings offer enhanced durability to headlights, safeguarding them from environmental contaminants, road debris, and weather extremes. This resilience prolongs the clarity and aesthetics of headlights over time.
- Minimized Oxidation: By preventing oxidation from occurring in the first place, UV-resistant coatings mitigate the need for frequent restoration efforts. This saves both time and expenses in the long run.
Instructions for Applying Protective Coatings Effectively
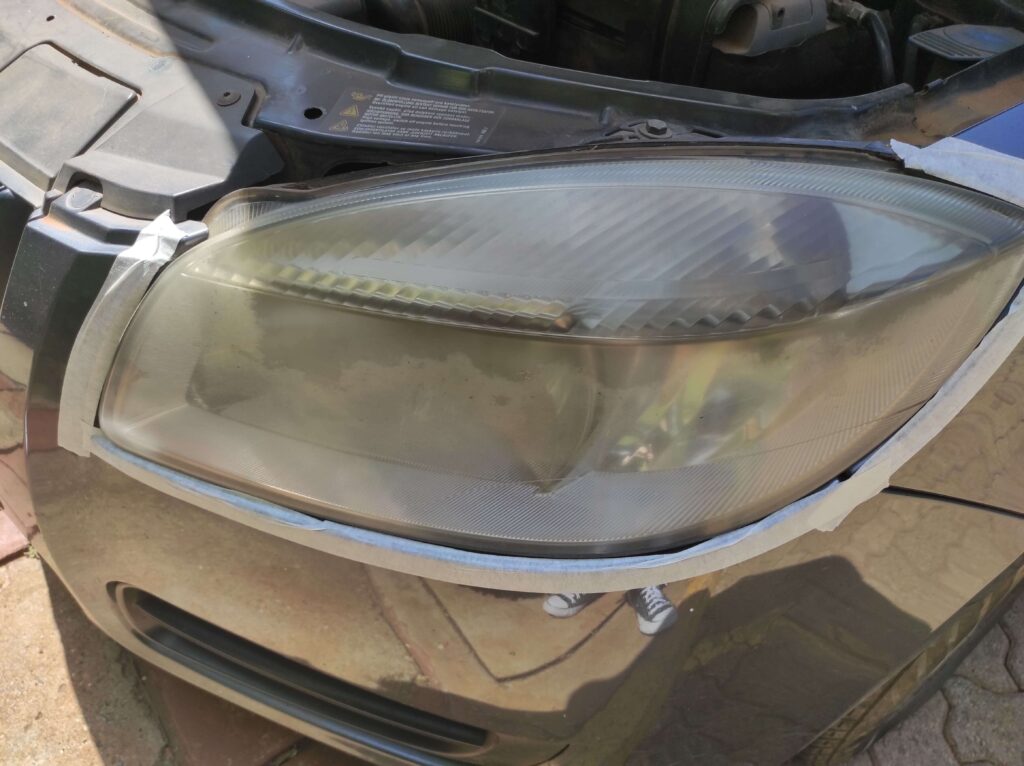
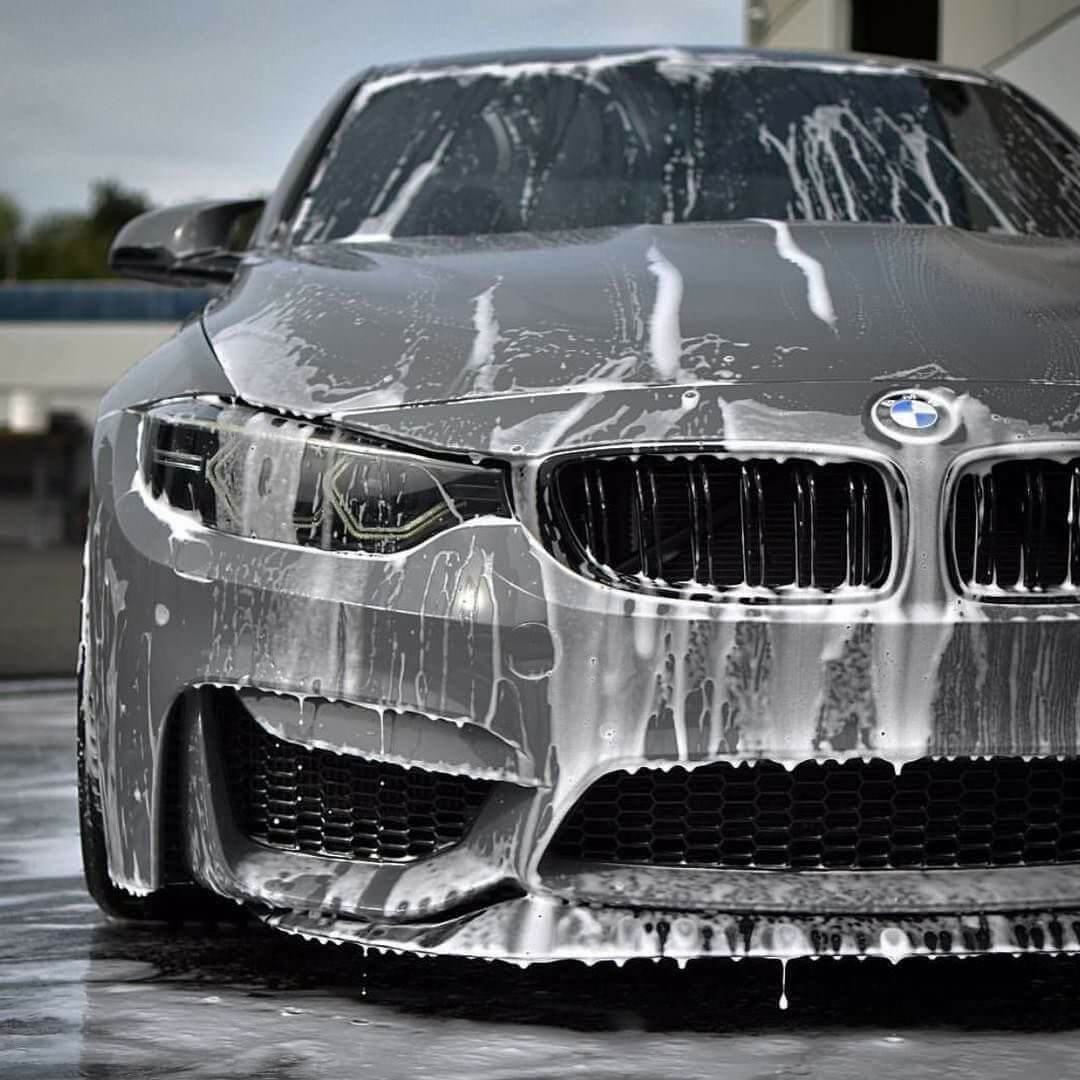
1. Clean and Prep: Begin by thoroughly cleaning the headlights to remove any dirt, grime, or previous coatings. Use gentle car soap and microfiber cloth to ensure a pristine surface.
2. Surface Assessment: Inspect the headlights for any scratches, imperfections, or signs of oxidation. Address these issues before applying the protective coating to ensure optimal results.
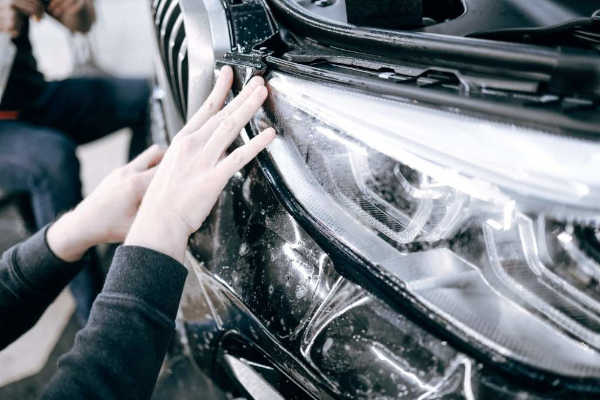
3. Masking: Use painter’s tape to mask off surrounding areas to prevent the coating from coming into contact with your vehicle’s paint.
4. Application Technique: Follow the manufacturer’s instructions for the specific protective coating you’re using. In most cases, the coating can be applied using an applicator pad or microfiber cloth. Apply the coating evenly and in overlapping motions.
5. Curing Time: Allow the protective coating to cure as per the manufacturer’s recommendations. This typically involves letting the coating sit for a specific duration before removing any excess.
6. Buffing and Finishing: After the curing period, gently buff the headlights with a clean and dry microfiber cloth to achieve a smooth, glossy finish.
7. Avoid Moisture and Contaminants: Refrain from exposing the coated headlights to moisture or contaminants during the curing process. Keep your vehicle in a dry and controlled environment.
By proactively applying UV-resistant protective coatings, you’re not only preserving the allure of your headlights but also investing in their long-term clarity and functionality. These coatings serve as armor against the forces of nature, ensuring that your headlights maintain their brilliance and luminosity, enhancing both aesthetics and driving safety. As we progress, the following section will illuminate effective cleaning practices that contribute to maintaining the clarity and charm of your vehicle’s headlights. Stay tuned for actionable insights that empower you to make the most of your headlight maintenance journey.
Crystal-Clear Habits: Regular Cleaning for Lasting Brilliance
As the saying goes, an ounce of prevention is worth a pound of cure. When it comes to maintaining the brilliance of your vehicle’s headlights, adopting regular cleaning habits can make a significant difference. In this section, we’ll explore the importance of consistent cleaning and share safe and effective practices to ensure your headlights remain crystal clear over time.
Suggested Cleaning Frequency to Maintain Headlight Clarity
Monthly Cleaning
- Regular Dust and Debris Removal: Monthly cleaning helps remove accumulated dust, dirt, and debris that can hinder the clarity of your headlights.
- Prevention of Build-Up: Consistent cleaning prevents the build-up of contaminants that can lead to hazing and diminished light output.
Safe and Effective Cleaning Practices to Prevent Damage
Gather Your Supplies
Microfiber Cloth: Use a soft microfiber cloth to gently wipe away dirt and grime without scratching the headlight surface.
Mild Soap Solution: Prepare a mild soap solution by mixing a few drops of car wash soap with water. This solution is safe for cleaning headlights.
Water: Use clean water to rinse off the soap solution after cleaning.
Step-by-Step Cleaning Process
1. Rinse the Headlights: Begin by rinsing the headlights with water to remove loose dirt and debris.
2. Apply Soap Solution: Dip the microfiber cloth in the soap solution and gently wipe the headlight surface. Avoid using excessive pressure to prevent scratching.
3. Gently Scrub: For stubborn dirt or bug residue, gently scrub using a circular motion. Keep the cloth damp with the soap solution.
4. Rinse Thoroughly: Rinse the headlights thoroughly with clean water to remove any soap residue.
5. Dry with a Clean Cloth: Use a dry microfiber cloth to gently dry the headlights and prevent water spots.
Avoid These Practices
- Abrasive Material: Avoid using abrasive materials like rough sponges or paper towels, as they can scratch the headlight surface.
- Harsh Chemicals: Refrain from using harsh chemicals, ammonia-based cleaners, or household cleaners, as they can damage the headlight’s protective coating.
- High-Pressure Washers: Avoid using high-pressure washers, as the force of the water can cause damage to the headlight lens or housing.
By incorporating regular cleaning into your vehicle maintenance routine, you’re taking proactive steps to preserve the clarity and brilliance of your headlights. These practices not only enhance the aesthetics of your vehicle but also contribute to your safety by ensuring optimal visibility during nighttime and adverse weather conditions. As we move forward, the upcoming sections will address common queries related to headlight cleaning and restoration. Stay tuned for illuminating answers that provide clarity and insights into the world of headlight maintenance.
Frequently Asked Questions
In this section, we address the most frequently asked questions about headlight cleaning. Gain insights into the best practices, myths, and impact of headlight maintenance on safety and vehicle value.
By understanding these FAQs, you’re equipped with the knowledge to make informed decisions about headlight maintenance. As we conclude this FAQ section, the journey continues to the final chapter, where we reflect on key takeaways and empower you to choose the right cleaning approach for sustained safety and aesthetics.
Conclusion
As we near the end of this informative journey, let’s recap the key takeaways, empower you with the knowledge to make informed decisions, and emphasize the importance of ongoing maintenance for headlight clarity.
Key Takeaways and Recap
Throughout this guide, we’ve explored the intricate world of headlight maintenance and restoration. Here are the key takeaways:
- Safety First: Clear headlights are essential for safe driving, as they ensure optimal visibility, especially at night and in adverse weather conditions.
- Aesthetics Matter: Well-maintained headlights not only enhance safety but also contribute to the overall aesthetics of your vehicle, reflecting your commitment to vehicle care.
- DIY vs. Professional: You have the choice between DIY methods and professional restoration services. Each approach has its advantages and disadvantages.
- Preventive Measures: Regular cleaning, protective coatings, and responsible driving habits can help prevent headlight oxidation and maintain clarity.
Choosing the Right Cleaning Approach
Choosing the right method to clean and maintain your headlights is crucial. Consider the following when making your decision:
- Severity: Assess the level of oxidation and haze on your headlights. Mild oxidation can be treated with DIY methods, while severe cases may warrant professional restoration.
- Time and Skill: DIY methods require time and attention to detail. If you’re not comfortable or lack the necessary tools, professional services might be a better choice.
- Longevity: Professional restoration often provides longer-lasting results due to the specialized tools, techniques, and quality materials used.
In conclusion, we have illuminated your journey to achieving headlight brilliance through insights into effective cleaning methods, preventive measures, and the significance of expert restoration. As you apply this knowledge, you’re not only enhancing the aesthetics of your vehicle but also embracing a safer driving experience. So, keep those headlights shining and embark on the road with clarity, confidence, and a commitment to safety.