The Ultimate Guide on How to Polish Headlights
Table of Contents
Introduction
In this section, we will explore the importance of clear and bright headlights and the benefits of polishing them. Headlights play a crucial role in ensuring safe and effective nighttime driving, as well as enhancing the overall appearance of a vehicle.
Benefits of Polishing Headlights
Polishing your headlights offers numerous advantages, including:
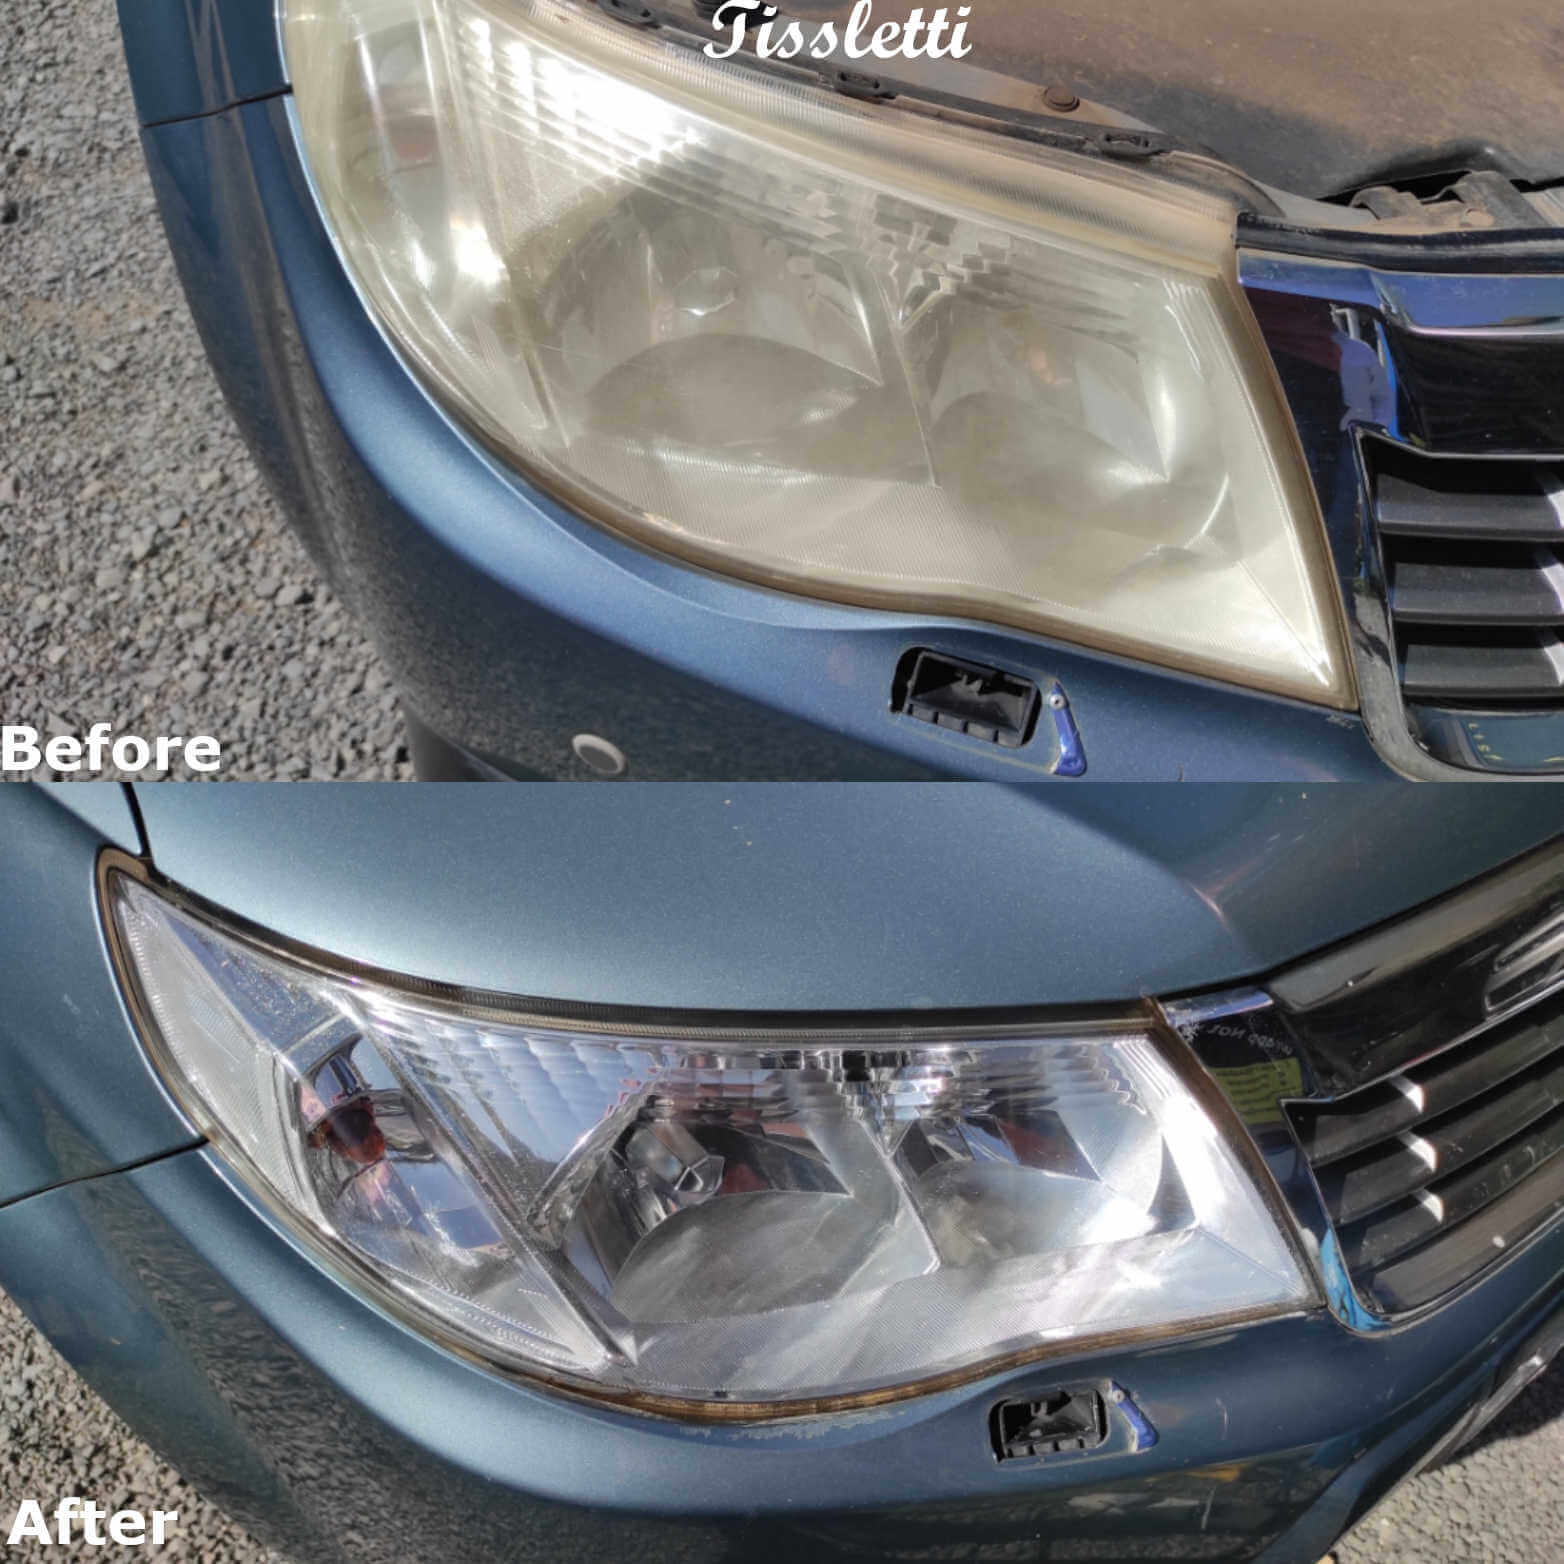
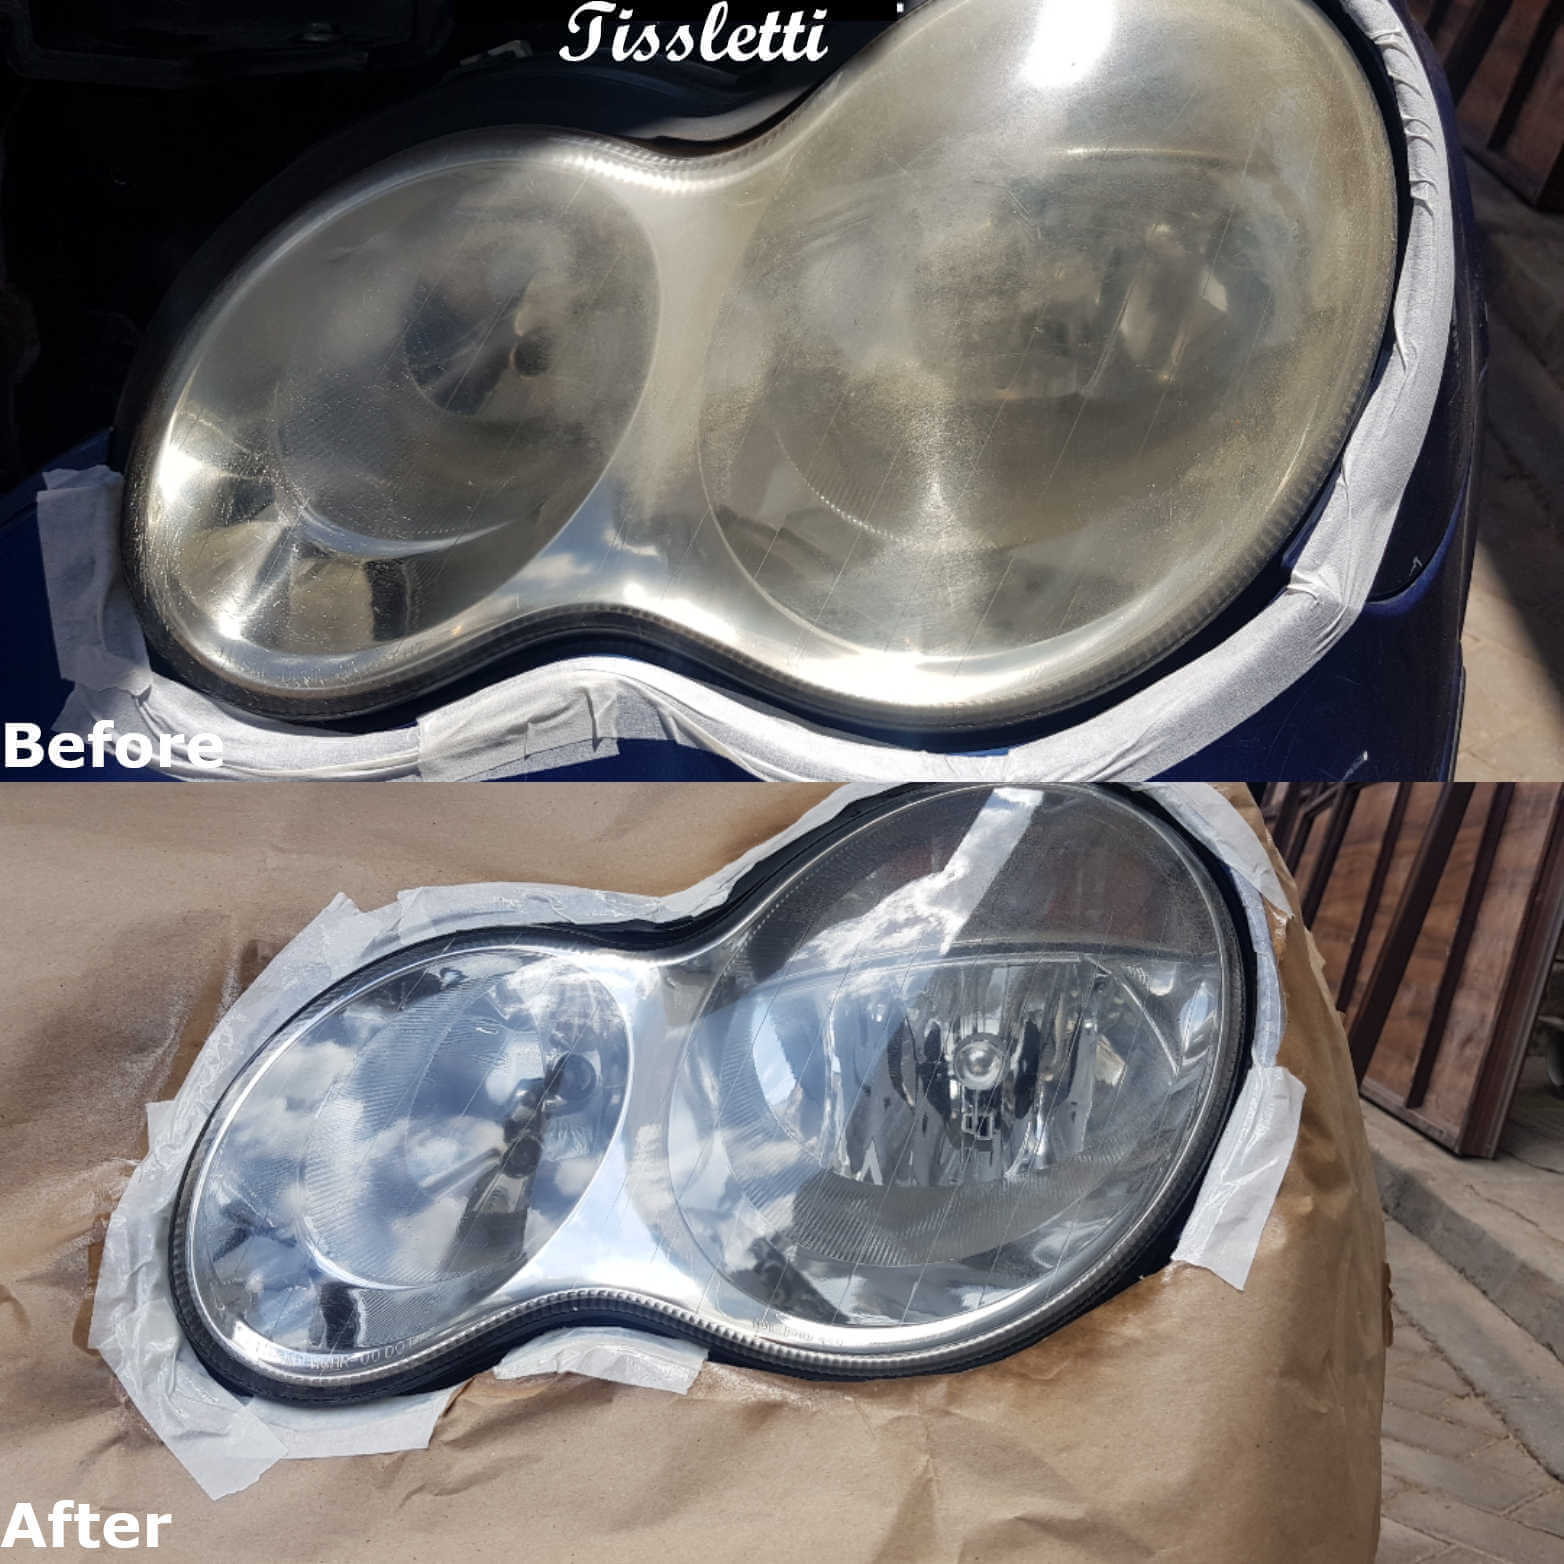
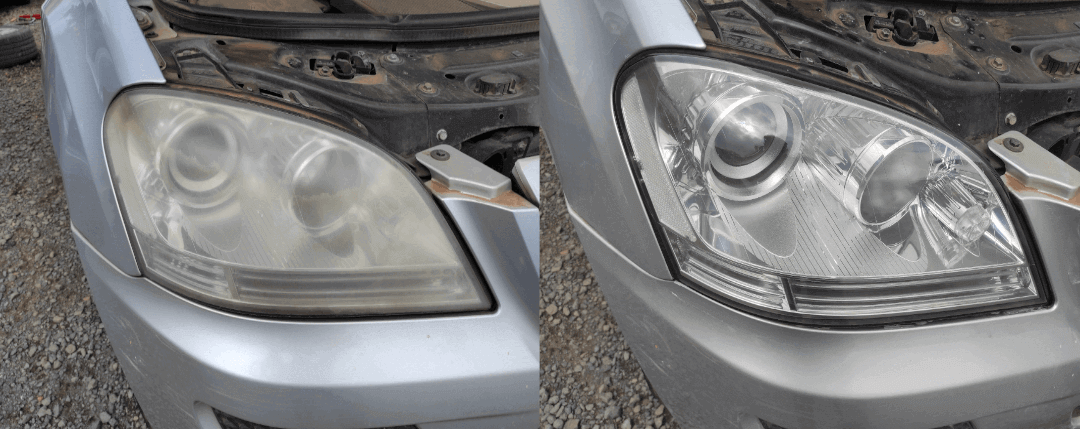
1. Improved Aesthetics: Over time, headlights can become cloudy, yellowed, or dull due to oxidation and environmental factors. Polishing them restores their clarity and shine, giving your vehicle a fresh and well-maintained appearance.
2. Enhanced Performance: Polished headlights provide better light output, increasing visibility and allowing you to see farther and more clearly on the road. This is especially important during nighttime driving or in challenging weather conditions.
3. Cost-Effective Solution: Instead of replacing the entire headlight assembly, which can be expensive, polishing is a cost-effective alternative. It can significantly improve the condition and performance of your headlights without breaking the bank.
4. Extended Headlight Lifespan: Regularly polishing your headlights helps protect them from further damage and prolongs their lifespan. By removing oxidation and other contaminants, you prevent deterioration and maintain the structural integrity of the headlight lenses.
In the next sections, we will delve deeper into the causes of headlight damage, the step-by-step process of polishing headlights, and tips to ensure a successful and long-lasting outcome.
Understanding Headlight Oxidation and Damage
In this section, we will delve into the causes of headlight oxidation and damage, the signs of deteriorating headlights, and the effects of cloudy and hazy headlights on visibility and safety. Understanding these aspects is essential for recognizing when your headlights require attention and taking appropriate measures to restore their condition.
Causes of Headlight Oxidation and Damage
Headlight oxidation and damage can occur due to various factors, including:
1. UV Exposure: Prolonged exposure to ultraviolet (UV) rays from the sun is a common cause of headlight damage. UV rays break down the protective layer on the headlight lenses, leading to oxidation and yellowing.
2. Environmental Contaminants: Road debris, chemicals, and pollutants can accumulate on the surface of headlights over time. These contaminants can cause scratches, pitting, and discoloration, further deteriorating the clarity of the lenses.
3. Moisture and Condensation: Improperly sealed headlights or cracked lenses can allow moisture to enter, leading to condensation inside the housing. This moisture can contribute to oxidation and foggy appearance of the headlights.
4. Age and Wear: Headlights naturally degrade with age and usage. Continuous exposure to the elements, such as rain, snow, and temperature fluctuations, can accelerate the deterioration process.
Signs of Deteriorating Headlights
To determine if your headlights are deteriorating, watch out for the following signs:
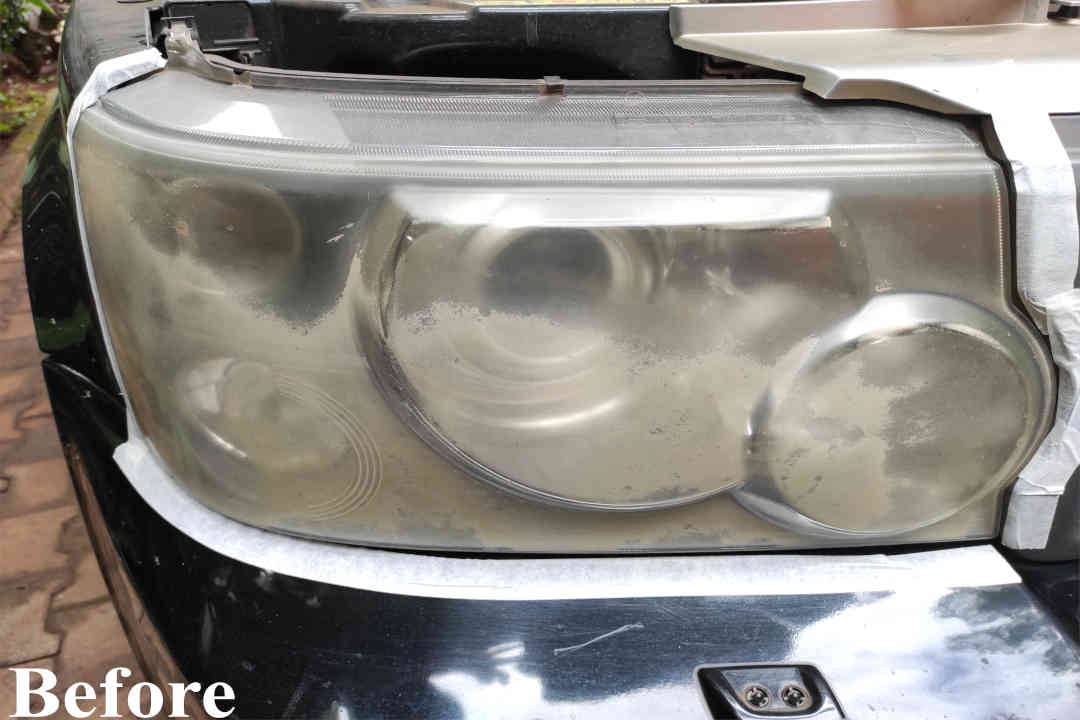
1. Yellowing or Discoloration: Oxidation and UV exposure can cause the headlights to turn yellow or develop a cloudy appearance. This discoloration reduces the brightness and effectiveness of the lights.
2. Foggy or Hazy Lenses: A buildup of moisture or contaminants can create a foggy or hazy appearance on the headlight lenses. This not only affects the aesthetics but also impairs the light output.
3. Diminished Light Output: Deteriorating headlights may emit significantly less light, resulting in reduced visibility during nighttime driving. You may notice a decrease in the range and clarity of the beam.
4. Scratches or Pitting: Physical damage, such as scratches or pitting on the headlight lenses, can occur over time. These imperfections scatter the light, causing a diffused and less focused beam.
Effects of Cloudy and Hazy Headlights on Visibility and Safety
Cloudy and hazy headlights can have several negative effects on visibility and safety:
1. Reduced Illumination: The cloudiness and haziness of headlights diminish the amount of light that reaches the road ahead. This can make it difficult to see obstacles, pedestrians, or road signs, increasing the risk of accidents.
2. Limited Peripheral Vision: Impaired headlights can narrow your field of vision, making it harder to perceive objects or movements in your peripheral vision. This can lead to delayed reactions or failure to spot hazards on the sides of the road.
3. Glare and Reflections: Cloudy headlights can produce glare or reflections, especially when light from the bulbs scatters within the damaged lenses. This glare can temporarily blind other drivers, compromising their safety as well.
4. Compromised Estimation of Distance: Diminished light output can make it challenging to accurately judge distances. This can affect your ability to gauge the proximity of other vehicles, pedestrians, or objects on the road.
By understanding the causes of headlight oxidation and damage, recognizing the signs of deteriorating headlights, and realizing the impact on visibility and safety, you can take proactive steps to restore and maintain the optimal condition of your headlights.
Preparing for Headlight Polishing
In this section, we will cover the essential steps to prepare for headlight polishing. Proper preparation ensures a smooth and successful polishing process while prioritizing safety. Let’s explore the necessary tools and materials, as well as important safety precautions and considerations.
Gathering the Necessary Tools and Materials
Before you begin the headlight polishing process, it’s important to gather the following tools and materials:
1. Headlight Restoration Kit: Invest in a quality headlight restoration kit that includes sandpaper or polishing pads, a polishing compound, and a UV protective coating. These kits are specifically designed to restore clarity to headlights and simplify the polishing process.
2. Clean Water: You will need clean water to rinse the headlights and clean the polishing pads or sandpaper during the process. Ensure you have a sufficient amount of water available.
3. Microfiber Cloths: Use soft and lint-free microfiber cloths to dry the headlights and wipe off any residue after polishing. Avoid using paper towels or rough fabrics that may scratch the surface.
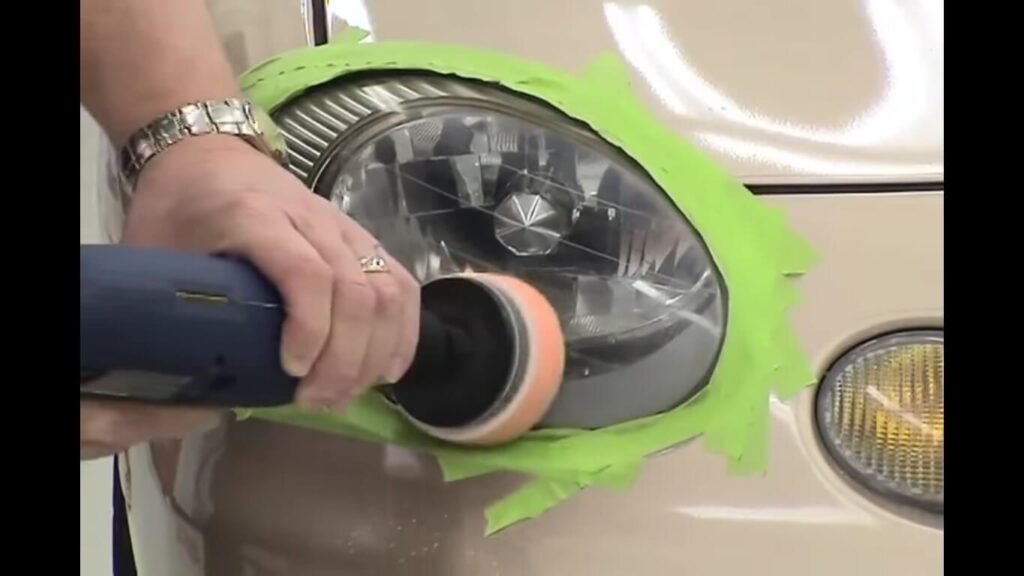
4. Masking Tape: It’s recommended to use masking tape to protect the surrounding areas of the headlights, such as the paintwork or trim. This helps prevent accidental damage or polishing compound transfer.
5. Spray Bottle: Fill a spray bottle with water to moisten the headlights during sanding and keep the surface lubricated. This helps prevent excessive heat and friction, ensuring a smoother sanding process.
6. Protective Gloves: Wear latex or nitrile gloves to protect your hands from the polishing compounds and any potential debris during the process. This helps maintain cleanliness and avoids skin irritation.
Safety Precautions and Considerations
While working on headlight polishing, it’s important to prioritize safety. Keep the following precautions and considerations in mind:
1. Eye Protection: Wear safety goggles or protective glasses to shield your eyes from any debris or polishing compound splatters. This protects your eyes from potential harm.
2. Well-Ventilated Area: Perform the headlight polishing in a well-ventilated area to avoid inhaling fumes from the polishing compounds. If working indoors, open windows or use a fan to ensure proper air circulation.
3. Avoid Excessive Pressure: Apply gentle and even pressure during the sanding and polishing process. Excessive force can damage the headlights or create uneven surfaces.
4. Follow Instructions: Read and follow the instructions provided with the headlight restoration kit carefully. Each kit may have specific guidelines or steps to achieve the best results.
5. Work in Sections: Divide the headlights into smaller sections and focus on one area at a time. This allows for better control and ensures thorough polishing without missing any spots.
6. Test in an Inconspicuous Area: Before applying any polishing compound or coating, test it on a small, inconspicuous area of the headlight to ensure compatibility and avoid any adverse reactions.
By gathering the necessary tools and materials, and adhering to safety precautions and considerations, you are well-prepared to embark on the headlight polishing process. Taking these initial steps sets the foundation for a successful restoration and helps maintain a safe working environment.
Step-by-Step Headlight Polishing Process
To effectively restore the clarity and brightness of your headlights, it’s important to follow a step-by-step polishing process. This section will guide you through each stage, starting with the initial step of cleaning the headlights.
Step 1: Cleaning the Headlights
Before you begin the actual polishing process, it’s essential to thoroughly clean the headlights to remove any dirt, grime, and debris that may have accumulated. This step prepares the surface for polishing and ensures optimal results. Here’s how you can clean your headlights:
1. Washing the Headlights with Soap and Water: Start by mixing a small amount of mild dish soap with water in a bucket or a spray bottle. Use a clean sponge or microfiber cloth soaked in the soapy water to gently scrub the headlights. Make sure to cover the entire headlight surface, including the edges and corners. Rinse the headlights with clean water to remove the soap residue.
2. Removing Dirt, Grime, and Debris: For more stubborn dirt or grime, you may need to use a specialized headlight cleaner or a plastic-safe cleaner. Apply the cleaner to a clean cloth or sponge and scrub the headlights in a circular motion. Pay close attention to areas with heavy buildup, such as the bottom edges or crevices. Rinse the headlights thoroughly with water to remove any remaining residue.
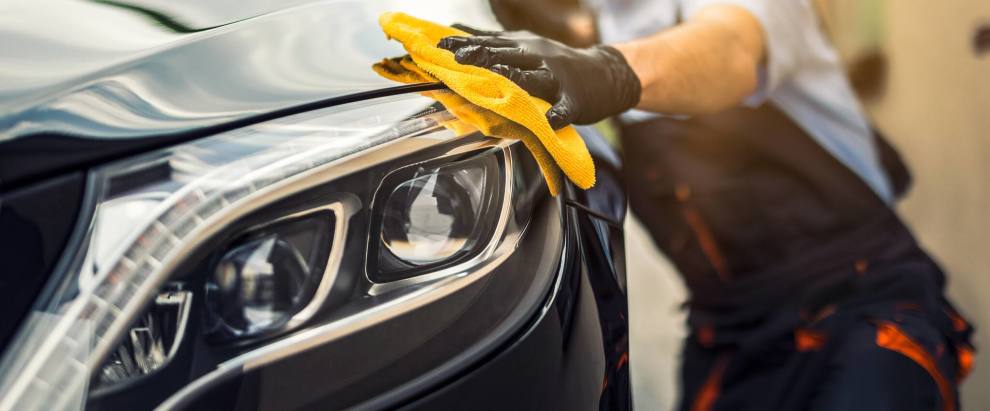
3. Drying the Headlights: After cleaning, use a dry microfiber cloth to carefully dry the headlights. This helps prevent water spots or streaks from forming on the surface. Ensure that the headlights are completely dry before proceeding to the next step.
Cleaning the headlights not only improves their appearance but also allows the subsequent polishing steps to work more effectively. By removing dirt, grime, and debris, you create a clean surface for the polishing compounds to make direct contact with the headlights. This enhances the overall polishing process and helps achieve better results.
In the next section, we will move on to the second step of the headlight polishing process: sanding the headlights to remove oxidation and restore clarity.
Step 2: Assessing the Headlight Condition
Before you begin polishing, take some time to carefully examine the headlights and assess their condition. This will allow you to understand the extent of oxidation and damage and choose the right method for restoration. Here are the key aspects to consider when assessing the headlight condition:
1. Identifying the Level of Oxidation and Damage: Start by inspecting the surface of the headlights for signs of oxidation, which may appear as a cloudy or yellowish haze. Look closely for any deep scratches, cracks, or other forms of damage that may require additional attention. Take note of the overall condition of the headlights, as this will guide your polishing approach.
2. Determining the Appropriate Approach for Polishing: Based on your assessment, you can determine the best method to restore your headlights. If the oxidation is minimal and there are no significant scratches or damage, a simple polishing process may be sufficient. However, if the headlights have severe oxidation or deep scratches, a more intensive restoration method, such as wet sanding or using a headlight restoration kit, might be necessary.
By carefully evaluating the condition of your headlights, you can tailor your polishing approach to meet their specific needs. This step ensures that you choose the right products and techniques to achieve the desired results. Skipping the assessment can lead to ineffective polishing or even potential damage to the headlights.
Once you have assessed the condition of your headlights and determined the appropriate approach for polishing, you can proceed to the next step: preparing the headlights for restoration.
Step 3: Wet-sanding the Headlights
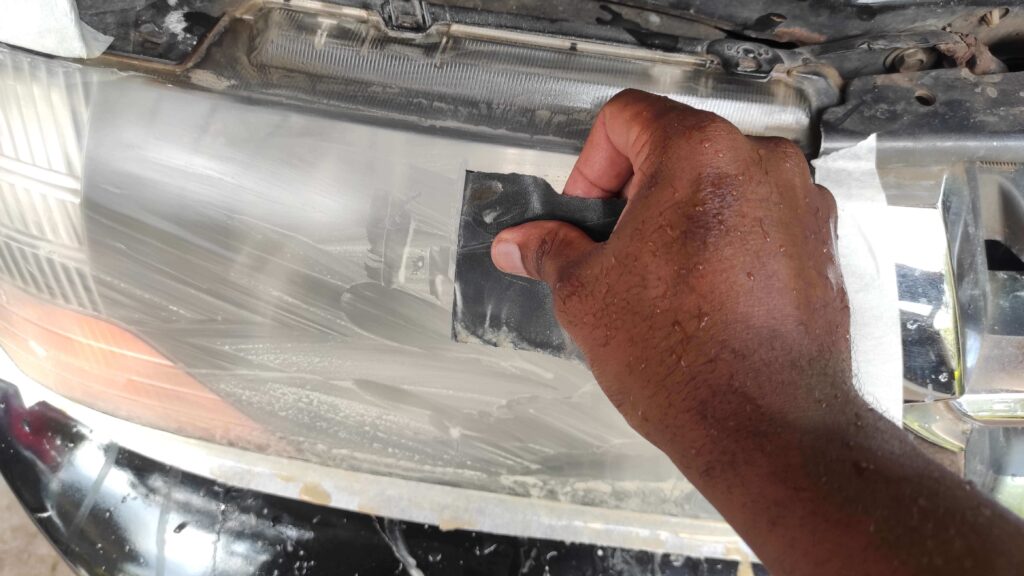
Wet sanding requires careful attention and precision to achieve the desired results. Follow these key points when performing the wet sanding process:
1. Selecting the Right Sandpaper Grits: Start by choosing the appropriate sandpaper grits for the wet sanding process. Typically, you’ll need a range of grits, starting with a coarser grit to remove the oxidation and scratches and gradually progressing to finer grits for a smoother finish. Commonly used sandpaper grits for wet sanding headlights include 800, 1000, 1500, and 2000 grit. Ensure you have an adequate supply of each grit before you begin.
2. Wet Sanding Techniques for Optimal Results: Wet sanding requires a consistent flow of water to lubricate the sandpaper and prevent it from clogging. Follow these steps for effective wet sanding:
- Prepare a Water Source: Fill a bucket or container with clean water and keep it nearby throughout the wet sanding process. This will allow you to continually wet the sandpaper and rinse off debris.
- Soak the Sandpaper: Before starting, soak the sandpaper in water for a few minutes to soften it. This will make it more pliable and easier to work with.
- Work in Sections: Begin wet sanding one section of the headlight at a time. Apply light pressure and move the sandpaper in a circular or back-and-forth motion. Keep the surface wet by frequently dipping the sandpaper in the water.
- Check your progress: Periodically wipe away the water and debris from the headlight surface to assess your progress. If necessary, switch to a finer grit of sandpaper and continue sanding until the desired level of clarity is achieved.
- Rinse and Dry: Once you’ve completed the wet sanding process, thoroughly rinse the headlights with water to remove any remaining debris. Dry them with a clean microfiber cloth.
Remember, wet sanding is a meticulous process that requires patience and precision. Take your time and ensure that you sand evenly and consistently across the entire headlight surface. This will help you achieve a smooth and uniform result.
Once you have completed the wet sanding process, you can proceed to the next step: applying a polishing compound to further enhance the clarity and shine of your headlights.
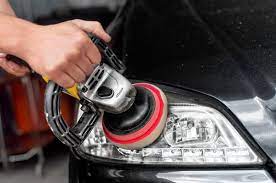
Step 4: Applying the Headlight Polish
Follow these steps to apply the headlight polish and bring back the shine to your headlights:
1. Choosing the suitable polish for the headlights: There are various headlight polishes available in the market, each with its own unique formulation and purpose. Consider the following factors when selecting a polish:
- Compatibility: Ensure the polish you choose is compatible with the type of headlight material you have. Some polishes are designed specifically for plastic headlights, while others may work well on glass or composite materials.
- UV Protection: Look for a headlight polish that offers UV protection. This will help prevent future oxidation and yellowing caused by exposure to sunlight.
- Abrasive Level: Depending on the level of oxidation and damage, you may need a more abrasive polish to remove stubborn imperfections. However, be cautious not to use a polish that is too abrasive, as it may damage the headlights further.
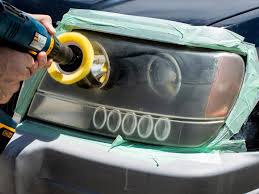
2. Applying and Buffing the Polish for Restoration: Once you have selected the appropriate polish, follow these steps for application:
- Clean the Headlights: Before applying the polish, ensure that the headlights are clean and free from any dirt or debris. Use a mild detergent and water to wash the headlights, and dry them thoroughly with a clean microfiber cloth.
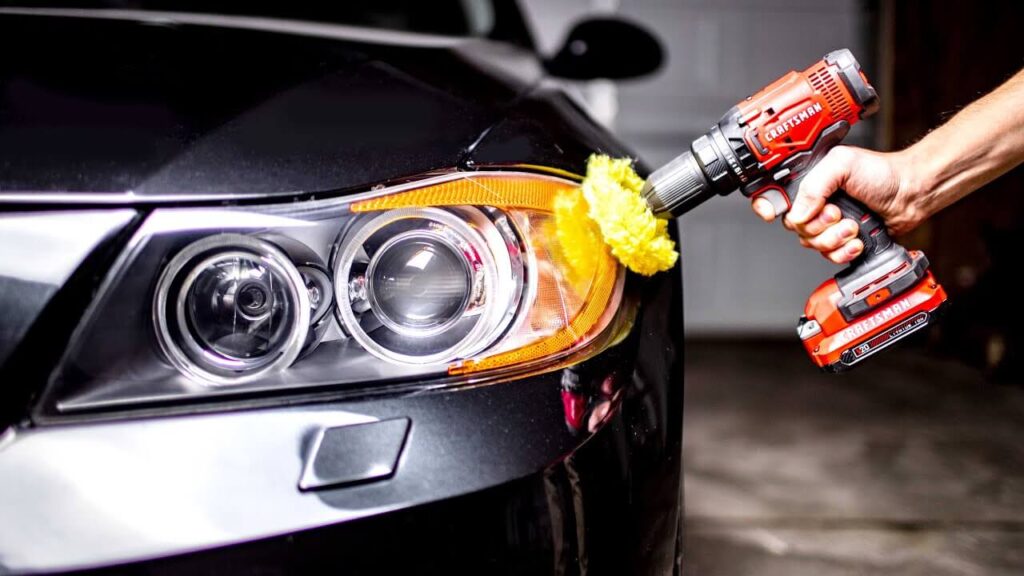
- Apply the polish: Squeeze a small amount of polish onto a clean, lint-free cloth or applicator pad. Start applying the polish in circular motions, working it into the headlight surface. Apply even pressure and cover the entire headlight area.
- Buff the Polish: After applying the polish, use a separate clean cloth or buffing pad to buff the headlights. Buff in circular motions until the polish is evenly distributed and a glossy shine begins to appear. Continue buffing until you achieve the desired level of clarity and shine.
- Inspect the Results: Once you have finished buffing, step back and inspect the headlights for any remaining imperfections. If necessary, you can repeat the application and buffing process to further improve the results.
- Wipe-Off Excess Polish: After achieving the desired results, use a clean cloth to wipe off any excess polish from the headlights. This will ensure a clean and polished finish.
By following these steps, you can effectively apply the headlight polish and restore the appearance of your headlights. The polish will help remove fine scratches, restore clarity, and provide a protective barrier against future damage.
Once you have completed the polishing process, the final step is to apply a protective sealant or coating to prolong the longevity of your headlights’ restored appearance.
Step 5: Finishing Touches and Protection
In the final step of the headlight polishing process, we will focus on adding finishing touches and implementing measures to protect the newly polished headlights. By applying a protective sealant or coating and following proper maintenance practices, you can prolong the longevity of your headlights’ restored appearance.
Applying a Protective Sealant or Coating
To safeguard your headlights against future oxidation and damage, it is recommended to apply a protective sealant or coating. Here’s how you can do it:
1. Choose a High-Quality Sealant or Coating: Look for a sealant or coating specifically designed for automotive headlights. Opt for a product that offers UV protection and is compatible with the material of your headlights.
2. Clean the Headlights: Ensure that the headlights are clean and free from any residual polish or debris. Use a mild automotive soap and water to wash the headlights, and dry them thoroughly before applying the sealant or coating.
3. Apply the sealant or coating: Follow the manufacturer’s instructions for applying the sealant or coating. Generally, it involves applying a thin layer of the product to the headlight surface using a clean cloth or applicator pad. Work in small sections and ensure even coverage. Allow the sealant or coating to cure as per the recommended time frame.
4. Buff and polish: After the sealant or coating has cured, gently buff the headlights using a clean microfiber cloth to enhance the shine and clarity. This step will also help to remove any excess product and ensure a smooth, even finish.
Maintaining and Preserving the Polished Headlights
To maintain the polished appearance of your headlights and ensure their longevity, consider the following tips:
1. Regular Cleaning: Regularly clean your headlights with mild automotive soap and water. Avoid using harsh chemicals or abrasive materials that can damage the protective sealant or coating.
2. Avoiding Direct Sunlight: Whenever possible, park your vehicle in shaded areas or use a car cover to minimize direct exposure to sunlight. UV rays can cause yellowing and deterioration of the headlights over time.
3. Avoiding Harsh Chemicals: When cleaning your vehicle, be cautious of using harsh chemicals near the headlights. Certain chemicals, such as strong solvents or abrasive cleaners, can degrade the protective sealant or coating.
4. Periodic Reapplication: Over time, the protective sealant or coating may wear off. Depending on the specific product, it is recommended to reapply the sealant or coating every few months or as per the manufacturer’s instructions.
By following these steps and practicing regular maintenance, you can extend the lifespan of your polished headlights and enjoy the improved visibility and aesthetics they provide.
In the next section, we will address common FAQs related to headlight polishing and provide expert answers to help you further enhance your understanding of the topic.
Tips and Best Practices for Headlight Polishing
To ensure a successful headlight polishing process and achieve optimal results, it’s essential to follow some tips and best practices. In this section, we will provide you with valuable insights to help you enhance your headlight polishing technique and avoid common mistakes.
Tips to Achieve Better Results
1. Thorough Cleaning: Before beginning the headlight polishing process, make sure to clean the headlights thoroughly. Remove any dirt, grime, or debris using a mild automotive soap and water. Clean headlights provide a better surface for the polishing products to work effectively.
2. Proper Surface Preparation: Ensure that the headlight surface is dry and free of moisture before applying any polish or restoration products. Moisture can interfere with the effectiveness of the polishing process.
3. Use Suitable Tools and Materials: Invest in high-quality polishing kits that include the necessary tools, such as sandpaper, polish compounds, and microfiber cloths. Using the right tools will contribute to achieving better results and prevent any damage to the headlights.
4. Follow the Instructions: Read and follow the instructions provided by the manufacturer of the polishing products. Each product may have specific guidelines and application techniques for optimal results.
5. Apply Even Pressure: When polishing the headlights, apply even pressure to ensure a consistent and uniform result. Avoid applying excessive force, as it may lead to uneven surfaces or even cause damage to the headlights.
6. Work in Small Sections: Divide the headlight surface into smaller sections and focus on one section at a time. This approach allows you to have better control over the polishing process and ensures thorough coverage.
Common Mistakes to Avoid During the Polishing Process
1. Skipping the Cleaning Step: Neglecting the initial cleaning step can significantly impact the effectiveness of the polishing process. Always start by cleaning the headlights to remove any surface contaminants.
2. Using the Wrong Grit Sandpaper: Using the wrong grit sandpaper can lead to unintended scratches or uneven surfaces on the headlights. Make sure to select the appropriate grit for the level of oxidation and damage present on the headlights.
3. Not Testing in an Inconspicuous Area: Before applying any polish or restoration product to the entire headlight surface, test it in a small, inconspicuous area. This step allows you to ensure compatibility with your headlights and avoid any adverse reactions.
4. Overusing Polishing Products: Excessive use of polish compounds or abrasive materials can remove too much of the headlight’s protective coating or plastic, resulting in a hazy or damaged appearance. Follow the recommended instructions and avoid overpolishing.
5. Not Applying a Protective Sealant: After polishing the headlights, it’s crucial to apply a protective sealant to prevent future oxidation and damage. Skipping this step can shorten the lifespan of your polished headlights.
By implementing these tips and avoiding common mistakes, you can enhance your headlight polishing results and enjoy long-lasting clarity and brightness.
Alternative Methods for Headlight Restoration
When it comes to headlight restoration, there are alternative methods and approaches you can explore. In this section, we will discuss different techniques and products that you can consider for restoring your headlights. We will also compare do-it-yourself (DIY) methods with professional headlight restoration services to help you make an informed decision.
Exploring Alternative Techniques or Products
1. Headlight Restoration Kit: Headlight restoration kits are readily available in the market and often come with step-by-step instructions and the necessary tools and materials. These kits typically include abrasive compounds, sandpaper, and sealants. They offer a convenient solution for DIY enthusiasts who prefer to restore their headlights themselves.
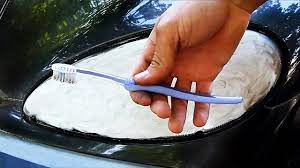
2. Toothpaste Method: The toothpaste method is a popular DIY technique for headlight restoration. It involves applying toothpaste, preferably a non-gel and non-whitening formula, to the headlights and gently rubbing it in a circular motion using a soft cloth. While this method may improve the appearance of mildly hazy headlights, it may not be as effective for severe oxidation or damage.
3. Baking Soda and Vinegar: Another DIY approach involves creating a paste using baking soda and vinegar. This mixture is applied to the headlights and gently rubbed in using a soft cloth. Baking soda is known for its abrasive properties, while vinegar helps remove dirt and grime. However, like the toothpaste method, this technique may yield limited results for heavily oxidized headlights.
4. Headlight Restoration Services: If you prefer a professional touch or have severely deteriorated headlights, you may opt for headlight restoration services. Automotive detailing shops or specialized headlight restoration professionals typically provide these services. They have the expertise and professional-grade tools and products to restore your headlights to a like-new condition.
Comparing DIY Methods vs. Professional Services
DIY Methods
Cost-effective: DIY methods are generally more cost-effective compared to professional services.
- Limited Results: While DIY methods may improve the appearance of mildly hazy headlights, they may not be as effective for severe oxidation or damage.
- Time and Effort: DIY methods require time, effort, and patience. You need to gather the necessary tools and materials and follow the instructions carefully.
- Variable Success: The success of DIY methods depends on the level of oxidation, the technique used, and the quality of the products employed.
Professional Services
Expertise and Experience: Professional headlight restoration services have the knowledge, experience, and specialized tools to handle different levels of oxidation and damage effectively.
- Long-Lasting Results: Professional services often provide long-lasting results, as they use professional-grade products and techniques.
- Convenience: Choosing professional services saves you time and effort since trained technicians perform the restoration.
- Cost Consideration: Professional services may be relatively more expensive than DIY methods, especially for severe oxidation or damage.
When deciding between DIY methods and professional services, consider factors such as the condition of your headlights, your budget, and the desired results. DIY methods can be suitable for mild oxidation, while professional services are recommended for heavily deteriorated headlights or for those seeking professional expertise and long-lasting results.
In the next section, we will address frequently asked questions about headlight restoration to provide further clarity and guidance.
Frequently Asked Questions (FAQs)
In this section, we will address some frequently asked questions about headlight polishing to provide you with the answers and information you need.
By addressing these frequently asked questions, we hope to provide you with a better understanding of headlight polishing and help you make informed decisions regarding the restoration of your headlights
Conclusion
In this article, we have explored the process of headlight polishing and its significance in maintaining clear and safe headlights for your vehicle. Let’s recap the key points covered and conclude with some final thoughts on the importance of maintaining clear headlights.
Recap of the Headlight Polishing Process
Throughout the article, we have discussed the step-by-step process of headlight polishing, which includes the following:
1. Understanding Headlight Oxidation and Damage: We learned about the causes of headlight oxidation and damage, the signs of deteriorating headlights, and the effects of cloudy and hazy headlights on visibility and safety.
2. Preparing for Headlight Polishing: We discussed the importance of gathering the necessary tools and materials for the polishing process, as well as the safety precautions and considerations to ensure a smooth and secure experience.
3. Step-by-Step Headlight Polishing Process: We covered the cleaning of headlights to remove dirt and debris, assessing the headlight condition to determine the appropriate approach for polishing, wet sanding techniques for optimal results, applying the suitable headlight polish, and the importance of finishing touches and protection.
4. Tips and Best Practices for Headlight Polishing: We provided useful tips to achieve better results during the polishing process and highlighted common mistakes to avoid for a successful restoration.
5. Alternative Methods for Headlight Restoration: We explored alternative techniques or products for headlight restoration and compared DIY methods versus professional services.
6. Frequently Asked Questions (FAQs): We addressed common questions about headlight polishing, including the duration of the results, the use of toothpaste, the effectiveness of restoration kits, the need for headlight removal, and the limitations of polishing for cracked or broken lenses.
Final Thoughts on the Importance of Maintaining Clear Headlights
Having clear and bright headlights is not only aesthetically pleasing but also crucial for your safety on the road. Deteriorating headlights can reduce visibility, making it difficult to see the road ahead, obstacles, or other vehicles. By regularly maintaining and polishing your headlights, you can enhance their performance and ensure a safer driving experience, especially during nighttime or adverse weather conditions.
Remember to follow the proper techniques and use suitable products for headlight polishing. If you’re unsure or dealing with severe oxidation or damage, it’s advisable to seek professional assistance for the best results.
By taking the time to care for your headlights, you not only improve the appearance of your vehicle but also prioritize your safety and the safety of others on the road.
Keep your headlights clear, bright, and shining, and enjoy the benefits of improved visibility and a more confident driving experience.