Table of Contents
Introduction
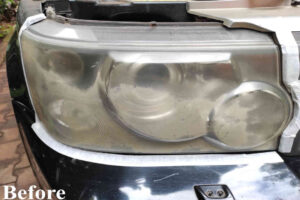
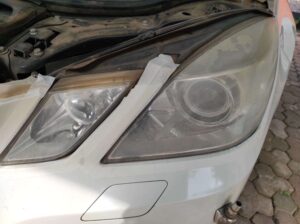
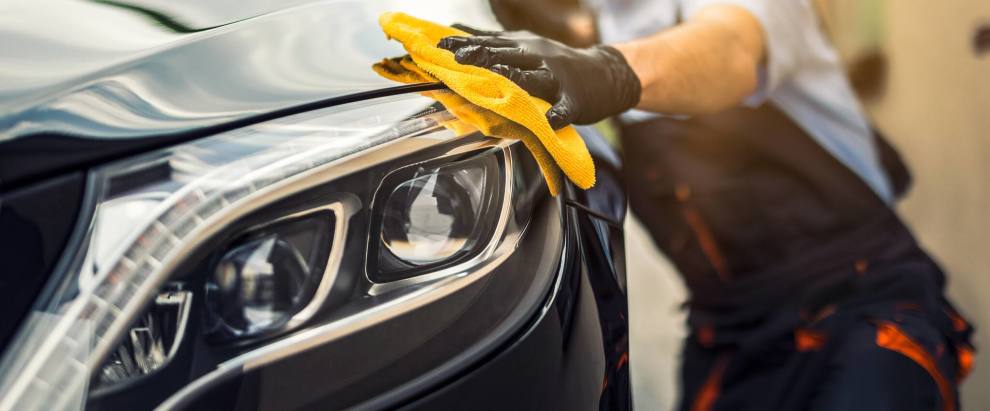
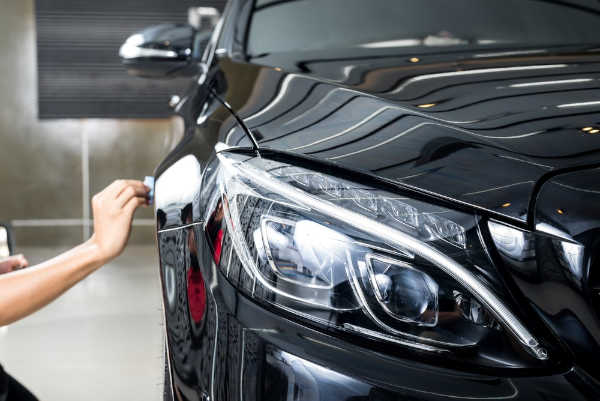
Headlights play a crucial role in ensuring safety and visibility while driving. However, over time, they can become faded, cloudy, or yellowed due to various factors such as UV exposure, environmental elements, and everyday wear and tear. These issues not only diminish the aesthetic appeal of your vehicle but also compromise the effectiveness of your headlights, potentially putting you at risk on the road.
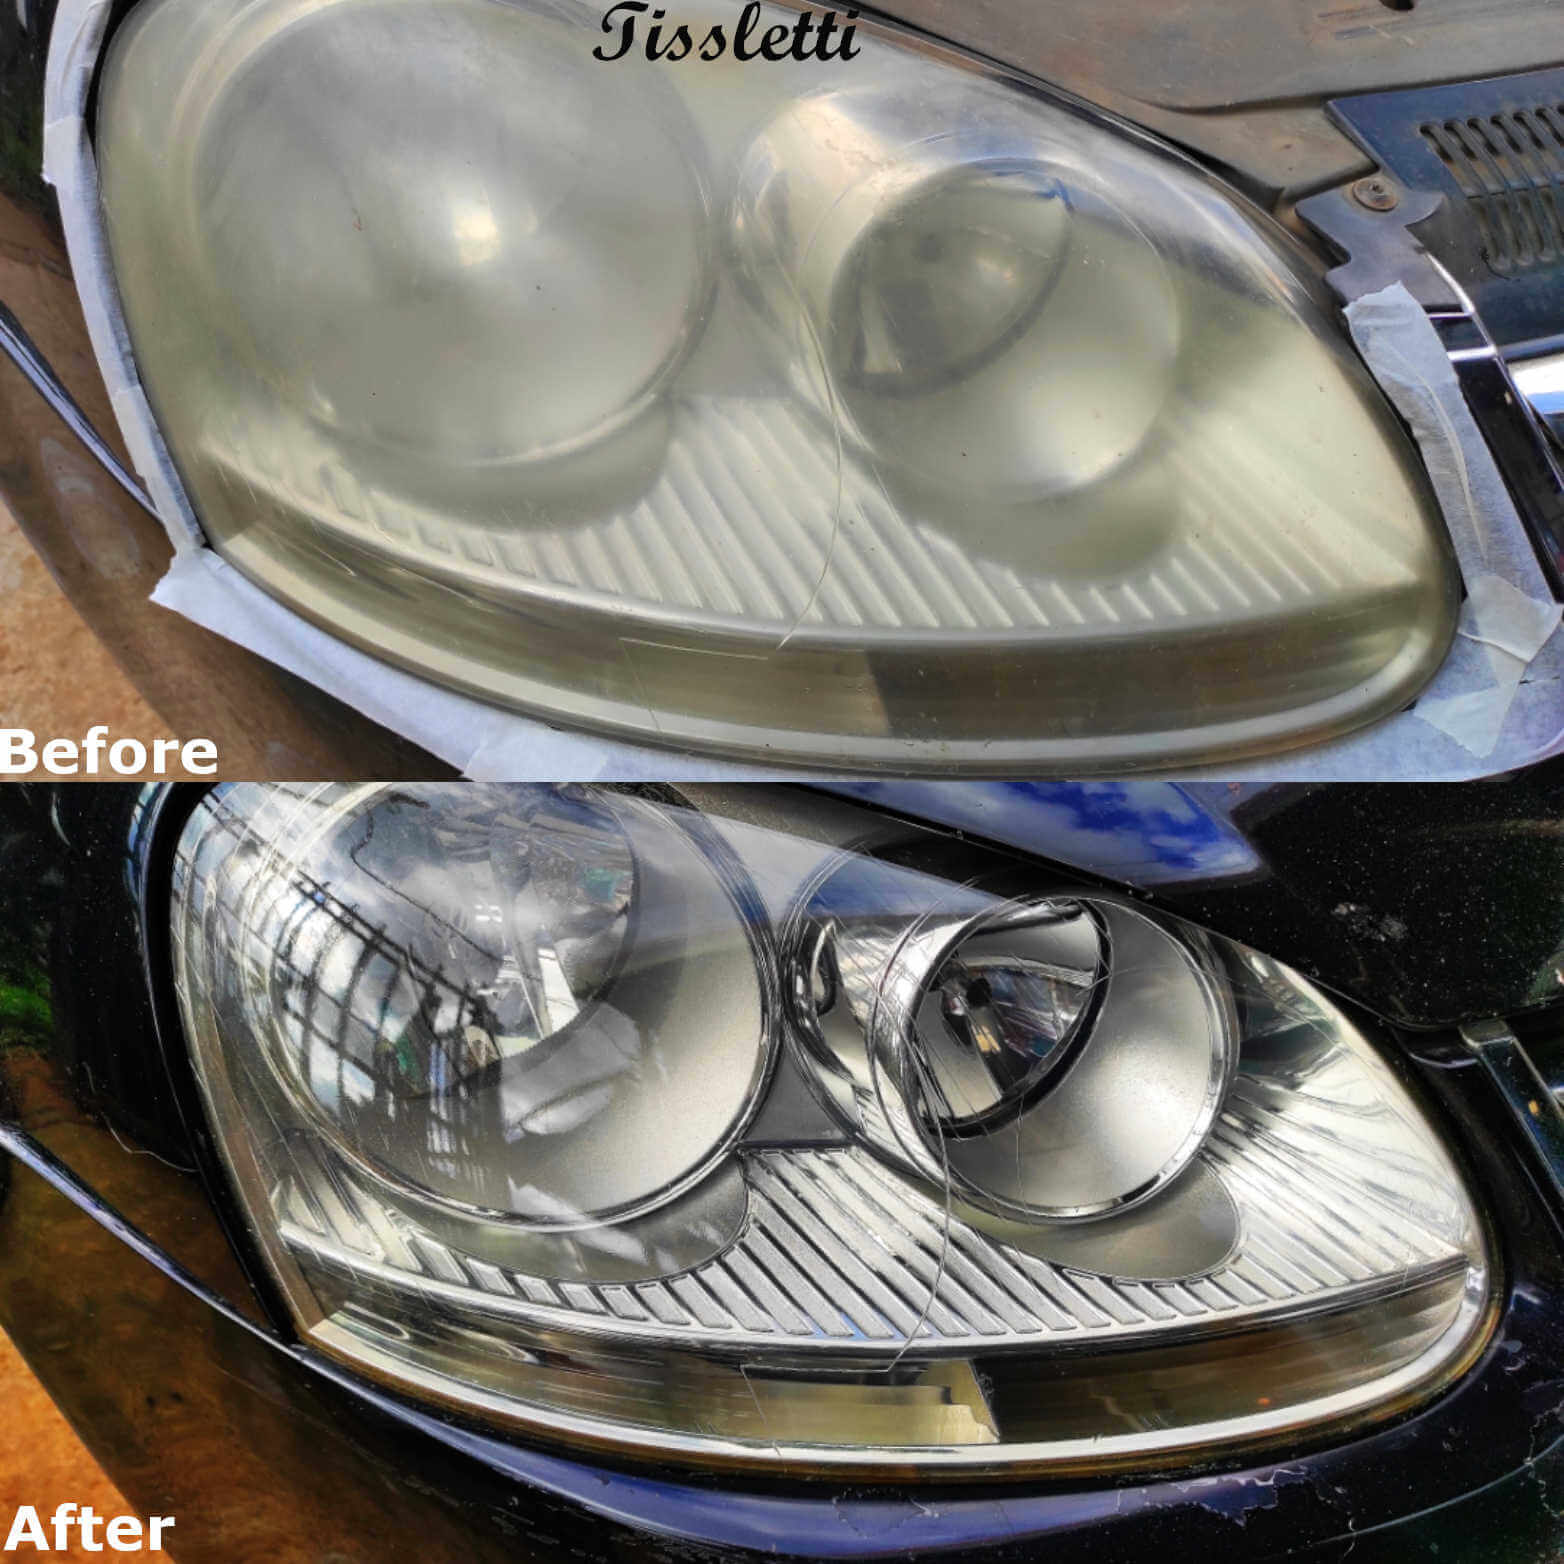
Fortunately, headlight restoration offers a cost-effective solution to restore clarity and brightness to your headlights. Instead of replacing the entire headlight assembly, restoration methods can effectively remove oxidation, dirt, and other contaminants from the headlight surface, revitalizing their performance and enhancing their appearance. In this comprehensive guide, we will explore the various techniques and steps involved in restoring your headlights to their former glory.
Understanding Headlight Degradation
Headlights are an essential component of any vehicle, providing illumination and ensuring safety during nighttime driving and adverse weather conditions. However, headlights are susceptible to degradation over time, which can compromise their performance and reduce visibility on the road. In this section, we will explore the factors that contribute to headlight degradation, the signs to look out for, and the impact of degraded headlights on visibility and safety.
Factors Contributing to Headlight Degradation
1. UV Exposure: One of the primary factors that contribute to headlight degradation is prolonged exposure to ultraviolet (UV) rays from the sun. Over time, the UV rays break down the protective coating on the headlight lens, causing it to become hazy, discolored, and prone to oxidation.
2. Environmental Elements: In addition to UV exposure, environmental elements such as road debris, moisture, chemicals, and pollutants can accelerate the degradation process. Dust, dirt, and contaminants can accumulate on the headlight surface, further diminishing its clarity and brightness.
Signs of Degraded Headlights
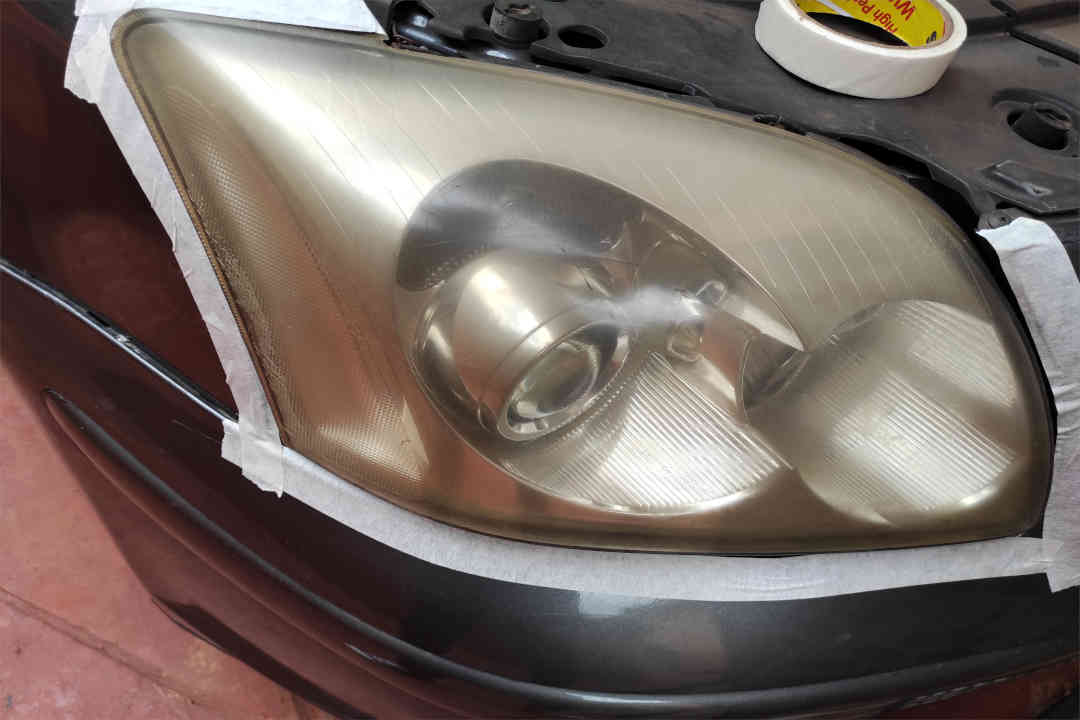
1. Cloudiness: One of the most common signs of degraded headlights is the appearance of cloudiness or haziness on the lens. The headlight may lose its transparency and develop a frosted or yellowed appearance, reducing the amount of light emitted.
2. Yellowing: Another noticeable sign is the yellowing of the headlight lens. This discoloration can occur due to the breakdown of the protective coating and the accumulation of oxidation over time. Yellowed headlights not only look unsightly but also emit a weaker and less focused beam of light.
3. Reduced Brightness: Degraded headlights often exhibit reduced brightness compared to their original state. The light output may become dimmer and less focused, affecting visibility during nighttime driving and making it challenging for other drivers to see your vehicle.
Impact of Degraded Headlights on Visibility and Safety
1. Compromised Visibility: Diminished clarity, cloudiness, and reduced brightness significantly impact your visibility on the road, especially in low-light conditions. This can make it difficult to see obstacles, pedestrians, or road signs ahead, increasing the risk of accidents.
2. Reduced Safety: Deteriorated headlights can compromise your safety and the safety of other road users. Clear visibility is essential for detecting hazards, judging distances, and reacting promptly. With degraded headlights, your ability to anticipate and respond to potential dangers is compromised.
3. Inadequate Light Projection: When headlights are degraded, their ability to project a focused and even beam of light is diminished. This can result in uneven illumination and dark spots on the road, making it harder to navigate and increasing the likelihood of collisions.
Understanding the factors that contribute to headlight degradation, recognizing the signs of degraded headlights, and being aware of the impact on visibility and safety will help you appreciate the importance of headlight restoration. In the next section, we will delve into various headlight restoration methods, discussing the pros and cons of each approach to help you choose the most suitable option for restoring the clarity and performance of your headlights. Stay tuned!
Types of Headlight Restoration Methods
When it comes to restoring headlights, there are various methods available that cater to different preferences and budgets. In this section, we will explore some popular do-it-yourself (DIY) home remedies for headlight restoration. These methods are cost-effective alternatives to professional services and can yield satisfactory results with the right approach.
DIY Home Remedies
1. The Toothpaste Method: One of the most commonly recommended DIY methods for headlight restoration is using toothpaste. While it may sound surprising, toothpaste can act as a mild abrasive and help remove the outer layer of oxidation from the headlights. Here’s a step-by-step process to follow:
- Start by thoroughly cleaning the headlights with soap and water to remove any dirt or debris.
- Apply a small amount of toothpaste (preferably non-gel) directly onto a clean, damp cloth or sponge.
- Gently rub the toothpaste onto the headlight surface in circular motions for several minutes.
- Rinse the headlights with clean water and inspect the results. Repeat the process if necessary.
- Finish by applying a UV-resistant sealant or car wax to protect the headlights from future damage.
The toothpaste method is generally considered effective for mild to moderate oxidation. However, it may not produce significant results for heavily damaged or severely yellowed headlights.
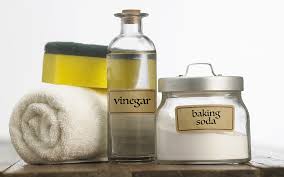
2. Baking Soda and Vinegar Method: Another DIY option for headlight restoration involves using a mixture of baking soda and vinegar. Baking soda acts as a gentle abrasive, while vinegar helps dissolve grime and stubborn stains. Here’s how to proceed:
- Prepare a paste by mixing baking soda with a small amount of vinegar to create a thick consistency.
- Apply the paste to the headlights, ensuring complete coverage.
- Let the paste sit on the headlights for about 10-15 minutes.
- Scrub the headlights using a clean cloth or sponge, applying moderate pressure.
- Rinse the headlights with water and assess the results. Repeat the process if necessary.
- Apply a protective sealant or wax to maintain the restored clarity and prevent future damage.
The baking soda and vinegar method can be effective for moderate oxidation and yellowing. It is important to note that this method may not provide significant improvement for headlights with extensive damage.
3. Lemon Juice and Hydrogen Peroxide: Lemon juice and hydrogen peroxide are natural ingredients that can be combined to create a DIY headlight restoration solution. Lemon juice contains citric acid, which helps remove oxidation, while hydrogen peroxide acts as a mild bleaching agent. Follow these steps for application:
Mix equal parts of lemon juice and hydrogen peroxide in a spray bottle or bowl.
- Spray or apply the mixture onto the headlights, ensuring even coverage.
- Let it sit for approximately 10 to15 minutes to allow the solution to work on the oxidation.
- Scrub the headlights using a soft brush or sponge to remove the loosened debris.
- Rinse the headlights thoroughly with water and inspect the results. Repeat if necessary.
- Apply a protective sealant or wax to prolong the restoration and shield against future damage.
The lemon juice and hydrogen peroxide method can be effective for mild oxidation and discoloration. However, it may require multiple applications or additional steps for more severe headlight damage.
Remember, while these DIY home remedies can provide a cost-effective solution for headlight restoration, their effectiveness may vary depending on the severity of the damage and the specific conditions of the headlights. If you encounter significant oxidation, deep scratches, or unsatisfactory results with these methods, it may be worth considering professional headlight restoration services for a more comprehensive and long-lasting restoration.
Commercial Restoration Kits
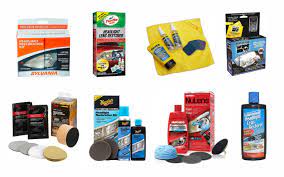
1. Overview of Commercial Kits: Commercial headlight restoration kits are a convenient and effective solution for restoring the clarity and functionality of headlights. These kits are readily available in the market and are designed to provide all the necessary products and tools for the restoration process. They are suitable for both professionals and DIY enthusiasts who want to achieve professional results.
Specific Products and Tools: Commercial restoration kits typically include a range of specific products and tools that are tailored to the headlight restoration process. These may include abrasive compounds, polishing pads, sandpaper, cleaning solutions, and protective coatings. Each component plays a crucial role in removing oxidation, scratches, and yellowing from the headlight surface, as well as providing long-lasting protection.
Step-by-Step Instructions: One of the key advantages of commercial restoration kits is that they come with detailed step-by-step instructions. These instructions guide users through the entire restoration process, ensuring that they follow the correct techniques and achieve optimal results. The instructions may include information on how to prepare the headlights, which products to use at each stage, and how to apply them effectively.
2. Popular Brands and Their Features: When it comes to choosing a commercial restoration kit, it’s important to explore reputable brands that offer high-quality products and reliable performance. Here are a few popular brands and their unique features:
Meguiar’s: Meguiar’s is a well-known brand in the automotive industry, offering a range of headlight restoration kits. Their kits often include specialized compounds that effectively remove oxidation and yellowing from headlights. Meguiar’s also provides clear protective coatings that help maintain the clarity and shine of the restored headlights over time.
3M: 3M is another reputable brand that offers comprehensive headlight restoration kits. Their kits feature innovative products that remove scratches, restore clarity, and provide UV protection. 3M is known for its high-quality sanding discs, polishing compounds, and finishing pads, which deliver professional-grade results.
Turtle Wax: Turtle Wax is a trusted brand that offers user-friendly headlight restoration kits suitable for DIY enthusiasts. Their kits often include all-in-one solutions that combine cleaning, polishing, and protection in a single product. Turtle Wax focuses on providing easy-to-use products that deliver excellent results without the need for advanced skills or equipment.
Remember that each brand may have its own unique formulation and additional features. It’s essential to consider your specific needs and preferences when choosing a commercial restoration kit for your headlights.
By opting for a commercial restoration kit, you can save time and effort while achieving professional-quality results. These kits provide all the necessary tools and products, along with step-by-step instructions, making headlight restoration a straightforward and satisfying process.
Professional Headlight Restoration Services
When it comes to restoring headlights, professional services offer a range of advantages over DIY methods. These services are provided by experts who have the knowledge, experience, and specialized tools to deliver exceptional results. In this section, we will explore the benefits of professional services, the process followed by professionals for headlight restoration, and important considerations to keep in mind when choosing a professional service provider.
Benefits of Professional Services over DIY Methods
1. Expertise and experience: Professional headlight restoration technicians are trained professionals who specialize in restoring headlights. They have extensive knowledge and experience in dealing with various types of headlights and the issues they may face, such as oxidation, yellowing, and scratches. Their expertise allows them to assess the condition of headlights accurately and determine the most suitable restoration techniques.
2. Advanced Tools and Techniques: Professionals use advanced tools and techniques that are not readily available to the average consumer. They have access to specialized equipment and products specifically designed for headlight restoration. These tools enable them to achieve superior results by effectively removing oxidation, restoring clarity, and improving the overall appearance of headlights.
3. Long-Lasting Results: Professional services often provide long-lasting results compared to DIY methods. Professionals use high-quality products and protective coatings that are designed to withstand environmental factors and prevent future deterioration. This ensures that the restored headlights maintain their clarity and functionality for an extended period.
4. Time and convenience: Opting for professional services saves you time and effort. Headlight restoration can be a time-consuming process, especially if you’re unfamiliar with the techniques involved. Professionals have the necessary skills and efficiency to complete the restoration quickly and efficiently, allowing you to focus on other tasks or enjoy your vehicle sooner.
Headlight Restoration Process by Professionals
1. Evaluation and Preparation: Professionals begin by evaluating the condition of the headlights. They assess the extent of damage, including scratches, oxidation, and yellowing. Based on the evaluation, they determine the appropriate restoration techniques and products to use. The headlights are thoroughly cleaned and prepared for the restoration process.
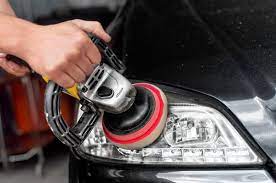
2. Correction and Restoration: Professionals use various methods such as wet sanding, machine polishing, and specialized compounds to remove imperfections and restore clarity to the headlights. They carefully follow a step-by-step process to ensure consistent and even results. The restoration techniques may vary depending on the specific needs of the headlights and the professional’s expertise.
3. Protective Coating Application: After restoring the headlights, professionals apply a protective coating to enhance their durability and resistance to environmental factors. The coating acts as a barrier, shielding the headlights from UV rays, dirt, and other contaminants that can cause deterioration over time. This step helps to maintain the restored headlights’ appearance and extends their lifespan.
Considerations When Choosing a Professional Service Provider
1. Experience and Reputation: Look for a service provider with a proven track record and positive customer reviews. Experience indicates their level of expertise and the quality of their work. A reputable service provider is more likely to deliver satisfactory results.
2. Certifications and Training: Check if the service provider’s technicians have relevant certifications and training in headlight restoration. This ensures that they possess the necessary skills and knowledge to handle the restoration process professionally.
3. Pricing and Services Offered: Compare the pricing and services offered by different professional service providers. Look for transparent pricing structures and inquire about any additional services included in the package, such as protective coatings or warranty options.
4. Customer Satisfaction and Guarantees: Consider service providers that prioritize customer satisfaction and offer guarantees on their work. This demonstrates their commitment to delivering high-quality results and ensuring customer happiness.
Choosing a professional headlight restoration service can provide you with superior results and a hassle-free experience. Professionals bring expertise, advanced tools, and proven techniques to the table, ensuring that your headlights are restored to their optimal condition while saving you time and effort.
Step-by-Step Headlight Restoration Process
Headlight restoration is a process that involves several steps to revive the clarity and functionality of your headlights. In this section, we will walk you through the step-by-step process of headlight restoration, starting with the crucial preparation stage.
Preparation
Before embarking on the headlight restoration journey, proper preparation is essential to ensure a successful outcome. This section will cover two important aspects of preparation: gathering the necessary tools and materials and taking necessary precautions and safety measures.
Gathering the Necessary Tools and Materials
To effectively restore your headlights, you will need a set of specific tools and materials. Here are some essential items you should gather before starting the restoration process:
1. Headlight Restoration Kit: Invest in a quality headlight restoration kit that typically includes items such as abrasive compounds, sandpaper or sanding discs, polishing pads, and a protective coating. These kits are designed to provide all the necessary components for a thorough restoration.
2. Masking Tape: Use masking tape to protect the surrounding areas of the headlights from accidental damage during the restoration process. It will help create a boundary and ensure a clean restoration job.
3. Clean Water and Soap: Have clean water and soap or a dedicated automotive cleaner to wash the headlights before starting the restoration process. This will remove dirt, grime, and any loose debris.
4. Microfiber Towels: Keep a supply of soft, lint-free microfiber towels for drying the headlights and applying products. Microfiber towels are gentle on the surface and help prevent scratches or swirl marks.
5. Protective Gloves: Wear protective gloves to safeguard your hands from any potential chemicals or abrasive substances used during the restoration process.
6. Safety Glasses: Protect your eyes with safety glasses to shield them from debris or accidental splashes.
Precautions and Safety Measures before Starting
To ensure a safe and efficient headlight restoration process, consider the following precautions and safety measures:
1. Work in a Well-Ventilated Area: Perform the restoration process in a well-ventilated area to avoid inhaling fumes or chemical odors that may be emitted during the process. If working indoors, open windows or use fans to promote air circulation.
2. Follow the Manufacturer’s Instructions: Carefully read and follow the instructions provided with the headlight restoration kit or any other products you are using. Adhering to the recommended procedures will help you achieve optimal results and avoid potential mishaps.
3. Protective Clothing: Wear appropriate clothing, such as long sleeves and pants, to protect your skin from any potential contact with abrasive substances or chemicals.
4. Avoid Direct Sunlight: It is advisable to perform headlight restoration in a shaded area or during the cooler hours of the day to prevent products from drying too quickly and interfering with the restoration process.
By gathering the necessary tools and materials and taking proper precautions, you are ready to begin the headlight restoration process. The next section will guide you through the step-by-step restoration procedure, ensuring that you achieve remarkable results and restore the clarity and appearance of your headlights.
Cleaning and Preparing the Headlight Surface
To achieve successful headlight restoration, proper cleaning and preparation of the headlight surface are crucial. This section will guide you through the essential steps involved in cleaning and preparing the headlight surface before starting the restoration process.
Washing the Headlight to Remove Dirt and Debris
Before diving into the restoration process, it’s important to thoroughly clean the headlight to remove any dirt, grime, or debris that may have accumulated on the surface. Follow these steps for effective cleaning:
1. Gather the Necessary Supplies: Prepare a bucket of warm water and add a mild automotive soap or dish soap to create a soapy solution. You’ll also need a soft sponge or microfiber cloth for scrubbing.
2. Rinse the Headlight: Use a hose or a separate container of clean water to rinse the headlight, removing loose dirt and debris.
3. Apply the Soapy Solution: Dip the sponge or microfiber cloth into the soapy solution and gently scrub the entire headlight surface. Pay attention to areas with stubborn grime or bug splatters.
4. Rinse Thoroughly: Once you’ve scrubbed the headlight surface, thoroughly rinse off the soapy residue with clean water. Ensure that no soap or dirt remains on the headlight.
5. Dry the Headlight: Use a clean, lint-free microfiber cloth to dry the headlight completely. This step is crucial to prevent water spots or streaks from affecting the restoration process.
Masking and Protecting Surrounding Areas
To avoid accidental damage to your vehicle’s paint or other sensitive components, it’s important to mask and protect the surrounding areas of the headlight before proceeding with the restoration process. Follow these steps for proper masking:
1. Gather Masking Materials: Prepare high-quality automotive masking tape and a plastic or protective covering to shield the adjacent areas.
2. Identify Boundaries: Determine the areas around the headlight that you want to protect, such as the surrounding paintwork or adjacent trim. Take note of any areas that may be susceptible to damage.
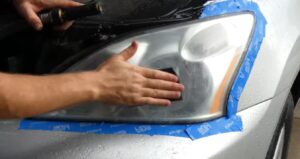
3. Apply Masking Tape: Carefully apply masking tape along the edges of the protected areas, ensuring that the tape adheres firmly to create a clean boundary. This will prevent accidental contact with abrasive compounds or restoration products.
4. Cover Adjacent Areas: If necessary, use a plastic sheet or protective covering to shield larger sections surrounding the headlight. This will provide an extra layer of protection against overspray or accidental splatters.
By cleaning the headlight surface thoroughly and taking the necessary precautions to protect the surrounding areas, you’ve now set the stage for a successful headlight restoration. In the next section, we will delve into the step-by-step restoration process, enabling you to bring back clarity and shine to your headlights.
Restoration Techniques
Restoring the clarity and shine of your headlights involves a series of effective techniques. In this section, we will explore the step-by-step process of headlight restoration, including sanding, polishing, and applying protective sealants or coatings. By following these techniques, you can rejuvenate your headlights and enhance both their appearance and functionality.
Sanding the Headlight Surface to Remove Oxidation
Over time, headlights can become dull and hazy due to the effects of oxidation. Sanding the headlight surface is an essential step in the restoration process, as it helps to eliminate the oxidized layer and reveal the clear, underlying plastic. Here’s how you can effectively sand your headlights:
1. Gather the Necessary Supplies: Prepare different grits of sandpaper, ranging from coarse to fine (e.g., 400, 800, 1200, 1500, and 2500 grit). You’ll also need a spray bottle filled with water and masking tape to protect surrounding areas.
2. Mask Surrounding Areas: To prevent accidental damage to your vehicle’s paint or other components, use masking tape to cover the areas surrounding the headlights. This will create a boundary and ensure a focused sanding process.
3. Wet Sanding: Begin by wetting the headlight surface with water from the spray bottle. This helps to lubricate the sandpaper and prevent excessive heat buildup. Start with the coarsest grit sandpaper (e.g., 400 grit) and sand the headlight using horizontal or vertical strokes. Maintain a steady pressure and keep the surface wet throughout the process.
4. Gradually Progress to Finer Grits: Once you’ve sanded the headlight surface with the coarse grit sandpaper, repeat the process using finer grits (e.g., 800, 1200, 1500, and 2500 grit) to refine the surface and remove any remaining oxidation. Remember to keep the surface wet and maintain a consistent sanding pattern.
5. Rinse and Dry: After sanding, thoroughly rinse the headlight surface with clean water to remove any residue. Dry the headlight using a clean, lint-free cloth.
Polishing to Restore Clarity and Shine
After sanding, polishing the headlights will help remove any remaining imperfections and restore their clarity and shine. Follow these steps for effective polishing:
1. Choose a Headlight Polish: Select a high-quality headlight polishing compound that is specifically designed for plastic surfaces. These compounds typically contain abrasive particles that help to remove fine scratches and restore the headlight’s shine.
2. Apply the Polish: Apply a small amount of the polishing compound to a soft polishing pad or microfiber cloth. Work the polish onto the headlight surface using circular motions. Continue polishing until you achieve the desired level of clarity and shine.
3. Inspect and Repeat if Necessary: After polishing, inspect the headlights to ensure that they are free from scratches and have a smooth, glossy finish. If needed, repeat the polishing process to further enhance the results.
Applying Protective Sealants or Coatings
To prolong the clarity and protect the restored headlights from future damage, it’s essential to apply a protective sealant or coating. This step acts as a barrier against UV rays, oxidation, and environmental elements. Follow these guidelines for applying protective sealants or coatings:
1. Choose a Suitable Sealant or Coating: Select a high-quality UV-resistant sealant or coating designed for automotive headlights. These products often come in liquid or spray form.
2. Clean and Dry the Headlight Surface: Ensure that the headlight surface is thoroughly cleaned and dried before applying the sealant or coating. Any residual polish or contaminants may affect the adherence and effectiveness of the product.
3. Apply the Sealant or Coating: Follow the instructions provided by the manufacturer to apply the sealant or coating evenly on the headlight surface. Use a soft applicator pad or microfiber cloth to ensure smooth and uniform coverage.
4. Allow Sufficient Drying Time: After applying the sealant or coating, allow it to dry completely as per the manufacturer’s instructions. This typically involves a curing period during which the protective layer forms a strong bond with the headlight surface.
By following these restoration techniques of sanding, polishing, and applying protective sealants or coatings, you can bring back the brilliance and clarity of your headlights. In the next section, we will explore tips and maintenance practices to ensure the longevity of your restored headlights.
Maintenance and Care for Restored Headlights
After investing time and effort into restoring your headlights, it’s essential to implement proper maintenance and care to ensure their longevity and continued clarity. In this section, we will explore the necessary steps and precautions for maintaining your restored headlights, as well as common mistakes to avoid.
Regular Cleaning Routines to Prevent Deterioration
Regular cleaning is crucial to prevent dirt, grime, and other contaminants from accumulating on your restored headlights. By following these cleaning routines, you can keep your headlights looking clear and vibrant:
1. Use Mild Cleaning Solutions: When cleaning your headlights, opt for mild cleaning solutions specifically formulated for automotive use. Avoid using harsh chemicals or abrasive cleaners that can damage the protective layer or the headlight surface.
2. Gently Clean the Headlights: Use a soft microfiber cloth or sponge to clean the headlights. Apply the cleaning solution to the cloth and gently wipe the surface in a circular motion. Be careful not to apply excessive pressure that may scratch or damage the restored surface.
3. Rinse Thoroughly: After cleaning, rinse the headlights with clean water to remove any remaining residue from the cleaning solution. Ensure that all traces of the cleaning solution are thoroughly rinsed off.
4. Dry with a Lint-Free Cloth: Use a lint-free cloth to dry the headlights after cleaning. This will prevent water spots or streaks from forming on the surface.
Protective Measures for Maintaining Restored Headlights
To maintain clarity and protect your restored headlights, consider implementing the following protective measures:
1. Wax or Sealant Application: Apply a layer of automotive wax or a sealant specifically designed for headlights. This additional protective barrier can help shield the headlights from UV rays, oxidation, and environmental elements.
2. Park in Shaded Areas: Whenever possible, park your vehicle in shaded areas or use a car cover to protect the headlights from prolonged sun exposure. Direct sunlight can accelerate the deterioration of the restored surface.
3. Avoid Abrasive Materials: When cleaning or handling your vehicle, avoid using abrasive materials such as rough sponges or brushes that can scratch or damage the headlight surface. Opt for soft microfiber cloths and gentle cleaning techniques.
4. Regular Inspection: Periodically inspect your headlights for any signs of damage or deterioration. If you notice any chips, cracks, or fading, take immediate action to address the issue and prevent further damage.
Common Mistakes to Avoid After Restoration
Even with a successful restoration, it’s important to avoid certain mistakes that could compromise the results. Here are some common mistakes to steer clear of:
1. Using an ammonia-based Cleaner: Avoid using cleaners that contain ammonia on your restored headlights. Ammonia can cause the protective coating to degrade, leading to a diminished appearance and reduced longevity.
2. Neglecting Regular Cleaning: Don’t overlook the importance of regular cleaning and maintenance. Failure to keep your headlights clean can lead to the accumulation of dirt and grime, which can affect their clarity and performance.
3. Skipping Protective Measures: Neglecting to apply a protective sealant or wax can leave your restored headlights vulnerable to damage from UV rays, oxidation, and environmental factors. Make sure to follow the recommended protective measures to maintain the longevity of your restoration.
By implementing these maintenance and care practices, you can enjoy the benefits of your restored headlights for an extended period. In the next section, we will discuss additional tips and considerations for maintaining your vehicle’s lighting system as a whole.
Frequently Asked Questions
As headlight restoration has gained popularity, several questions arise regarding the techniques, ingredients, and frequency of the restoration process. In this section, we will address some commonly asked questions to provide clarity and guidance.
1. Can I use toothpaste alone to restore severely damaged headlights?
While toothpaste can help improve the appearance of mildly oxidized headlights, it may not be effective for severely damaged ones. Toothpaste contains mild abrasives that can remove surface-level oxidation and provide temporary clarity. However, for severely damaged headlights, it’s recommended to use specialized headlight restoration products or seek professional services for optimal results.
2. Is it possible to combine baking soda and vinegar for better restoration results?
Although baking soda and vinegar are often used for household cleaning purposes, their effectiveness for headlight restoration is limited. While the combination may produce some cleaning effects, it is unlikely to deliver significant restoration results. It’s best to use dedicated headlight restoration kits or products specifically formulated for this purpose.
3. How often should headlight restoration be performed using home remedies?
The frequency of headlight restoration using home remedies depends on various factors, such as the severity of oxidation, exposure to environmental elements, and the effectiveness of the chosen remedy. Generally, home remedies may provide temporary improvement, so it’s advisable to monitor the condition of your headlights regularly. If you notice a decline in clarity or signs of oxidation, it may be time to repeat the restoration process.
4. Are there specific types of toothpaste or baking soda to use for headlight restoration?
When using toothpaste for headlight restoration, it’s recommended to choose a non-gel, non-whitening toothpaste. These toothpaste formulations often contain mild abrasives that can aid in removing surface oxidation. Similarly, any baking soda variety can be used, as long as it is in powder form and does not contain additional additives.
5. What other household items can be used for headlight restoration?
While toothpaste and baking soda are commonly mentioned, there are other household items that may be used for headlight restoration. These include:
Vinegar: Vinegar can help remove dirt and grime from headlights. However, its effectiveness in restoring clarity may be limited.
Rubbing Alcohol: Rubbing alcohol can be used to clean headlights and remove certain surface contaminants. However, it may not be sufficient for significant restoration.
Ammonia: Ammonia can aid in removing tough stains on headlights. However, it should be used with caution, as it may damage the headlight surface or protective coatings.
It’s important to note that while these household items may provide some improvement, professional-grade headlight restoration kits or seeking professional services are often the best options for long-lasting and more substantial results.
By addressing these frequently asked questions, we hope to provide you with valuable insights and guidance for your headlight restoration endeavors. In the next section, we will wrap up the article by summarizing the key takeaways and offering final tips for successful headlight restoration.
Conclusion
As we conclude our exploration of headlight restoration, let’s recap the benefits and effectiveness of this essential maintenance process. By restoring your headlights, you can:
Enhance Visibility and Safety: Clear and bright headlights improve visibility, ensuring safer nighttime driving and better visibility in adverse weather conditions.
Restore Aesthetics: Oxidized and yellowed headlights can significantly detract from the overall appearance of your vehicle. Restoration brings back the original clarity, giving your car a fresh and well-maintained look.
Save Money: Headlight restoration is a cost-effective alternative to headlight replacement. By restoring your headlights, you can avoid the expense of purchasing new ones, ultimately saving you money.
Preserve Resale Value: Maintaining your vehicle in top condition increases its resale value. Restoring your headlights not only improves aesthetics but also demonstrates your commitment to proper car care.
With these benefits in mind, we encourage you to take action and restore your headlights to their former glory. Whether you choose a DIY approach or seek professional assistance, the rewards are well worth the effort.
As you embark on your headlight restoration journey, keep in mind the cost-effectiveness and accessibility of the various restoration methods. DIY methods using household items can be a convenient and budget-friendly option for mild oxidation. However, for more severe damage or long-lasting results, professional-grade restoration kits or services are recommended.
In conclusion, headlight restoration is a worthwhile investment in terms of safety, aesthetics, and overall vehicle maintenance. Don’t let dull and hazy headlights compromise your driving experience or the appearance of your car. Take the necessary steps to restore your headlights, and enjoy the benefits that come with improved visibility and a rejuvenated vehicle.
Remember, clear headlights not only illuminate the road ahead but also illuminate your commitment to maintaining your vehicle in its best condition. So, let’s get started on restoring your headlights and reaping the rewards of a well-maintained and safe driving experience.
Semantically Similar FAQs
1. Is headlight restoration a DIY task, or should I seek professional help?
When it comes to headlight restoration, you have the option to either tackle the task yourself or seek professional assistance. DIY headlight restoration kits and methods are available and can be effective for mild to moderate cases of oxidation and yellowing. However, if your headlights are severely damaged, heavily scratched, or have other complex issues, it is advisable to consult a professional. They have the expertise and specialized tools to handle more challenging restoration tasks.
2. What are the common causes of headlight degradation?
Headlight degradation can occur due to various factors, including:
Oxidation: Over time, exposure to UV rays and environmental elements causes the protective coating on headlights to deteriorate, leading to oxidation and a cloudy appearance.
Scratches and Pitting: Road debris, gravel, and other particles can cause scratches and pitting on the headlight surface, reducing clarity and brightness.
Moisture and Condensation: Moisture buildup inside the headlight lens can occur due to aging seals or cracks, leading to foggy or hazy headlights.
Chemical Damage: Harsh chemicals, such as certain cleaning agents or road salt, can damage the protective coating and lens of the headlights, contributing to degradation.
3. How long does a headlight restoration typically last?
The durability of headlight restoration varies depending on several factors, such as the quality of the restoration process, the extent of damage, and environmental conditions. On average, a well-executed headlight restoration can last anywhere from several months to a couple of years. However, it’s important to note that the restored headlights will still be susceptible to future oxidation and degradation. To prolong the lifespan of the restoration, regular cleaning and maintenance are recommended.
4. Can I restore headlights if they are severely scratched or cracked?
Severely scratched or cracked headlights may require more extensive repairs or even replacement. While minor scratches can often be addressed through the restoration process, deeper scratches or cracks that compromise the integrity of the lens may be beyond repair. It is advisable to consult a professional for an assessment in such cases, as they can provide expert guidance on the best course of action.
5. Are there any specific safety precautions to follow during the restoration process?
Yes, it is crucial to prioritize safety when undertaking headlight restoration. Here are some essential safety precautions to follow:
Eye Protection: Wear safety goggles or glasses to protect your eyes from debris and chemical splashes during the restoration process.
Ventilation: Ensure proper ventilation in the work area to prevent inhalation of fumes from cleaning agents or chemicals.
Gloves: Use gloves, preferably nitrile or latex, to protect your hands from potentially harmful substances and to maintain a good grip on tools.
Follow Instructions: Carefully read and follow the instructions provided with the restoration kit or method you choose, ensuring safe and proper usage.
6. Will headlight restoration improve the brightness of my headlights?
Yes, headlight restoration can significantly improve the brightness and clarity of your headlights. By removing oxidation, scratches, and other surface imperfections, the restoration process enhances light transmission, allowing your headlights to emit a stronger and clearer beam. This can improve visibility and ensure safer nighttime driving.
7. Can I use sandpaper from a hardware store for the restoration process?
While sandpaper from a hardware store may be suitable for certain DIY projects, it is not recommended for headlight restoration. Headlight restoration requires specific types of sandpaper with the appropriate grit and compatibility for automotive applications. Using the wrong sandpaper can cause further damage to the headlight surface and compromise the restoration results. It is best to use sandpaper specifically designed for headlight restoration or rely on professional-grade restoration kits.
8. Are there any alternative methods to restore headlights without sanding?
Yes, there are alternative methods to restore headlights without sanding, although their effectiveness may vary depending on the severity of the damage. Some common alternatives include:
Toothpaste: Certain types of toothpaste can be used as a mild abrasive to remove light oxidation from headlights. However, this method is typically only effective for minor cases of degradation.
Baking Soda and Vinegar: A mixture of baking soda and vinegar can be applied to headlights as a cleaning agent. While it may help remove dirt and grime, it is not as effective at addressing deeper oxidation or scratches.
It’s important to note that these alternative methods may provide temporary results and may not be as long-lasting or thorough as professional restoration techniques.
9. Can cloudy headlights be a result of moisture buildup inside the lens?
Yes, cloudy or hazy headlights can be a result of moisture buildup inside the lens. This can occur when the seals around the headlight assembly deteriorate or develop cracks, allowing moisture to seep in. When moisture accumulates inside the lens, it can create a foggy appearance and reduce the clarity of the headlights. In such cases, addressing the moisture issue and restoring the headlight seal may be necessary in addition to the restoration process itself.
10. What are the indicators that my headlights need restoration rather than replacement?
Here are some indicators that your headlights may benefit from restoration rather than immediate replacement:
Cloudiness and Yellowing: If your headlights appear cloudy, yellowed, or hazy, restoration can often improve their appearance and performance.
Reduced Visibility: Diminished light output or reduced beam clarity can indicate the need for restoration.
Minor Scratches and Surface Damage: If your headlights have minor scratches, pitting, or surface imperfections, restoration methods can often address these issues.
However, it is important to assess the severity of the damage. If your headlights are severely cracked, heavily scratched, or have internal issues, replacement may be the more appropriate solution. Consulting a professional can help determine the best course of action based on the specific condition of your headlights.
Remember, proper maintenance and regular inspection of your headlights can help identify the need for restoration and ensure optimal performance and safety while driving.